Call the List API
Now that we have our basic homepage set up, let’s make the API call to render our list of notes.
Make the Request
 Add the following right below the state variable declarations in
 src/containers/Home.js.
useEffect(() => {
  async function onLoad() {
    if (!isAuthenticated) {
      return;
    }

    try {
      const notes = await loadNotes();
      setNotes(notes);
    } catch (e) {
      onError(e);
    }

    setIsLoading(false);
  }

  onLoad();
}, [isAuthenticated]);

function loadNotes() {
  return API.get("notes", "/notes");
}
We are using the useEffect React Hook. We covered how this works back in the Load the State from the Session chapter.
Let’s quickly go over how we are using it here. We want to make a request to our /notes API to get the list of notes when our component first loads. But only if the user is authenticated. Since our hook relies on isAuthenticated, we need to pass it in as the second argument in the useEffect call as an element in the array. This is basically telling React that we only want to run our Hook again when the isAuthenticated value changes.
And include our Amplify API module in the header.
import { API } from "aws-amplify";
Now let’s render the results.
Render the List
Replace our renderNotesList placeholder method with the following.
function renderNotesList(notes) {
  return (
    <>
      <LinkContainer to="/notes/new">
        <ListGroup.Item action className="py-3 text-nowrap text-truncate">
          <BsPencilSquare size={17} />
          <span className="ml-2 font-weight-bold">Create a new note</span>
        </ListGroup.Item>
      </LinkContainer>
      {notes.map(({ noteId, content, createdAt }) => (
        <LinkContainer key={noteId} to={`/notes/${noteId}`}>
          <ListGroup.Item action>
            <span className="font-weight-bold">
              {content.trim().split("\n")[0]}
            </span>
            <br />
            <span className="text-muted">
              Created: {new Date(createdAt).toLocaleString()}
            </span>
          </ListGroup.Item>
        </LinkContainer>
      ))}
    </>
  );
}
The code above does a few things.
-
It always renders a Create a new note button as the first item in the list (even if the list is empty). And it links to the create note page that we previously created.
<LinkContainer to="/notes/new"> <ListGroup.Item action className="py-3 text-nowrap text-truncate"> <BsPencilSquare size={17} /> <span className="ml-2 font-weight-bold">Create a new note</span> </ListGroup.Item> </LinkContainer> -
In the button we use a
BsPencilSquareicon from the React Icons Bootstrap icon set. -
We then render a list of all the notes.
notes.map(({ noteId, content, createdAt }) => (... -
The first line of each note’s content is set as the
ListGroup.Itemheader.note.content.trim().split('\n')[0] -
And we convert the date the note was created to a more friendly format.
{new Date(createdAt).toLocaleString()} -
The
LinkContainercomponent directs our app to each of the items.
Include the LinkContainer and BsPencilSquare icon at the top of src/containers/Home.js.
import { BsPencilSquare } from "react-icons/bs";
import { LinkContainer } from "react-router-bootstrap";
Now head over to your browser and you should see your list displayed.
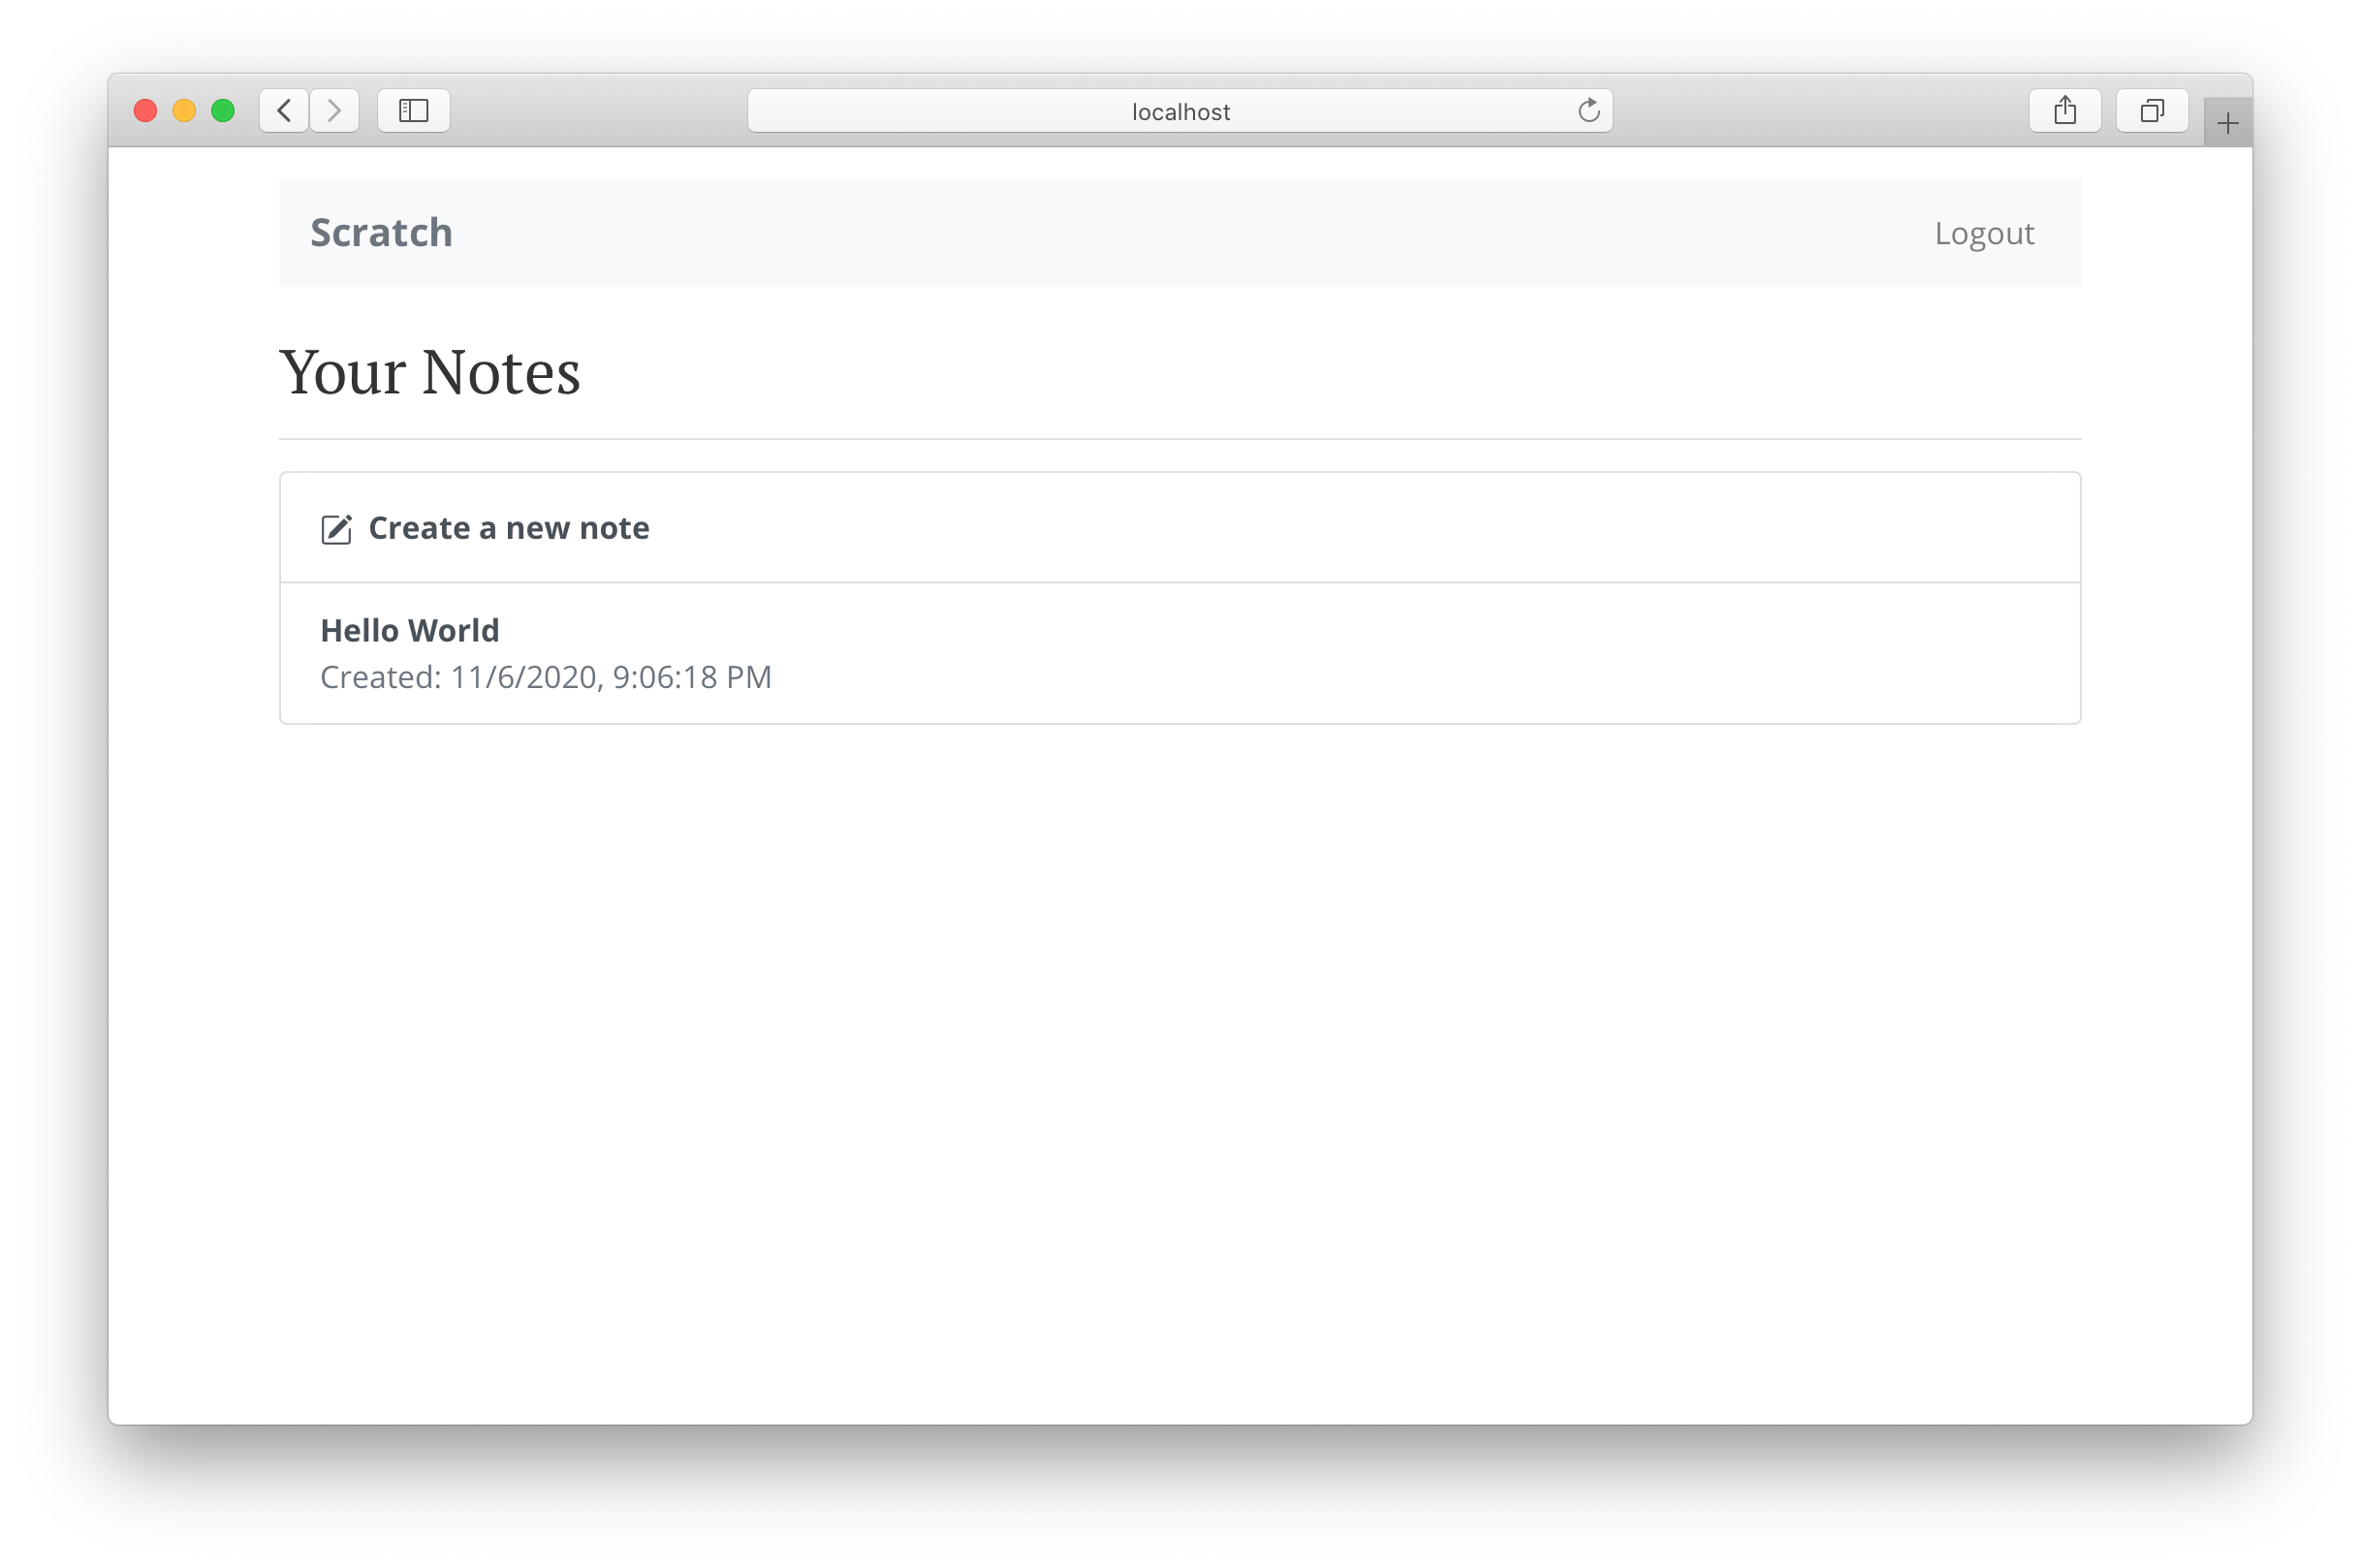
If you click on each entry, the links should generate URLs with appropriate noteIds. For now, these URLs will take you to our 404 page. We’ll fix that in the next section.
Next up we are going to allow users to view and edit their notes.
For help and discussion
Comments on this chapter