Set up WWW Domain Redirect
There’s plenty of debate over the www vs non-www domains and while both sides have merit; we’ll go over how to set up another domain (in this case the www) and redirect it to our original. The reason we do a redirect is to tell the search engines that we only want one version of our domain to appear in the search results. If you prefer having the www domain as the default simply swap this step with the last one where we created a bare domain (non-www).
To create a www version of our domain and have it redirect we are going to create a new S3 Bucket and a new CloudFront Distribution. This new S3 Bucket will simply respond with a redirect to our main domain using the redirection feature that S3 Buckets have.
So let’s start by creating a new S3 redirect Bucket for this.
Create S3 Redirect Bucket
Create a new S3 Bucket through the AWS Console. The name doesn’t really matter but it pick something that helps us distinguish between the two. Again, remember that we need a separate S3 Bucket for this step and we cannot use the original one we had previously created.
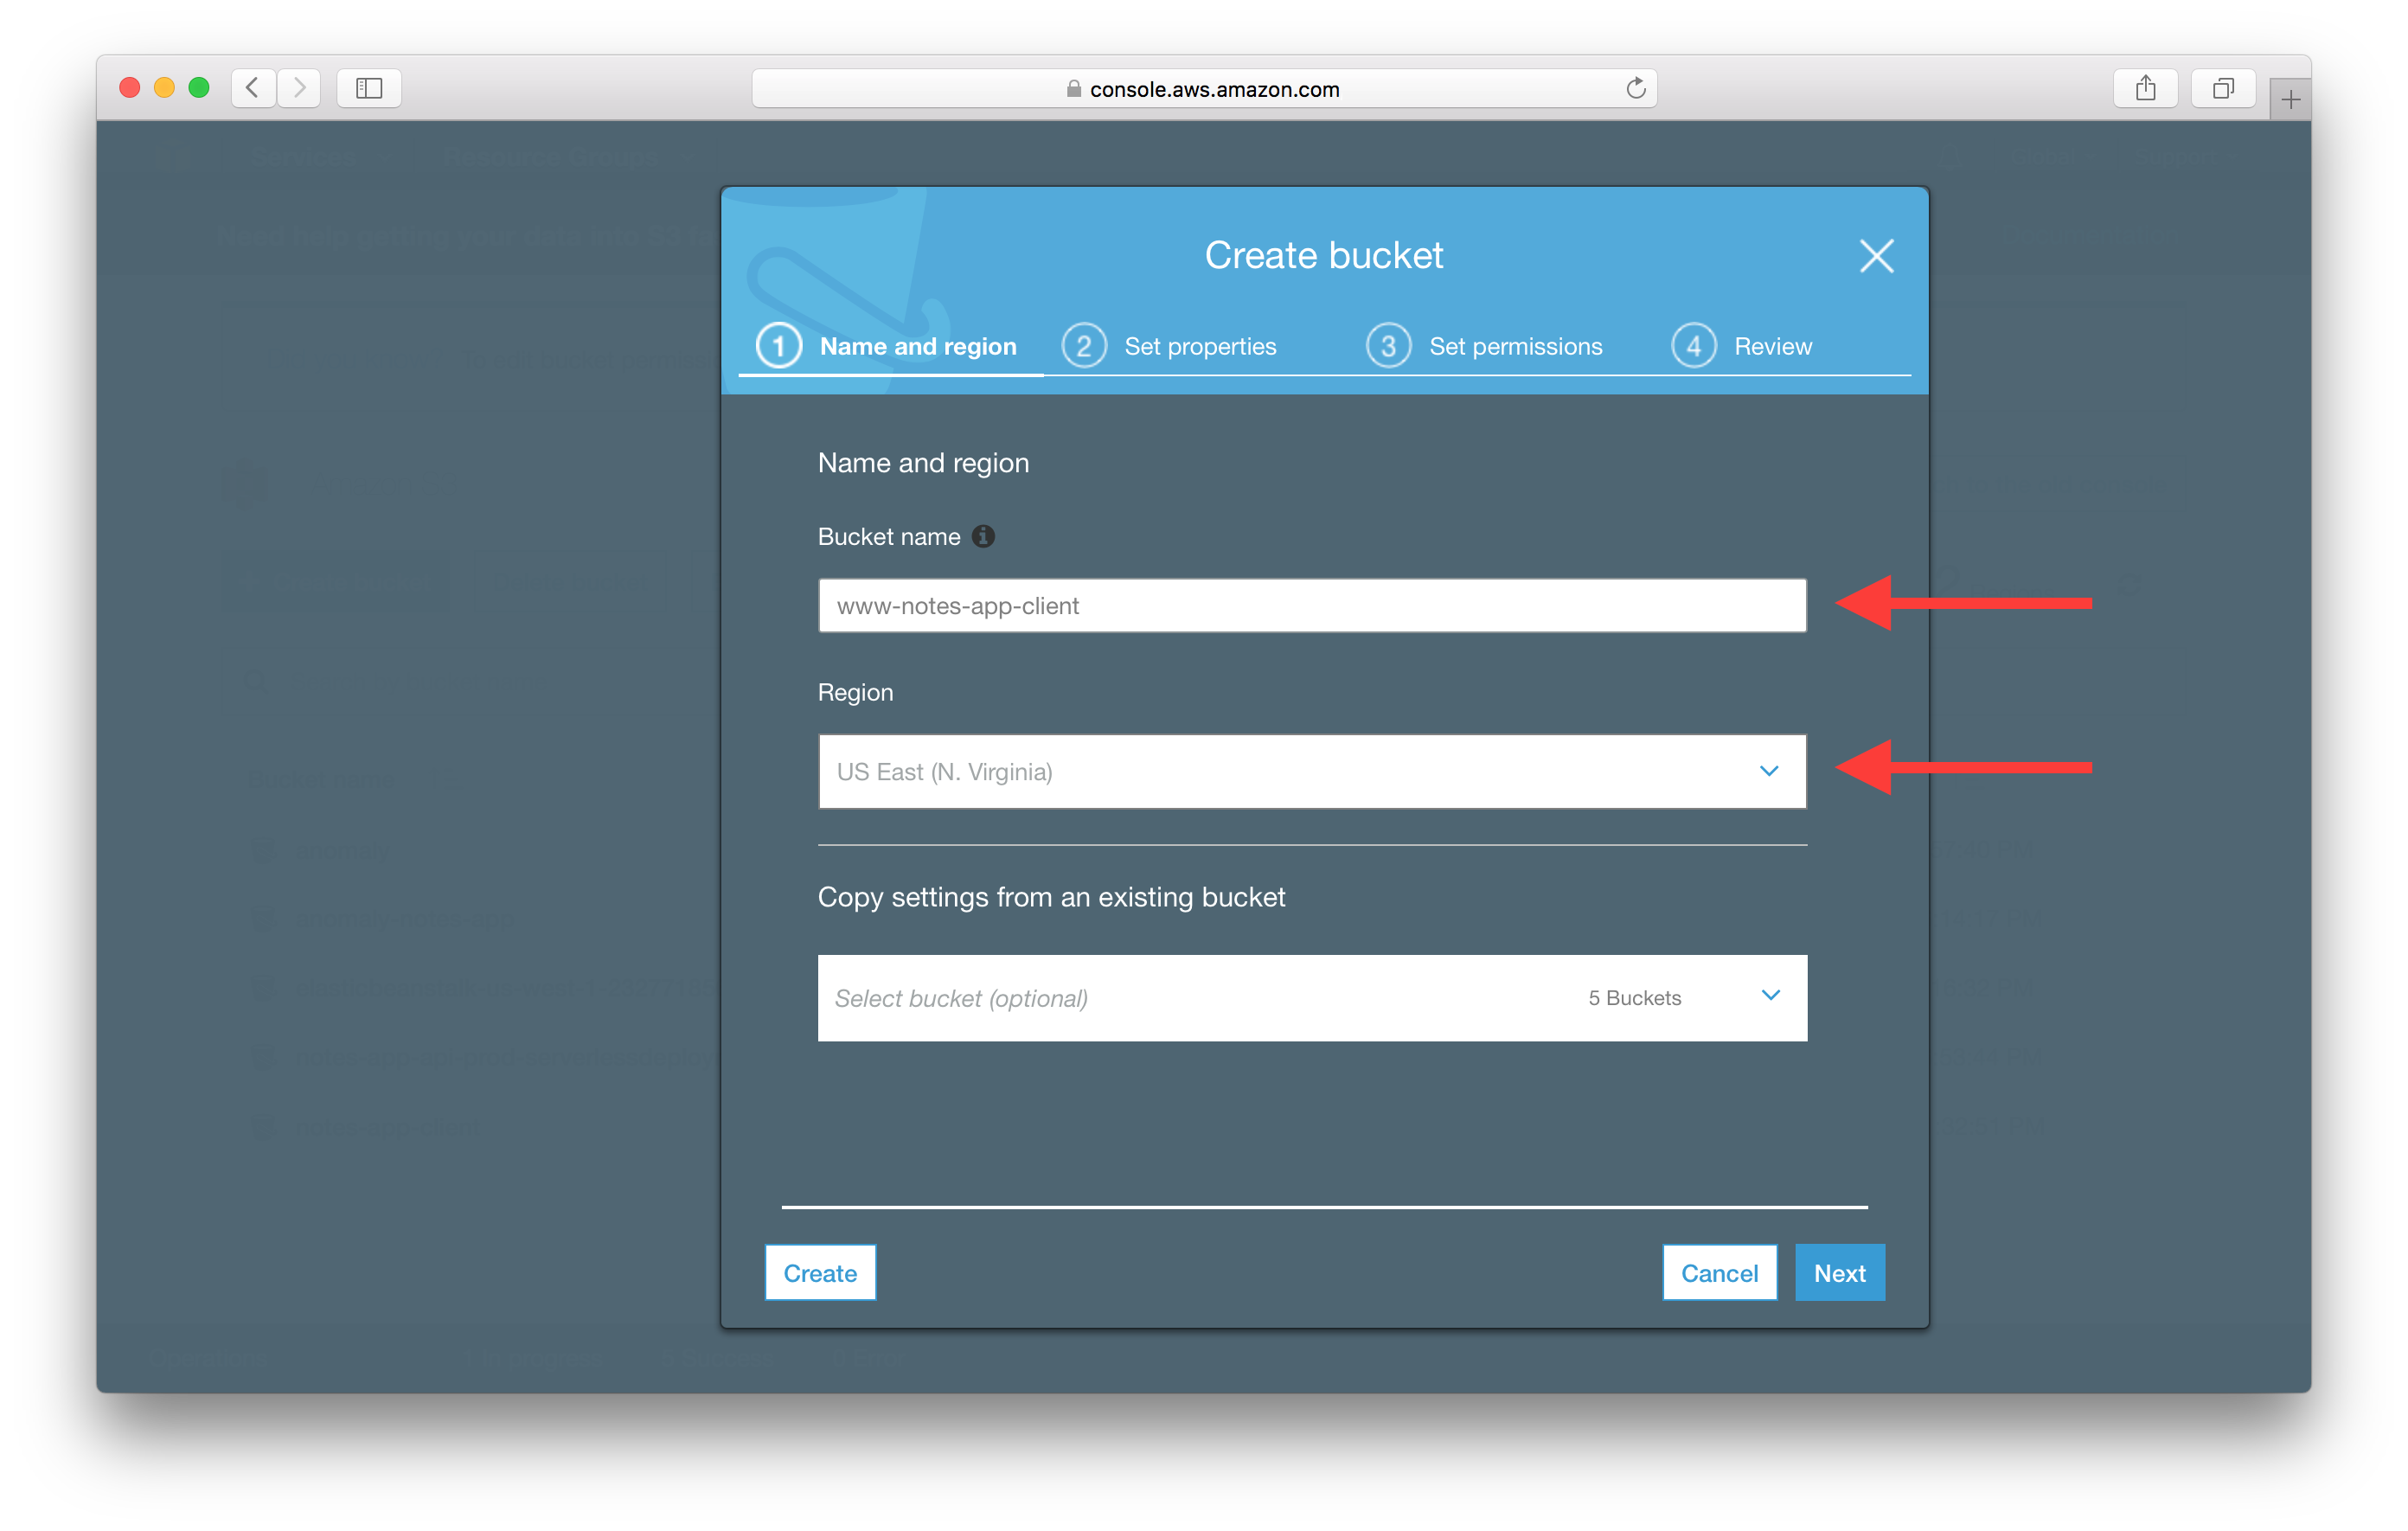
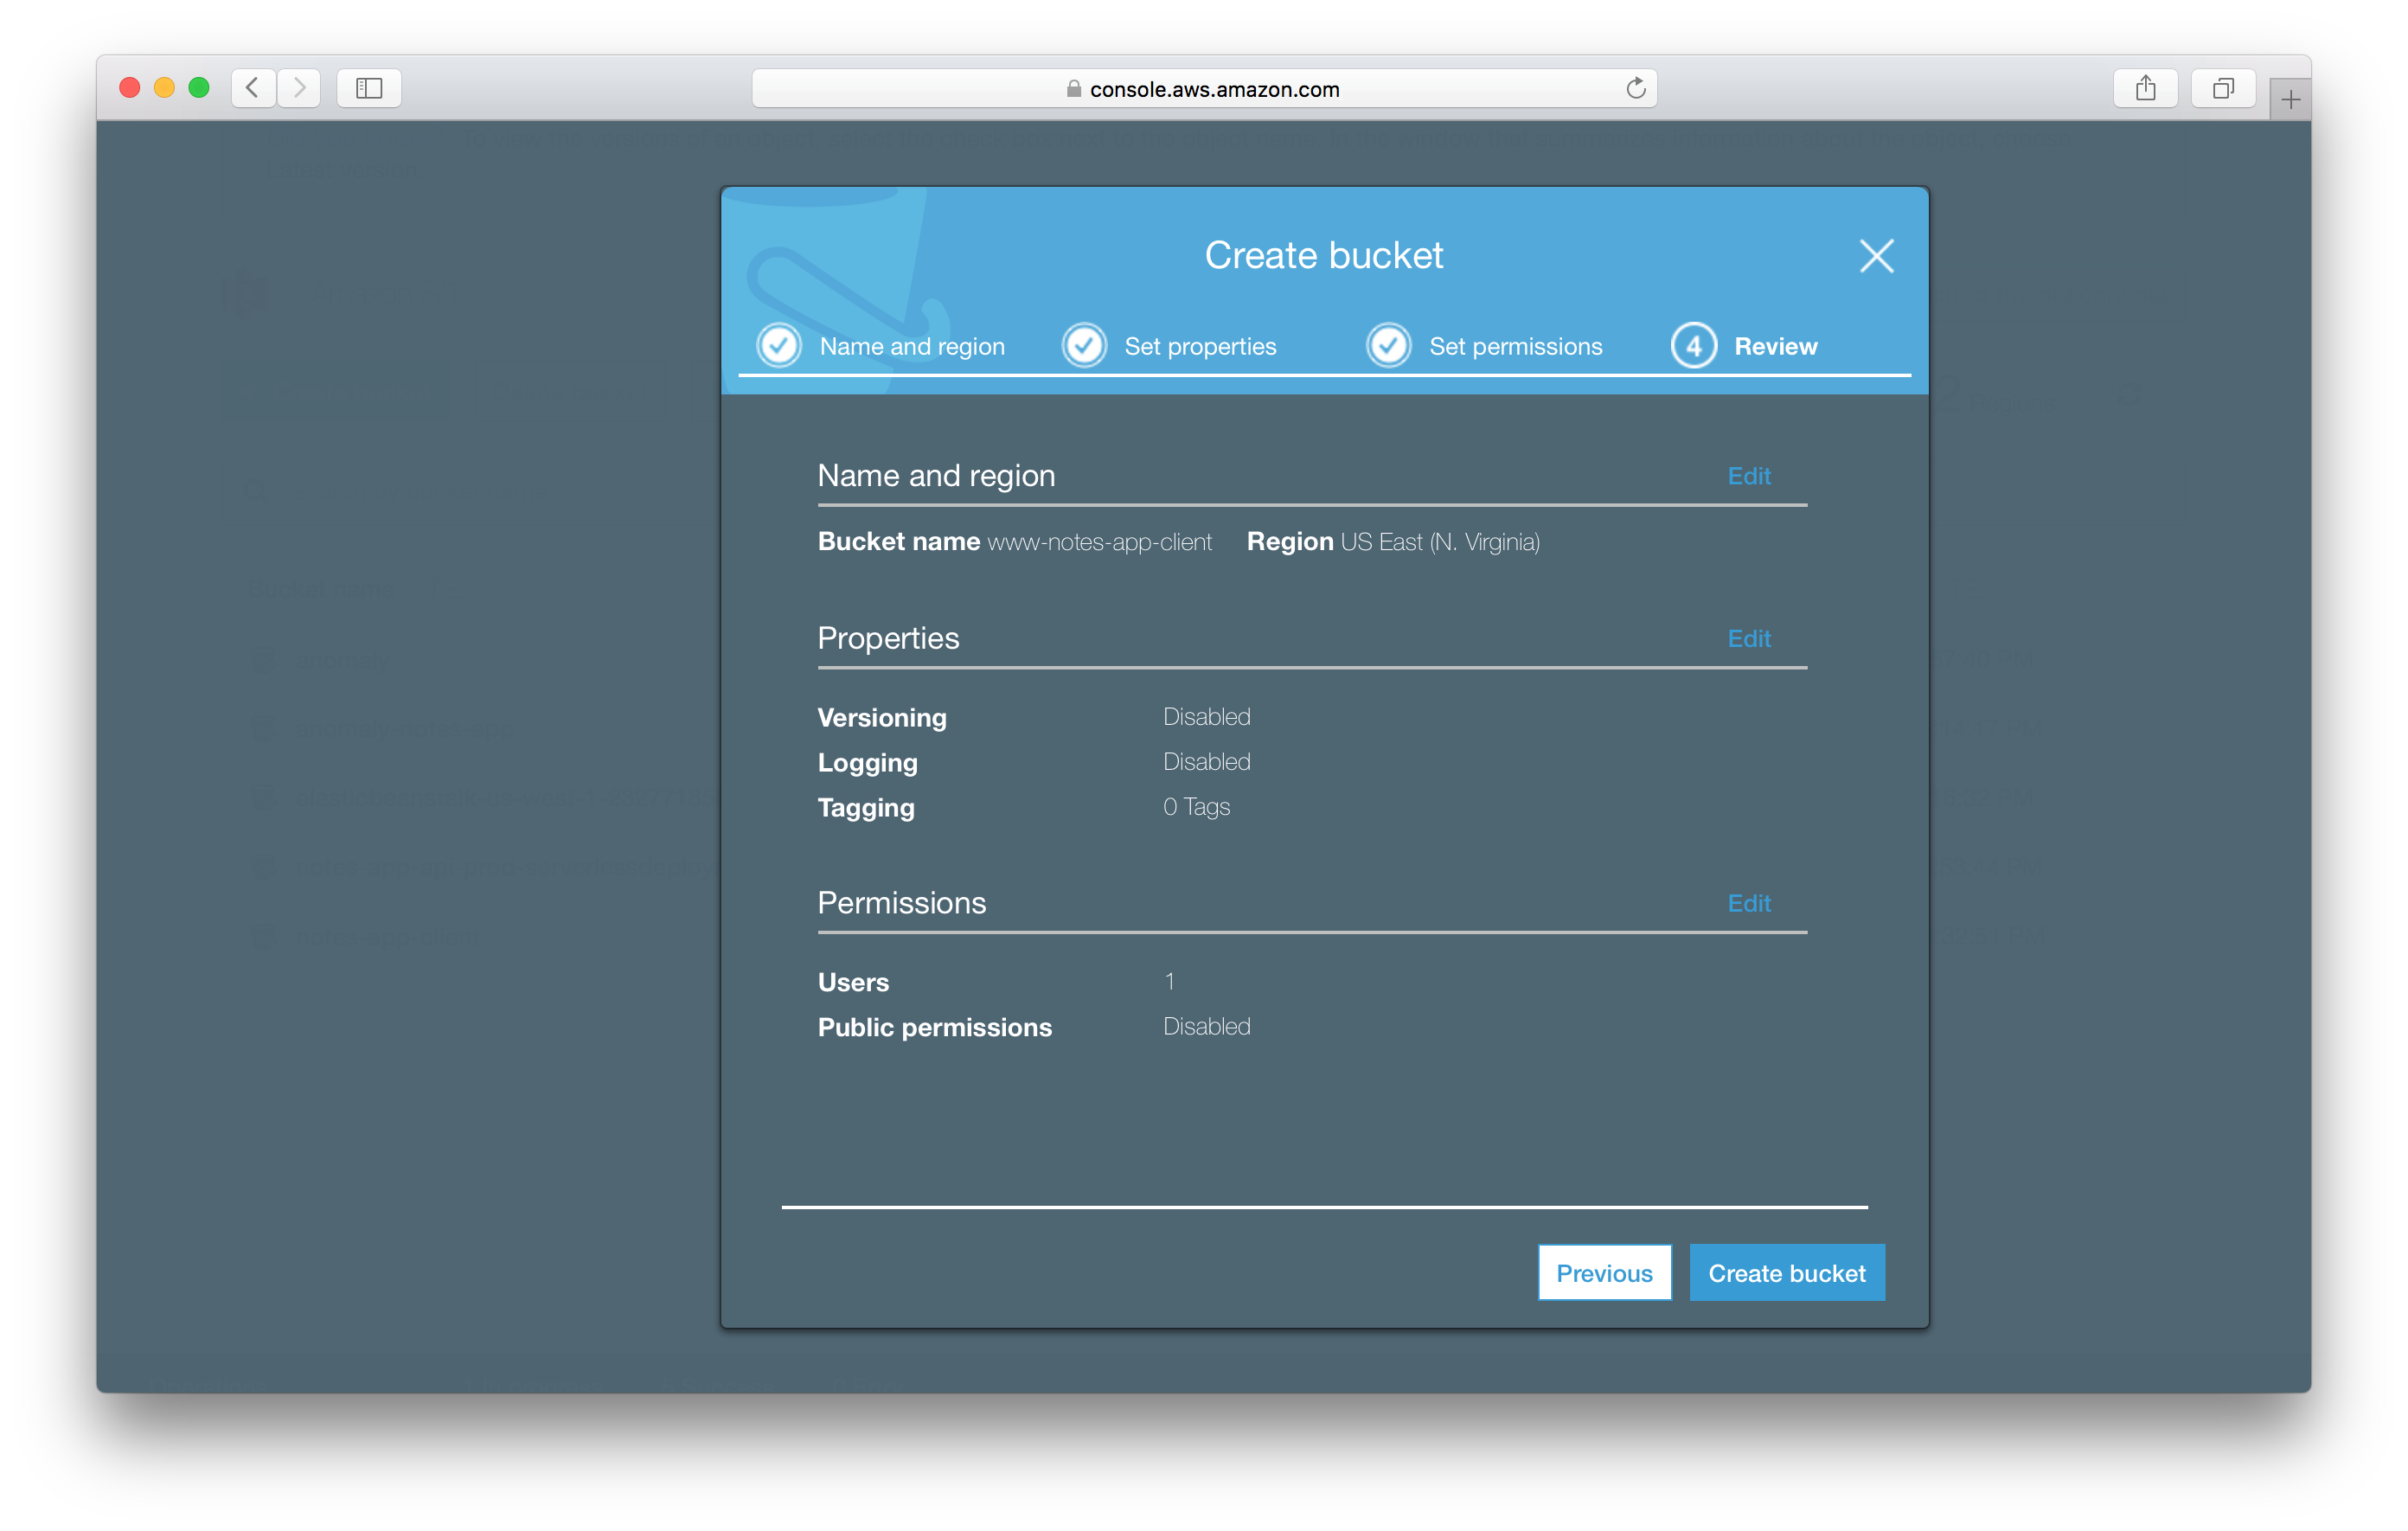
Next just follow through the steps and leave the defaults intact.
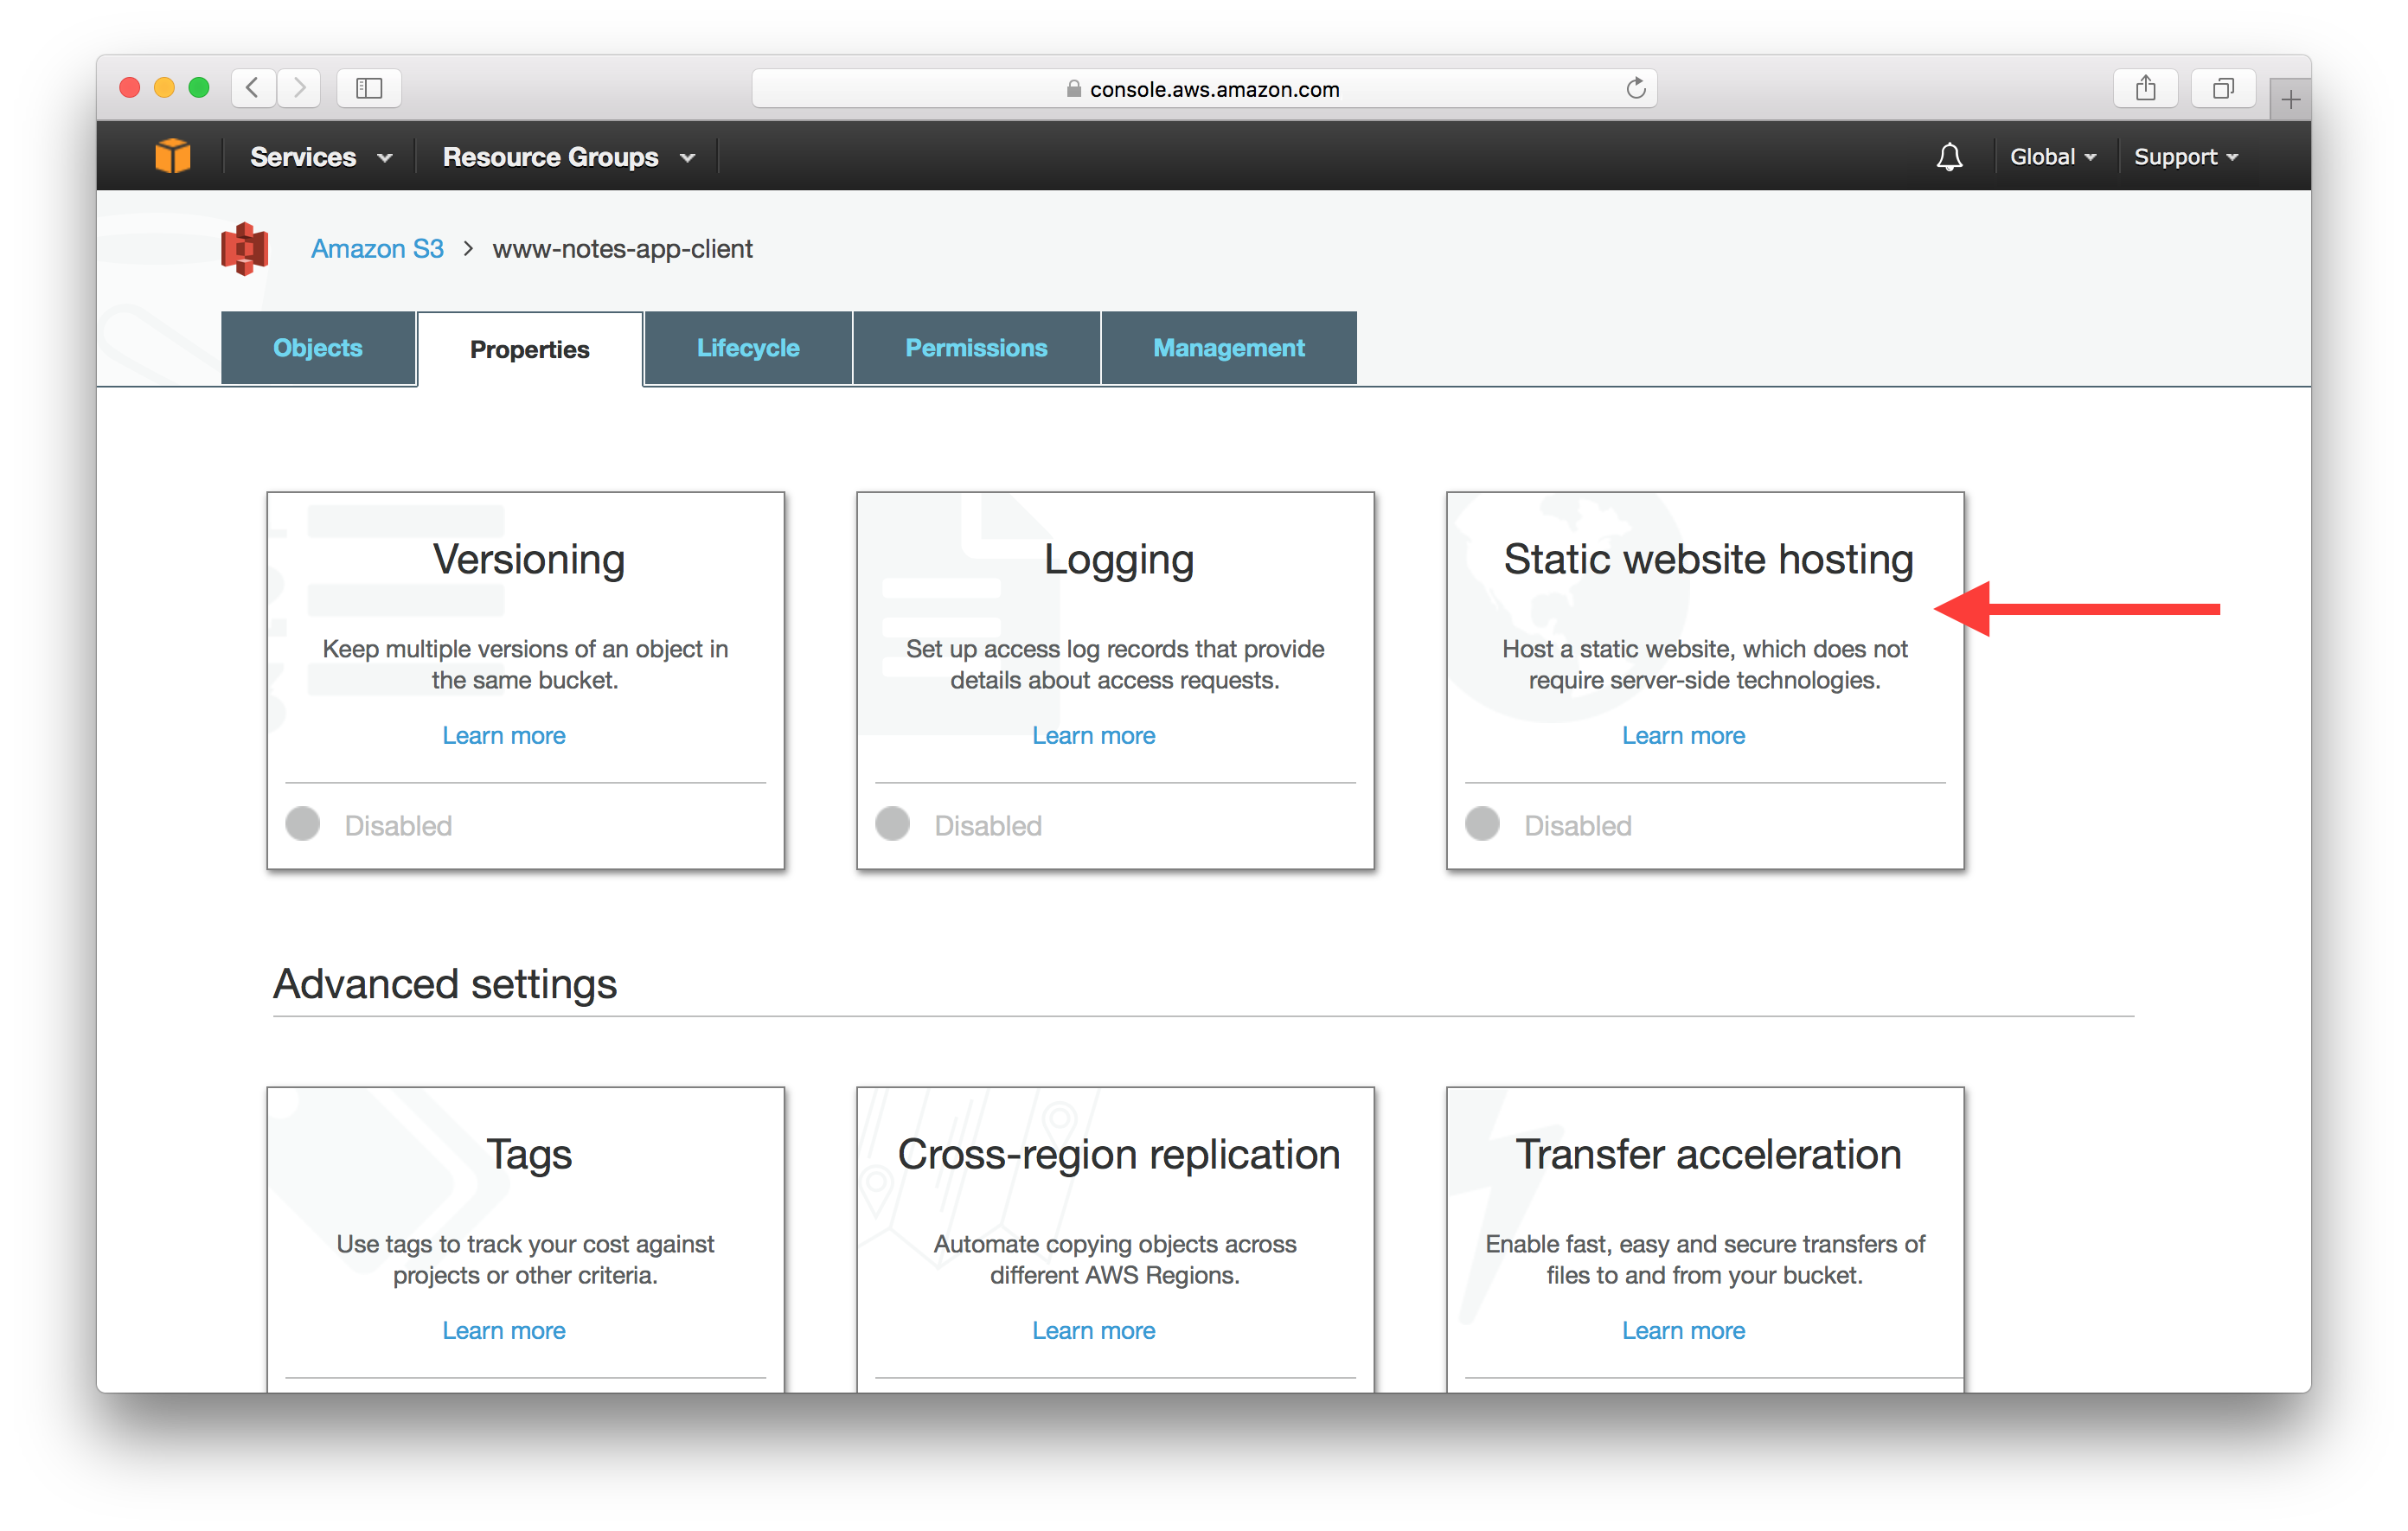
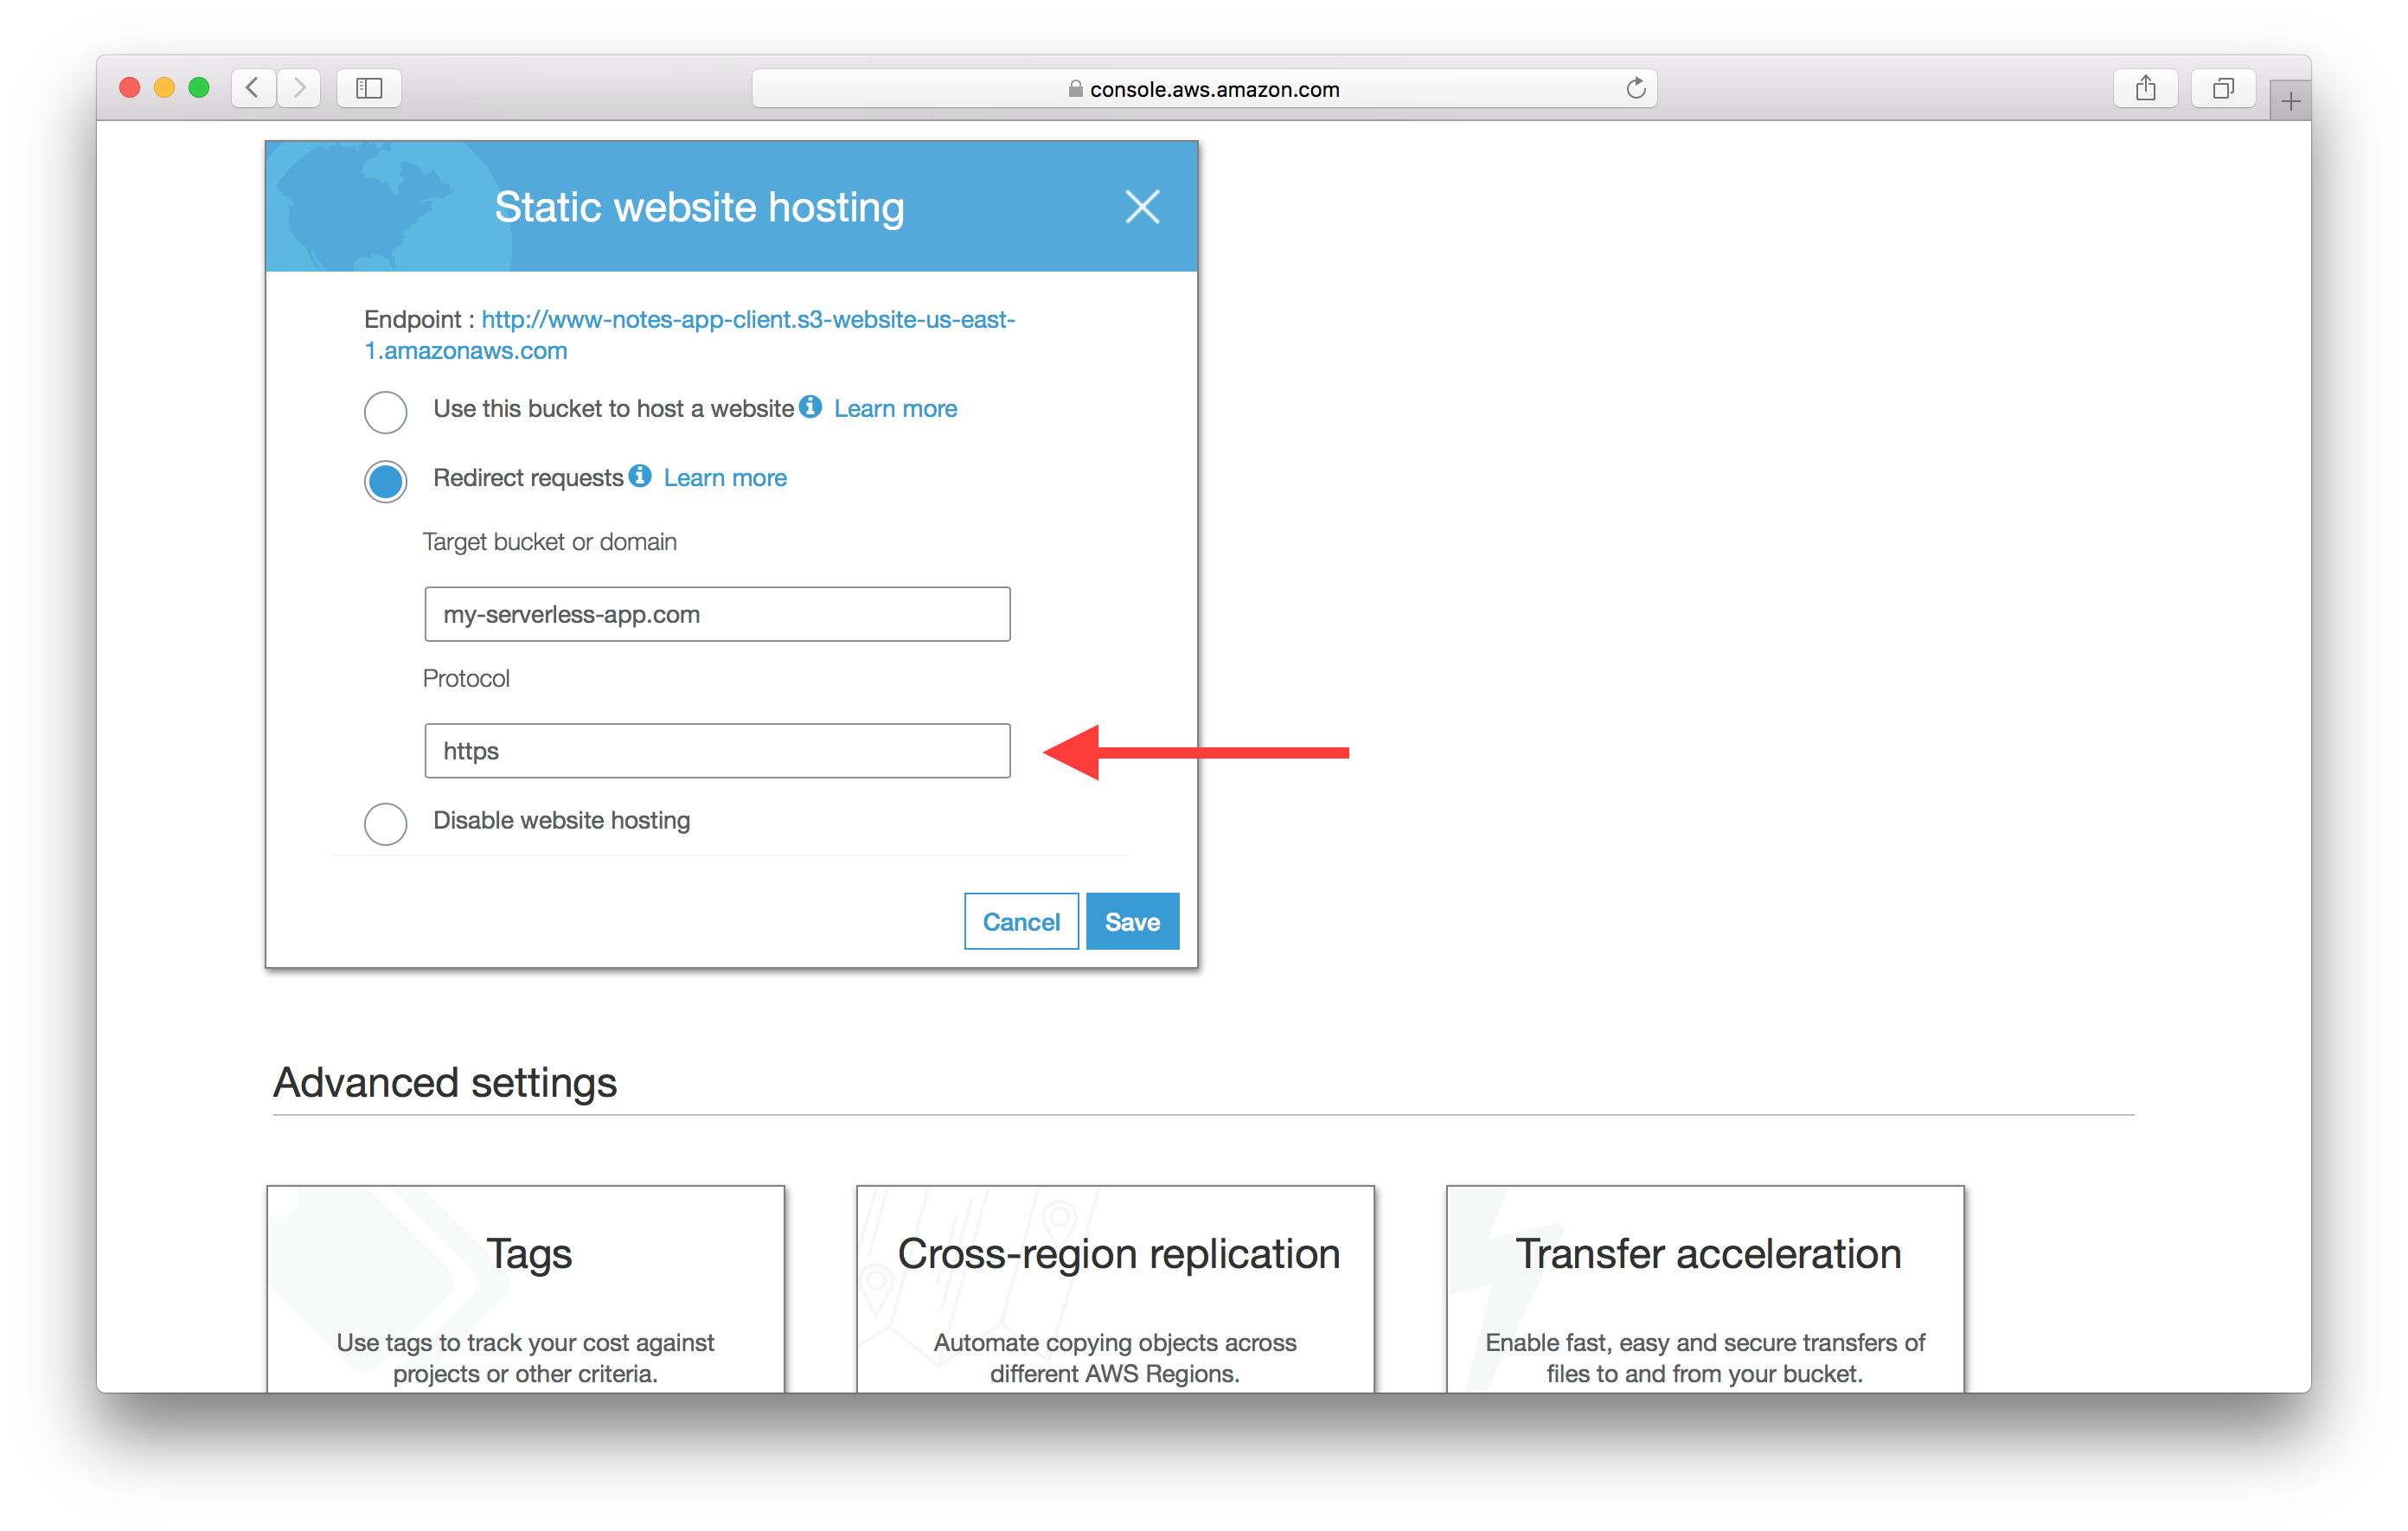
Now go into the Properties of the new bucket and click on the Static website hosting.
But unlike last time we are going to select the Redirect requests option and fill in the domain we are going to be redirecting towards. This is the domain that we set up in our last chapter.
Also, make sure to copy the Endpoint as we’ll be needing this later.
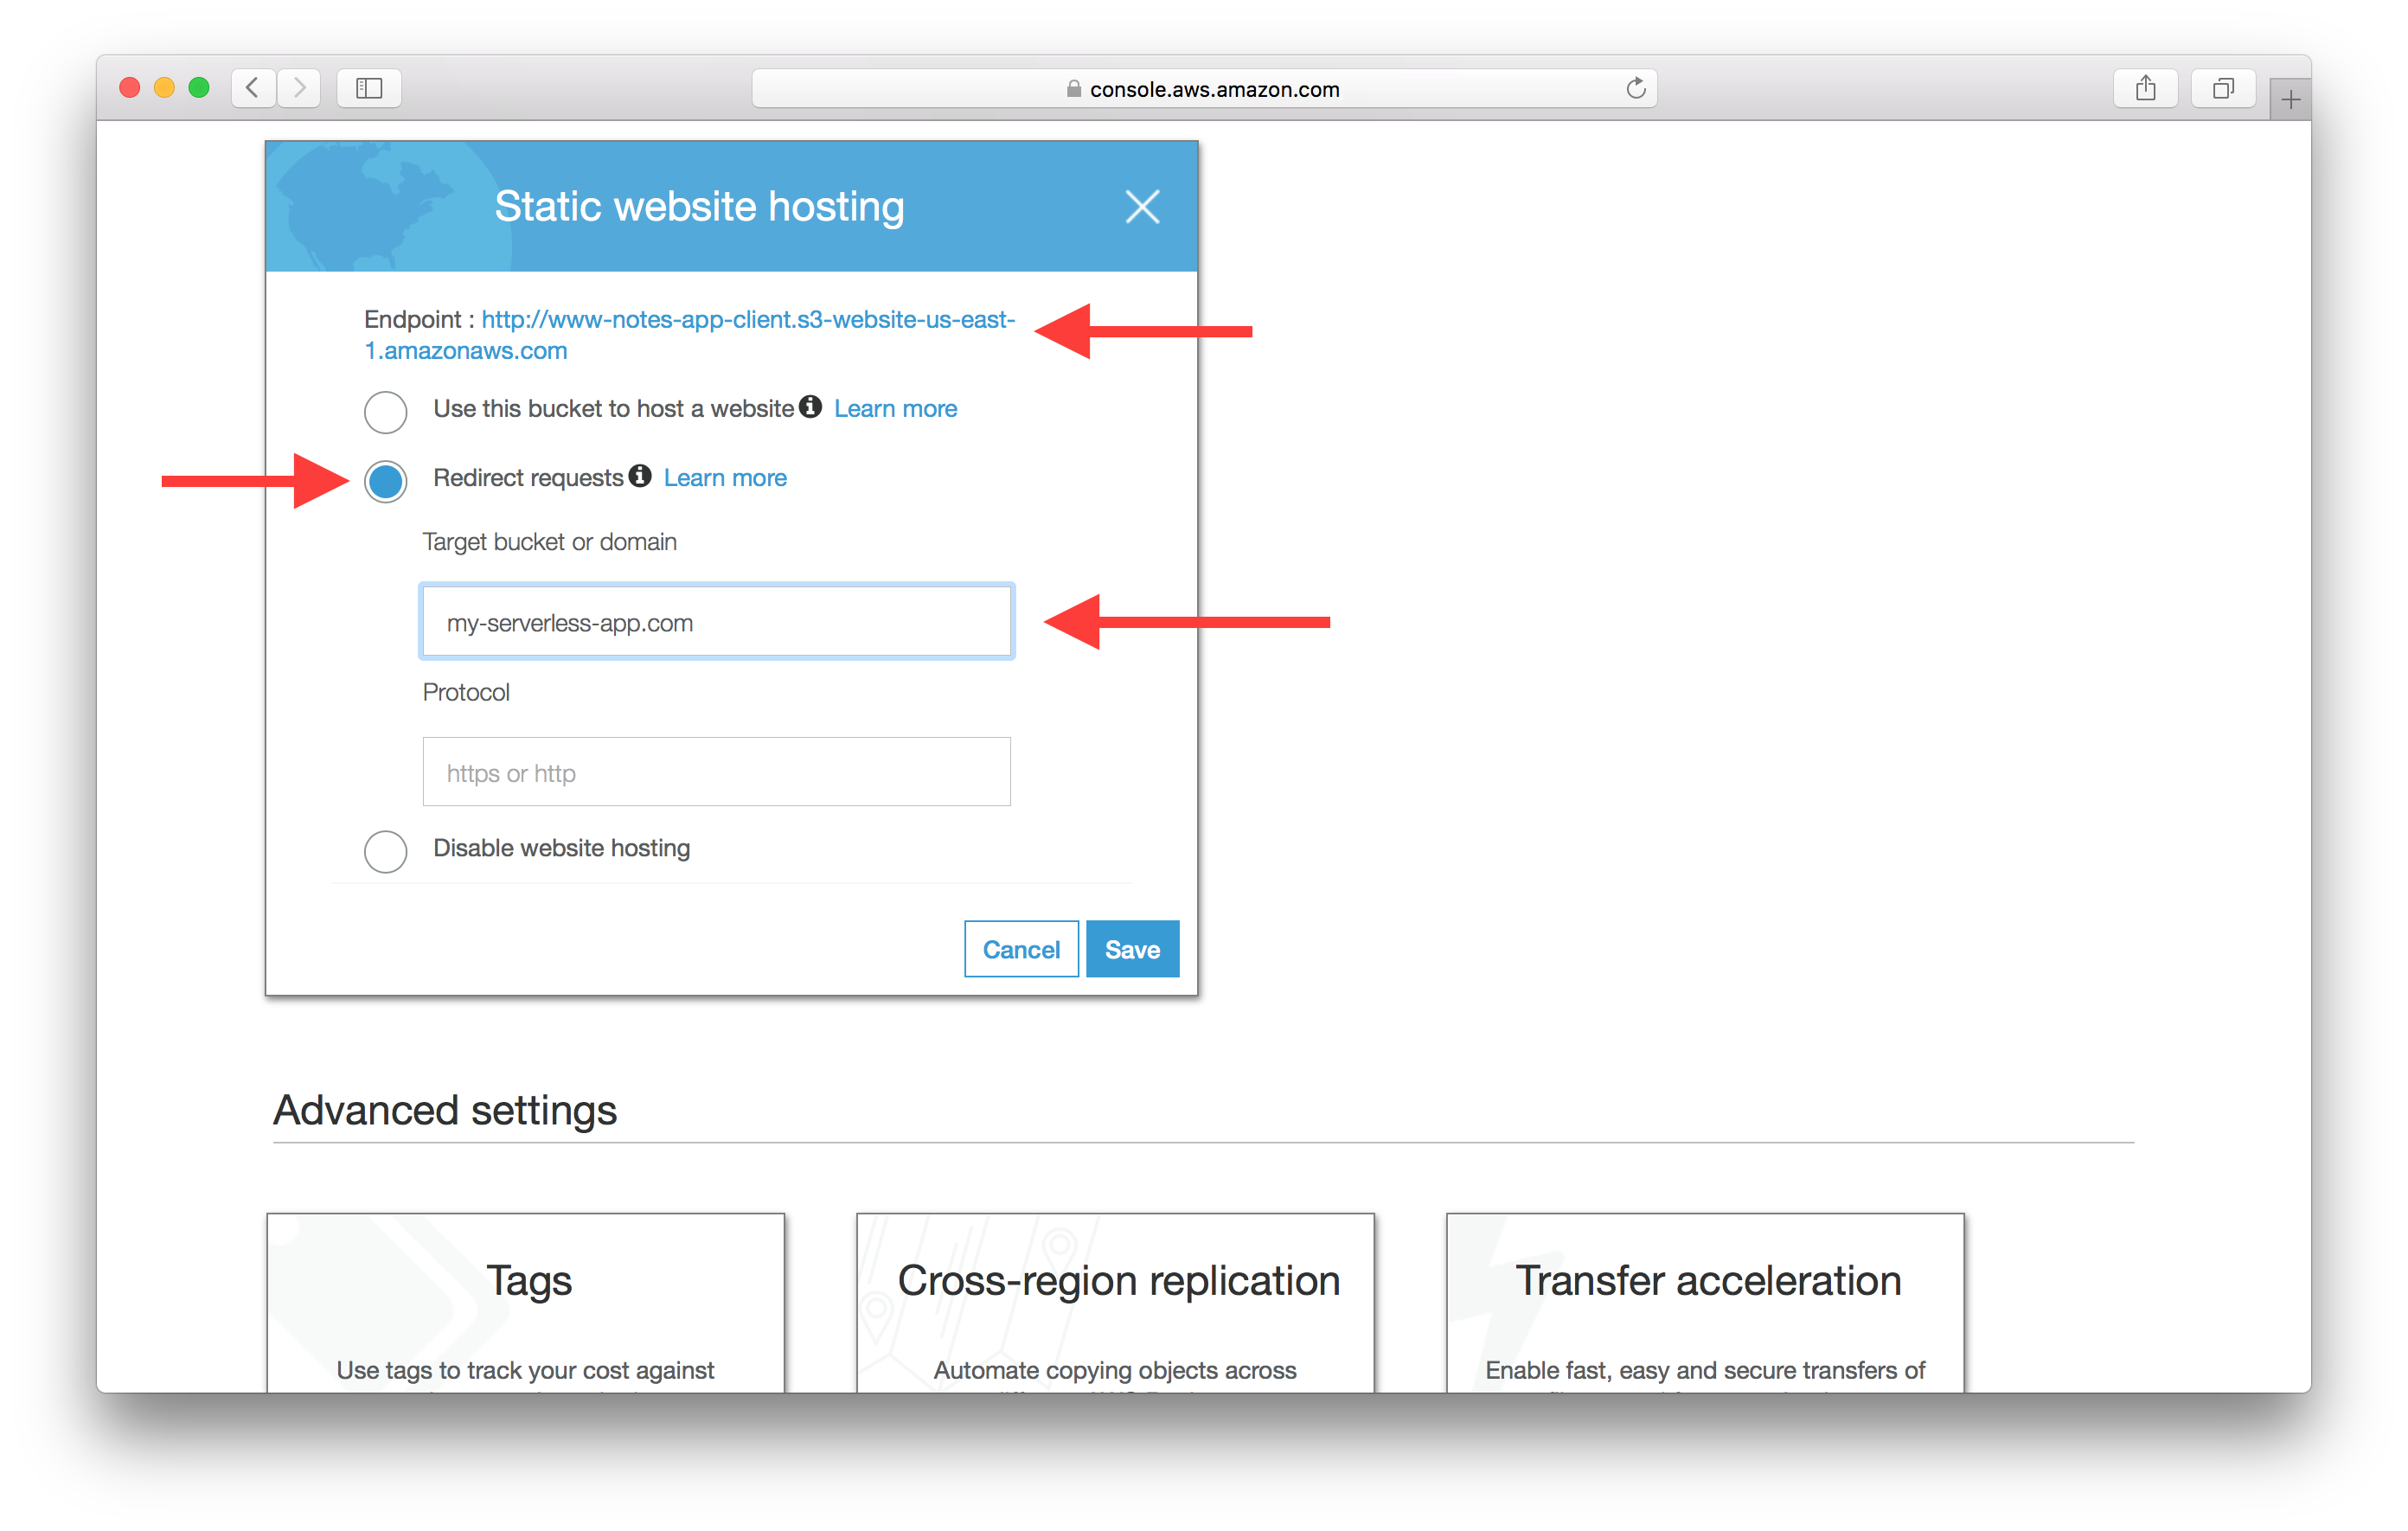
Change the Protocol to https and hit Save.
And hit Save to make the changes. Next we’ll create a CloudFront Distribution to point to this S3 redirect Bucket.
Create a CloudFront Distribution
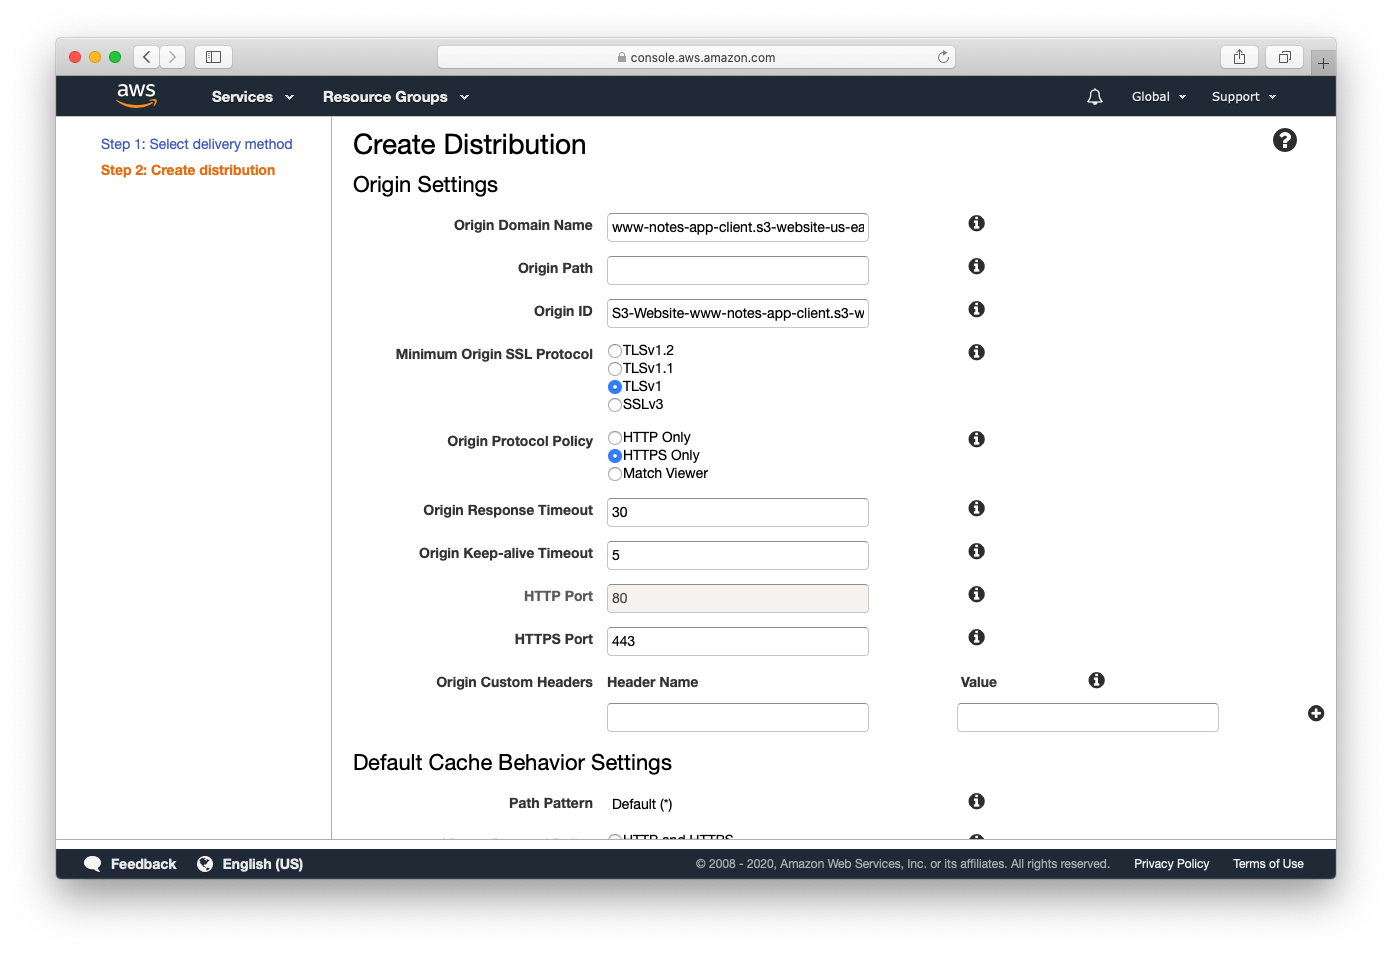
Create a new CloudFront Distribution. And copy the S3 Endpoint from the step above as the Origin Domain Name. Make sure to not use the one from the dropdown. In my case, it is http://www-notes-app-client.s3-website-us-east-1.amazonaws.com. In addition, select HTTPS Only as the Protocol Policy.
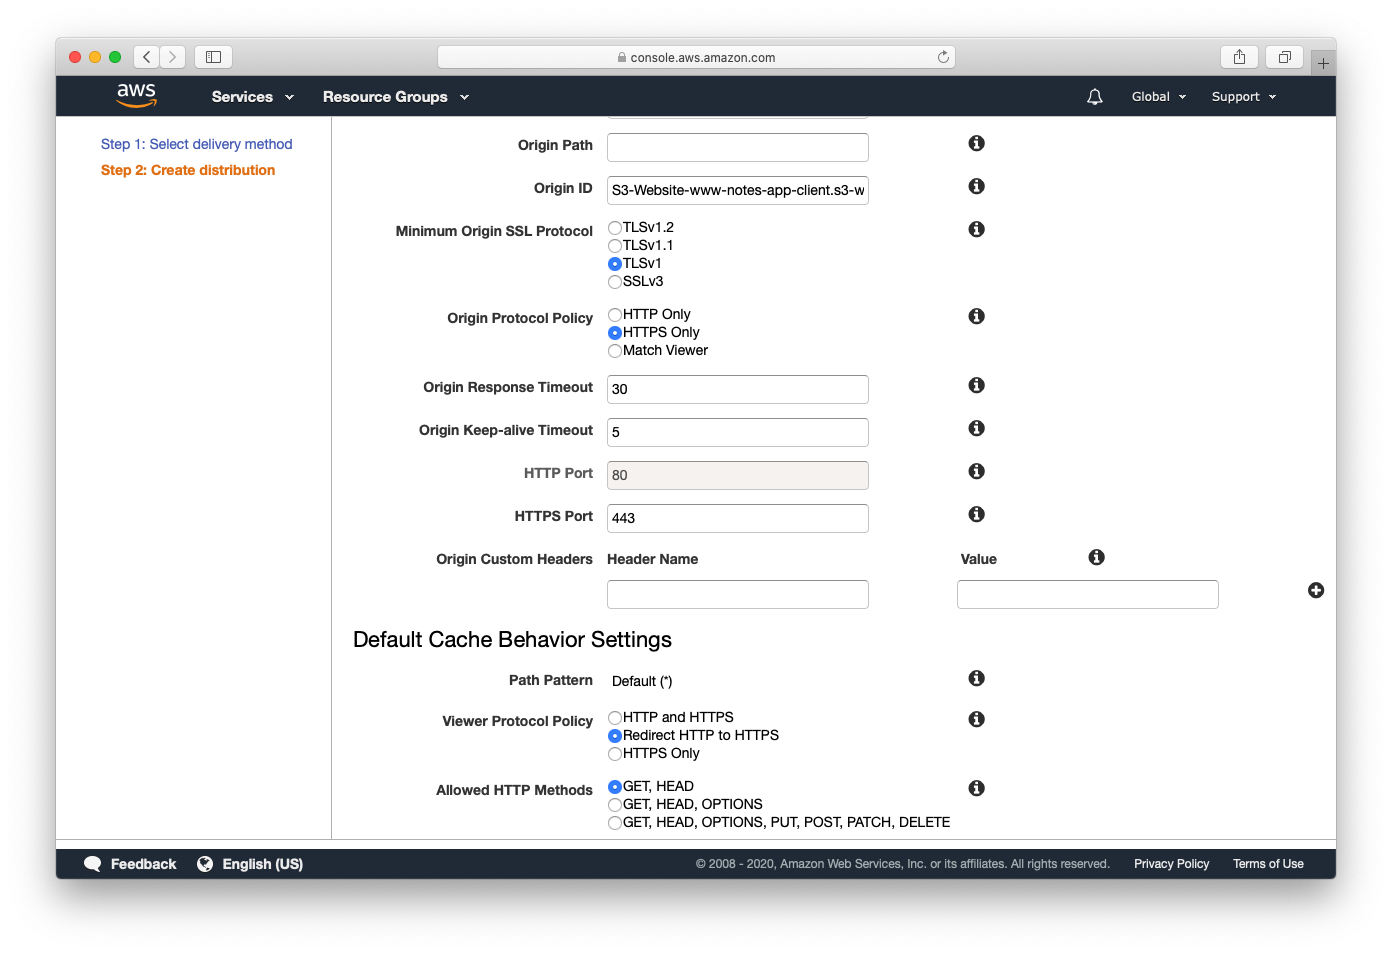
Set the Viewer Protocol Policy to Redirect HTTP to HTTPS.
Next, scroll down to the Alternate Domain Names (CNAMEs) and use the www version of our domain name here.
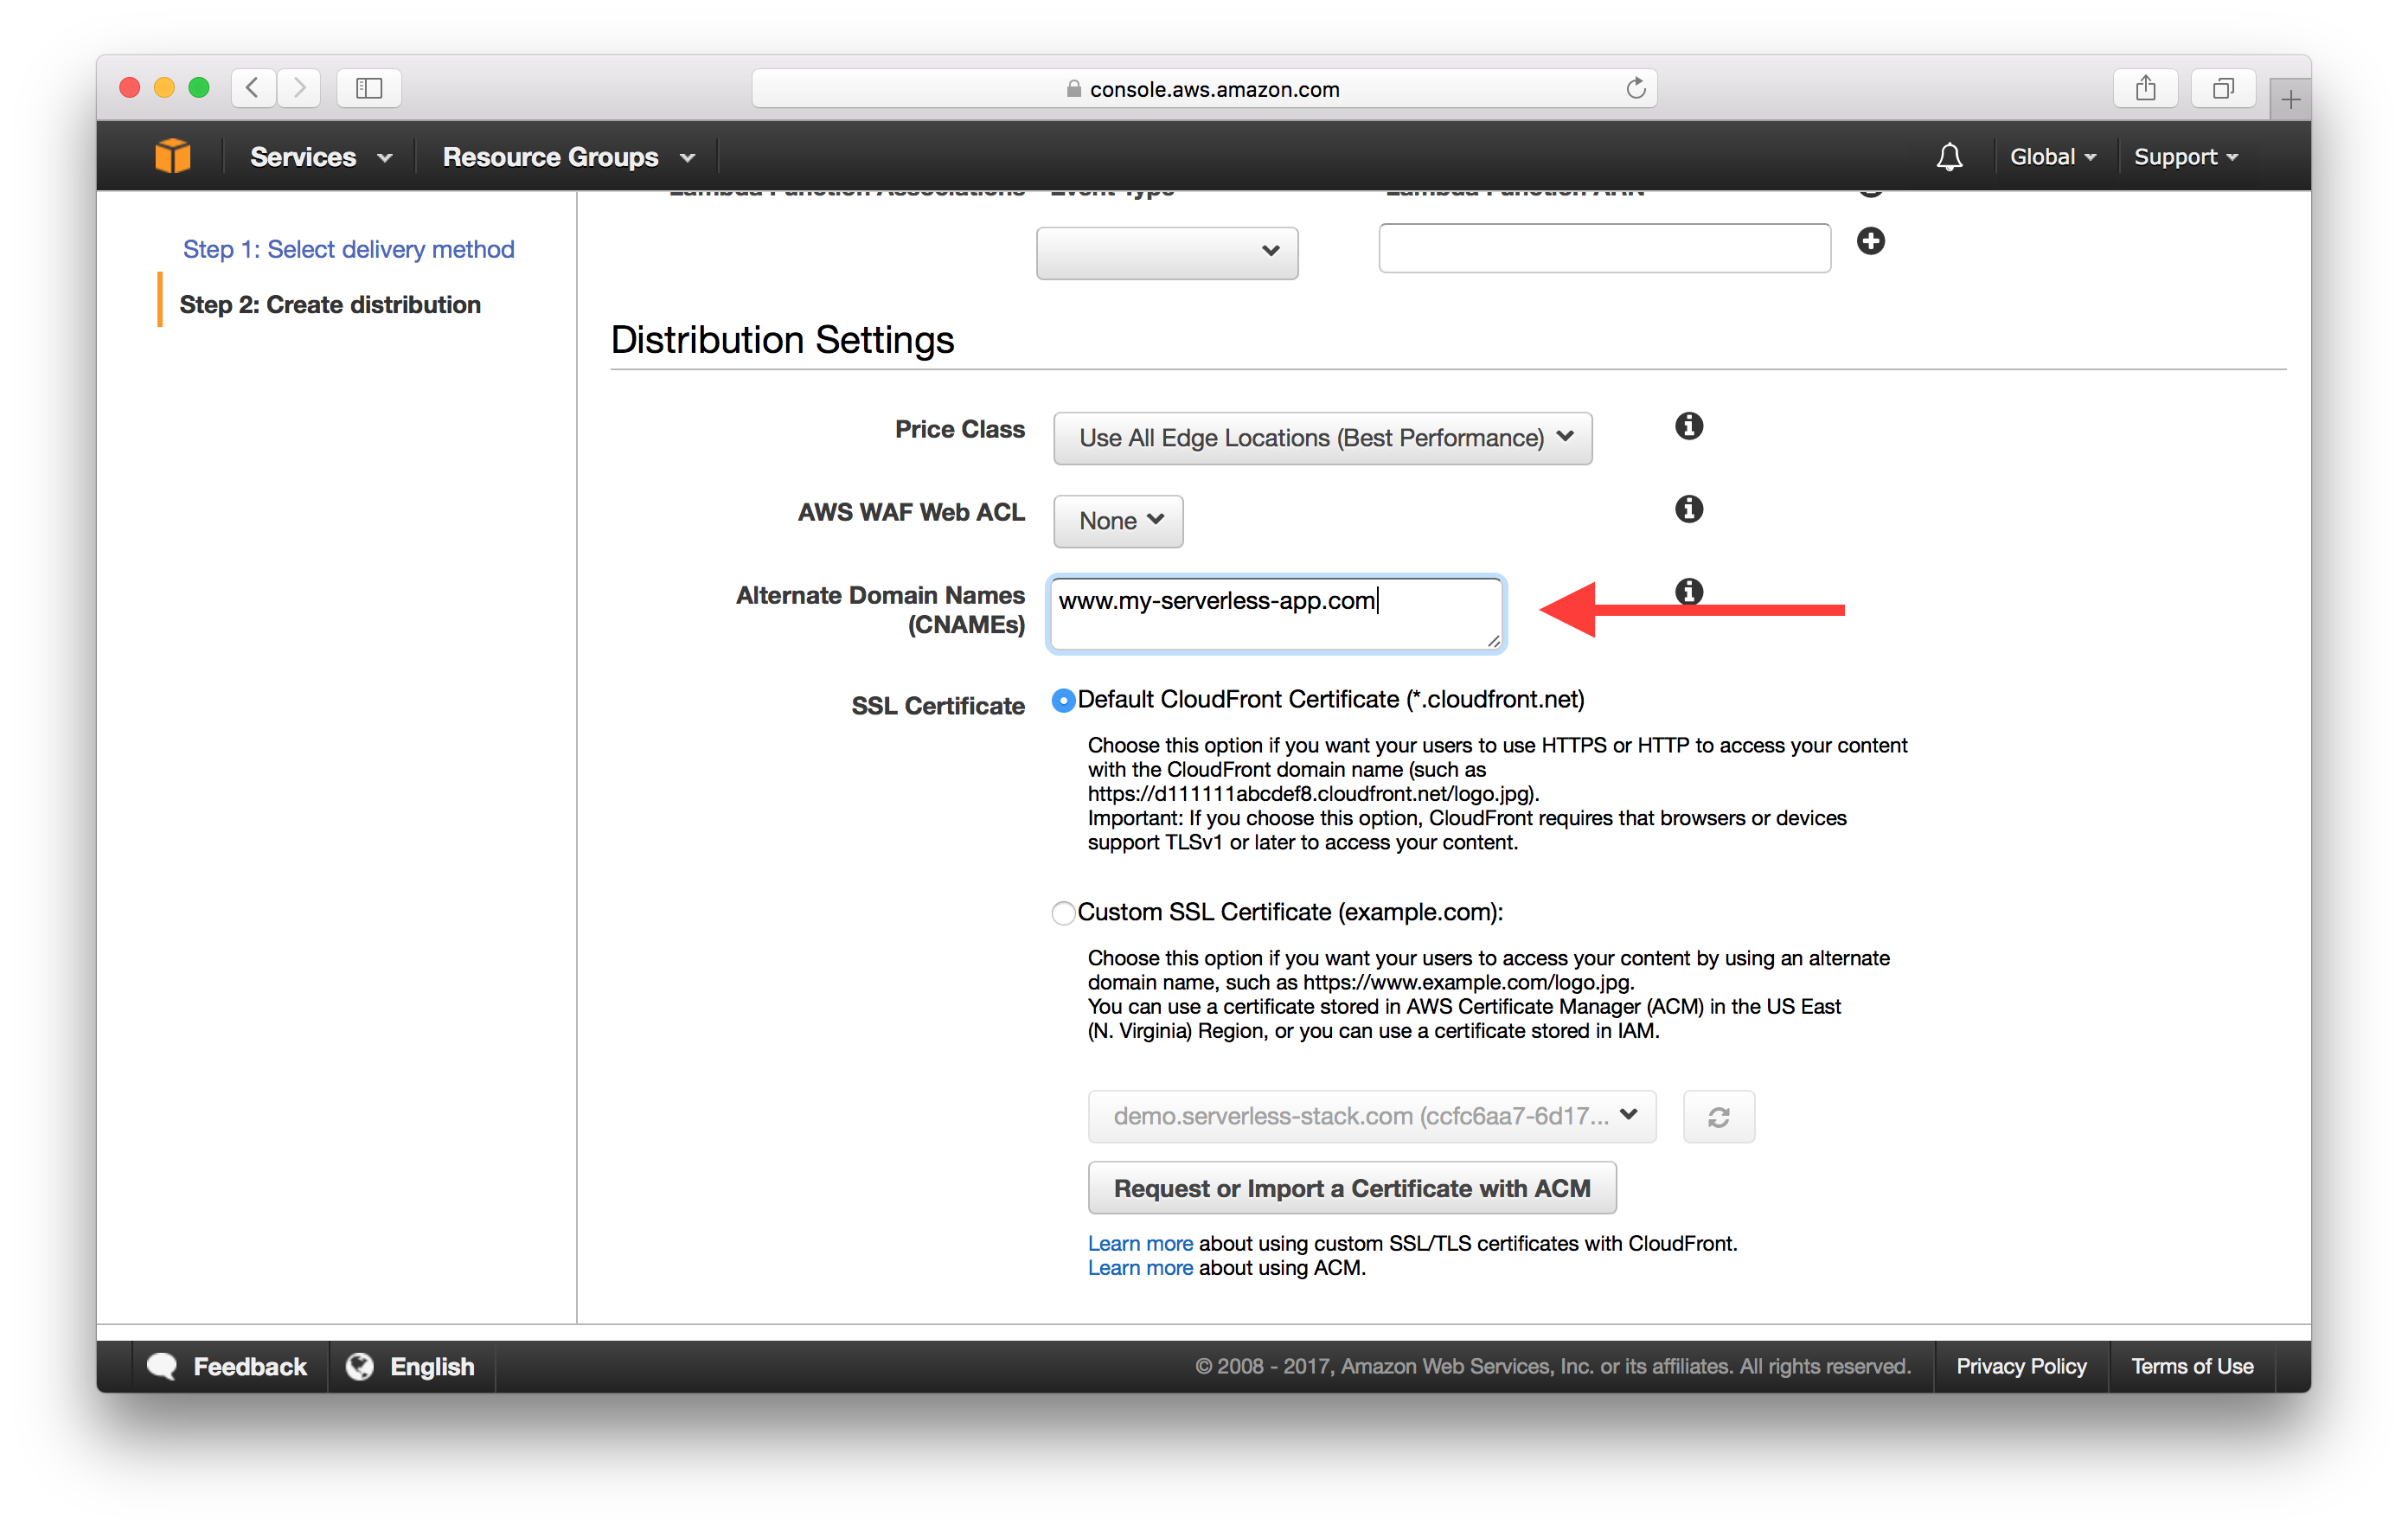
As before, switch the SSL Certificate to Custom SSL Certificate and select the certificate we created from the drop down.
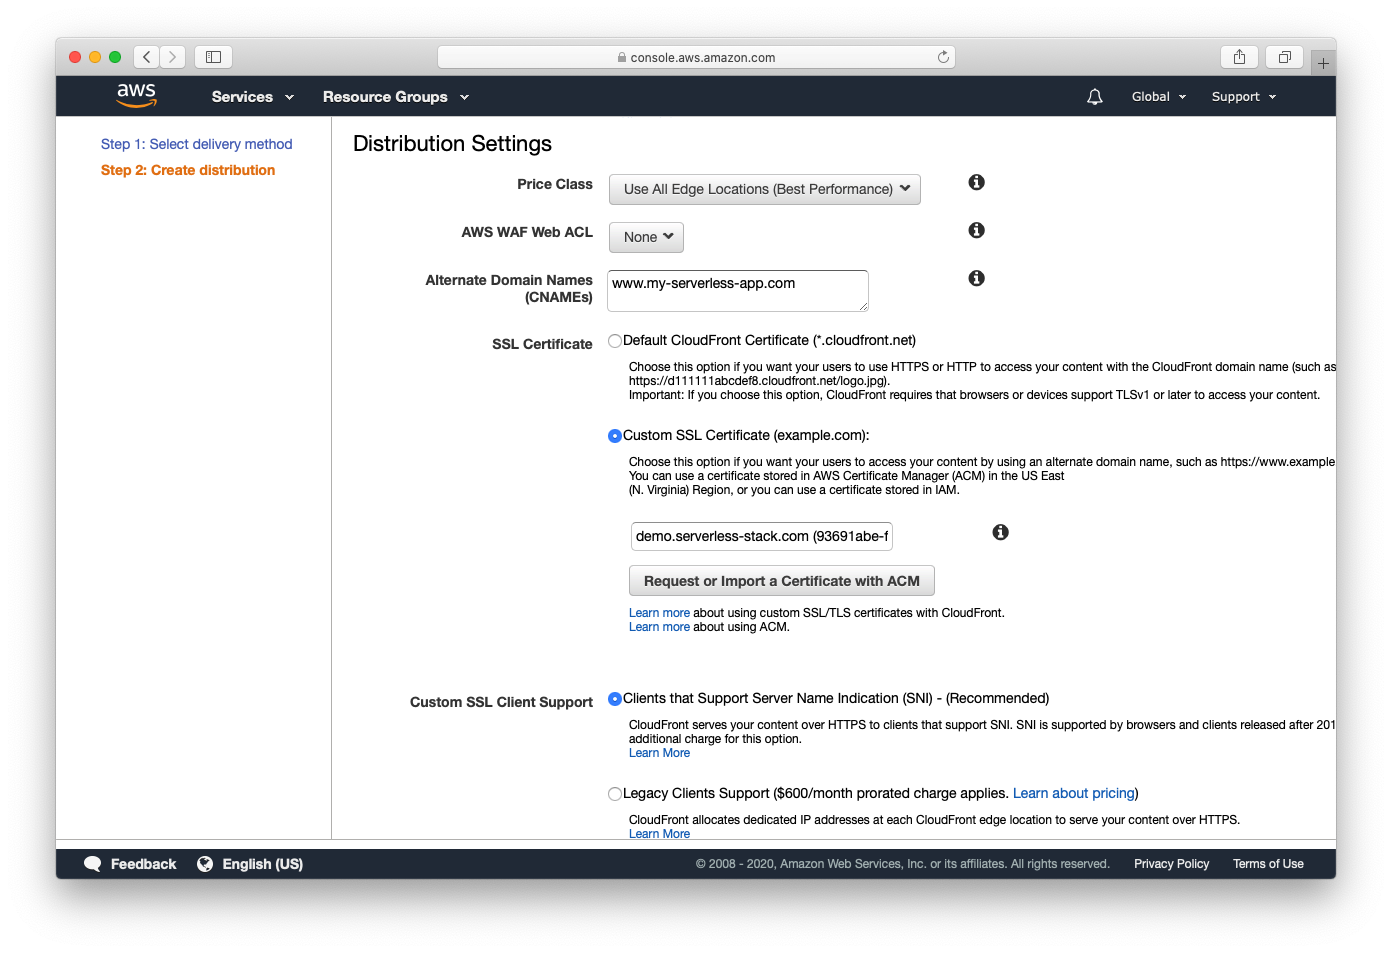
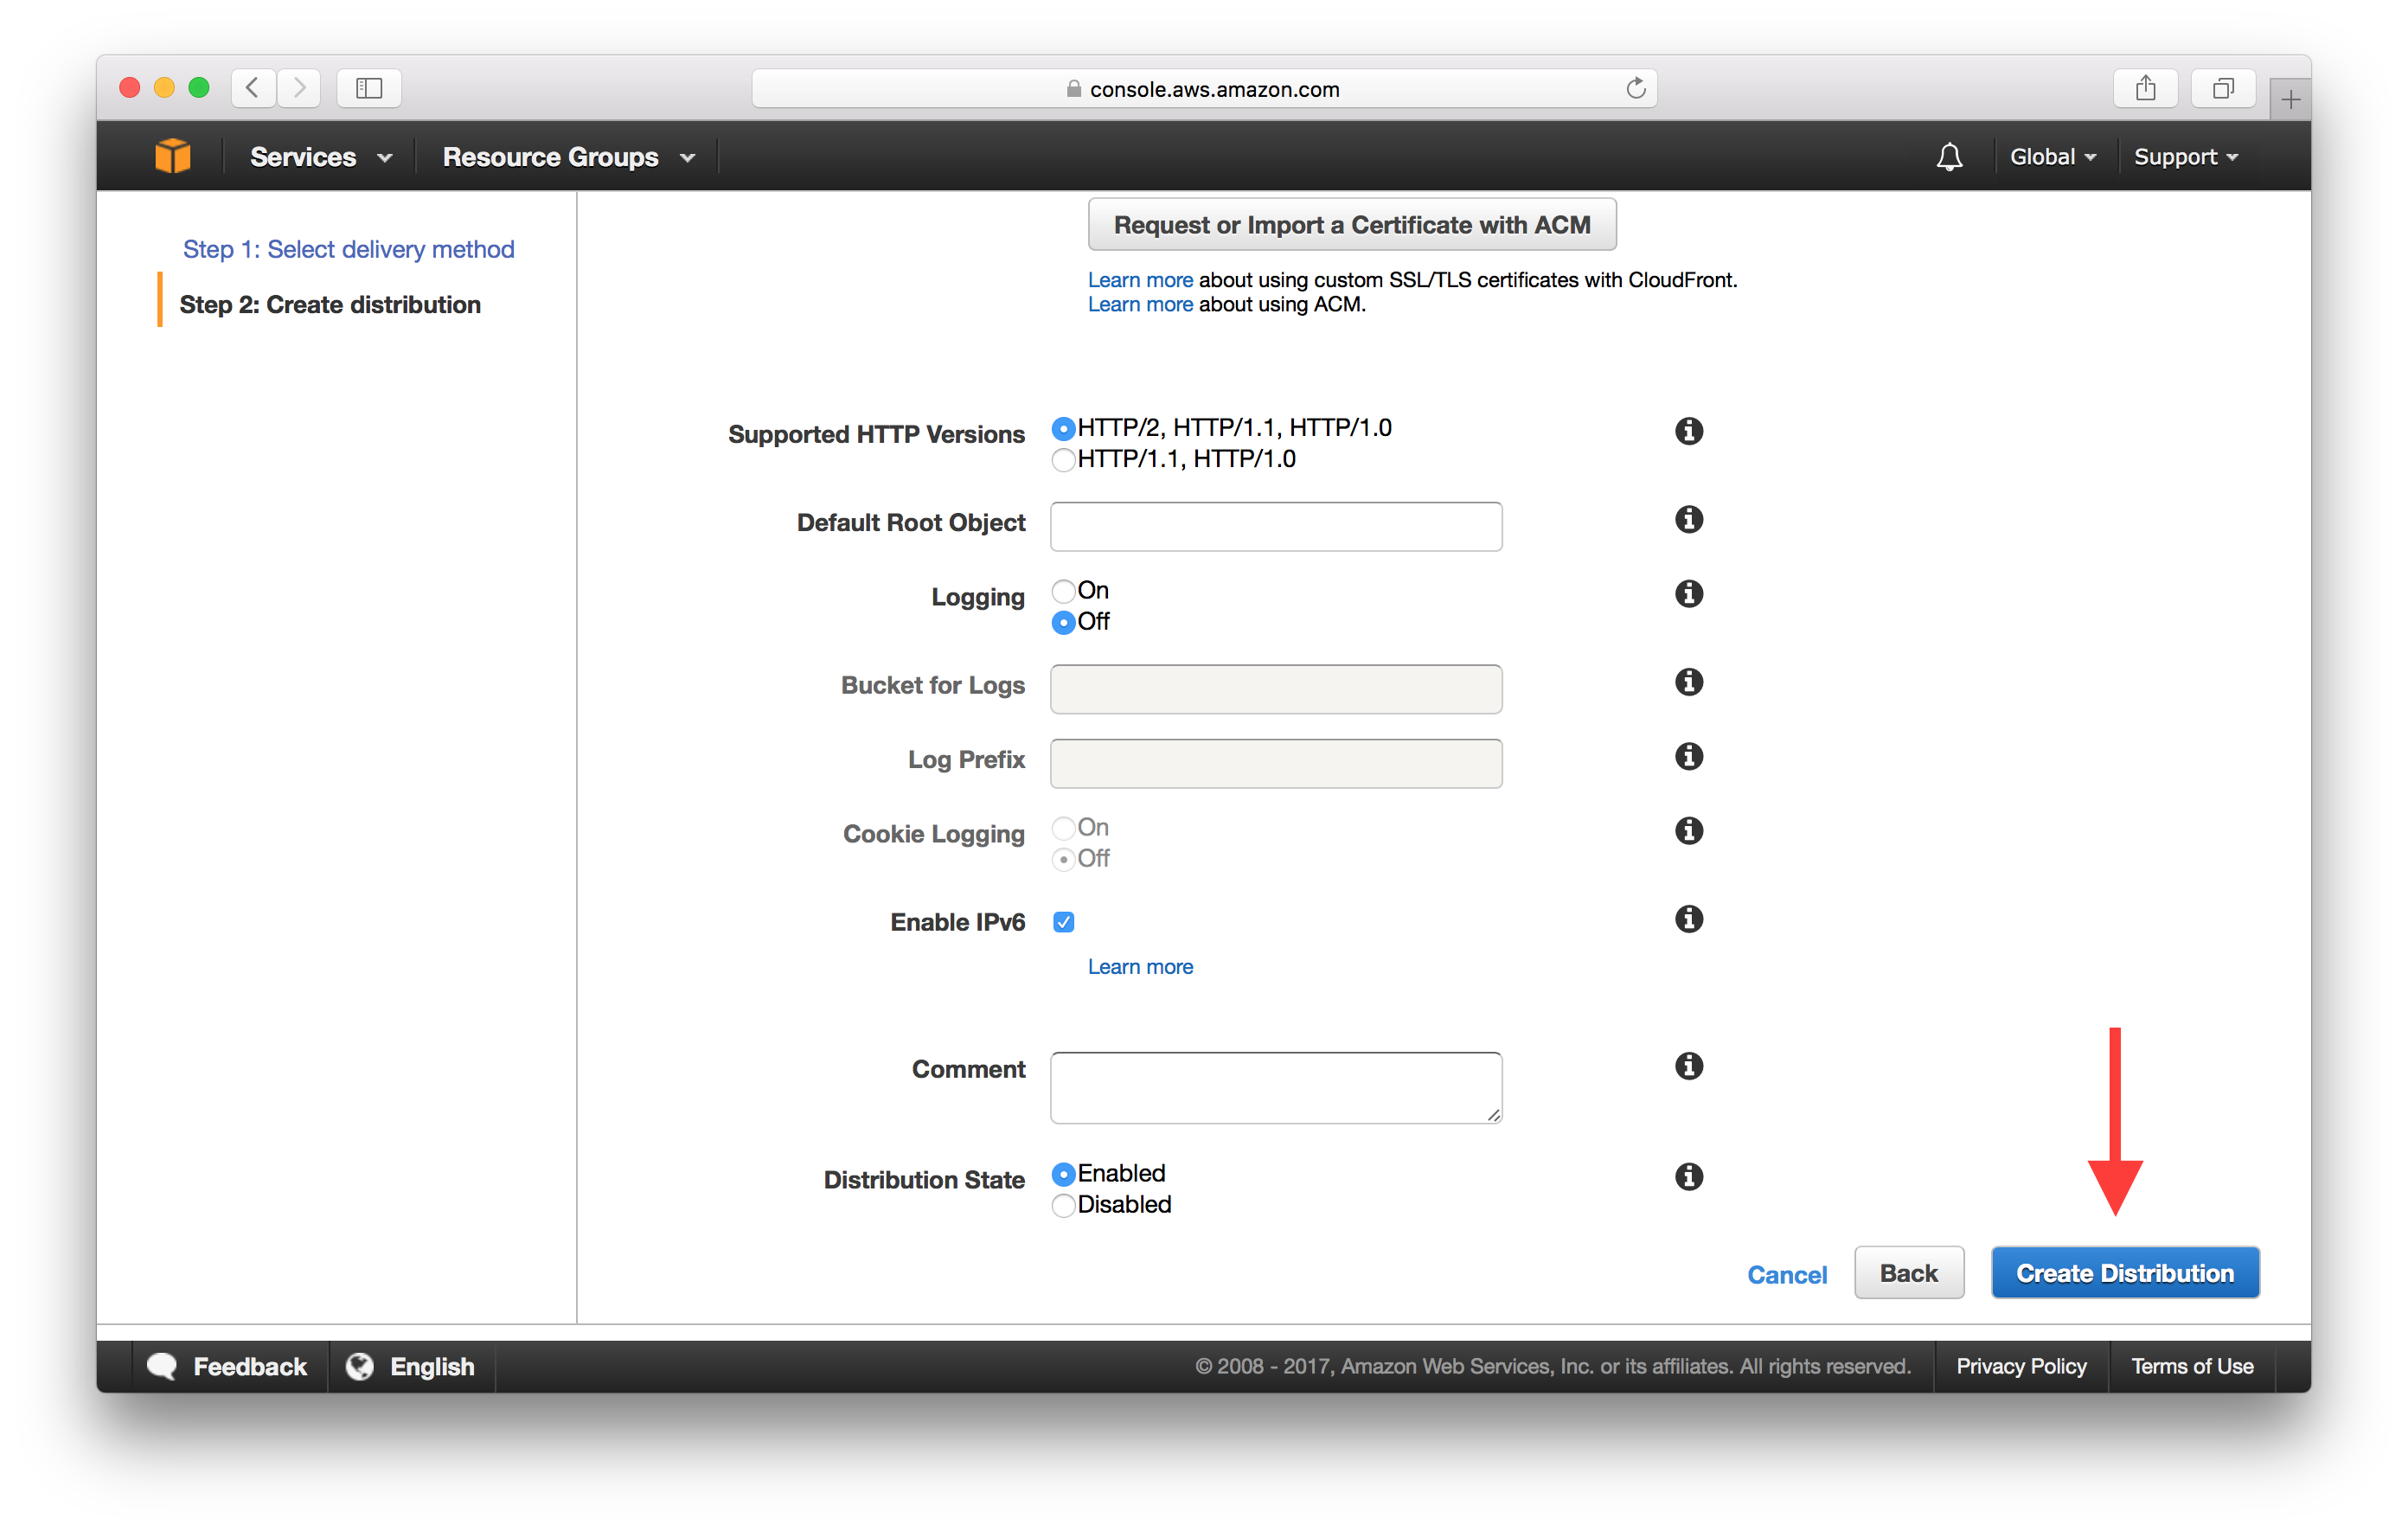
Then hit Create Distribution.
Finally, we’ll point our www domain to this CloudFront Distribution.
Point WWW Domain to CloudFront Distribution
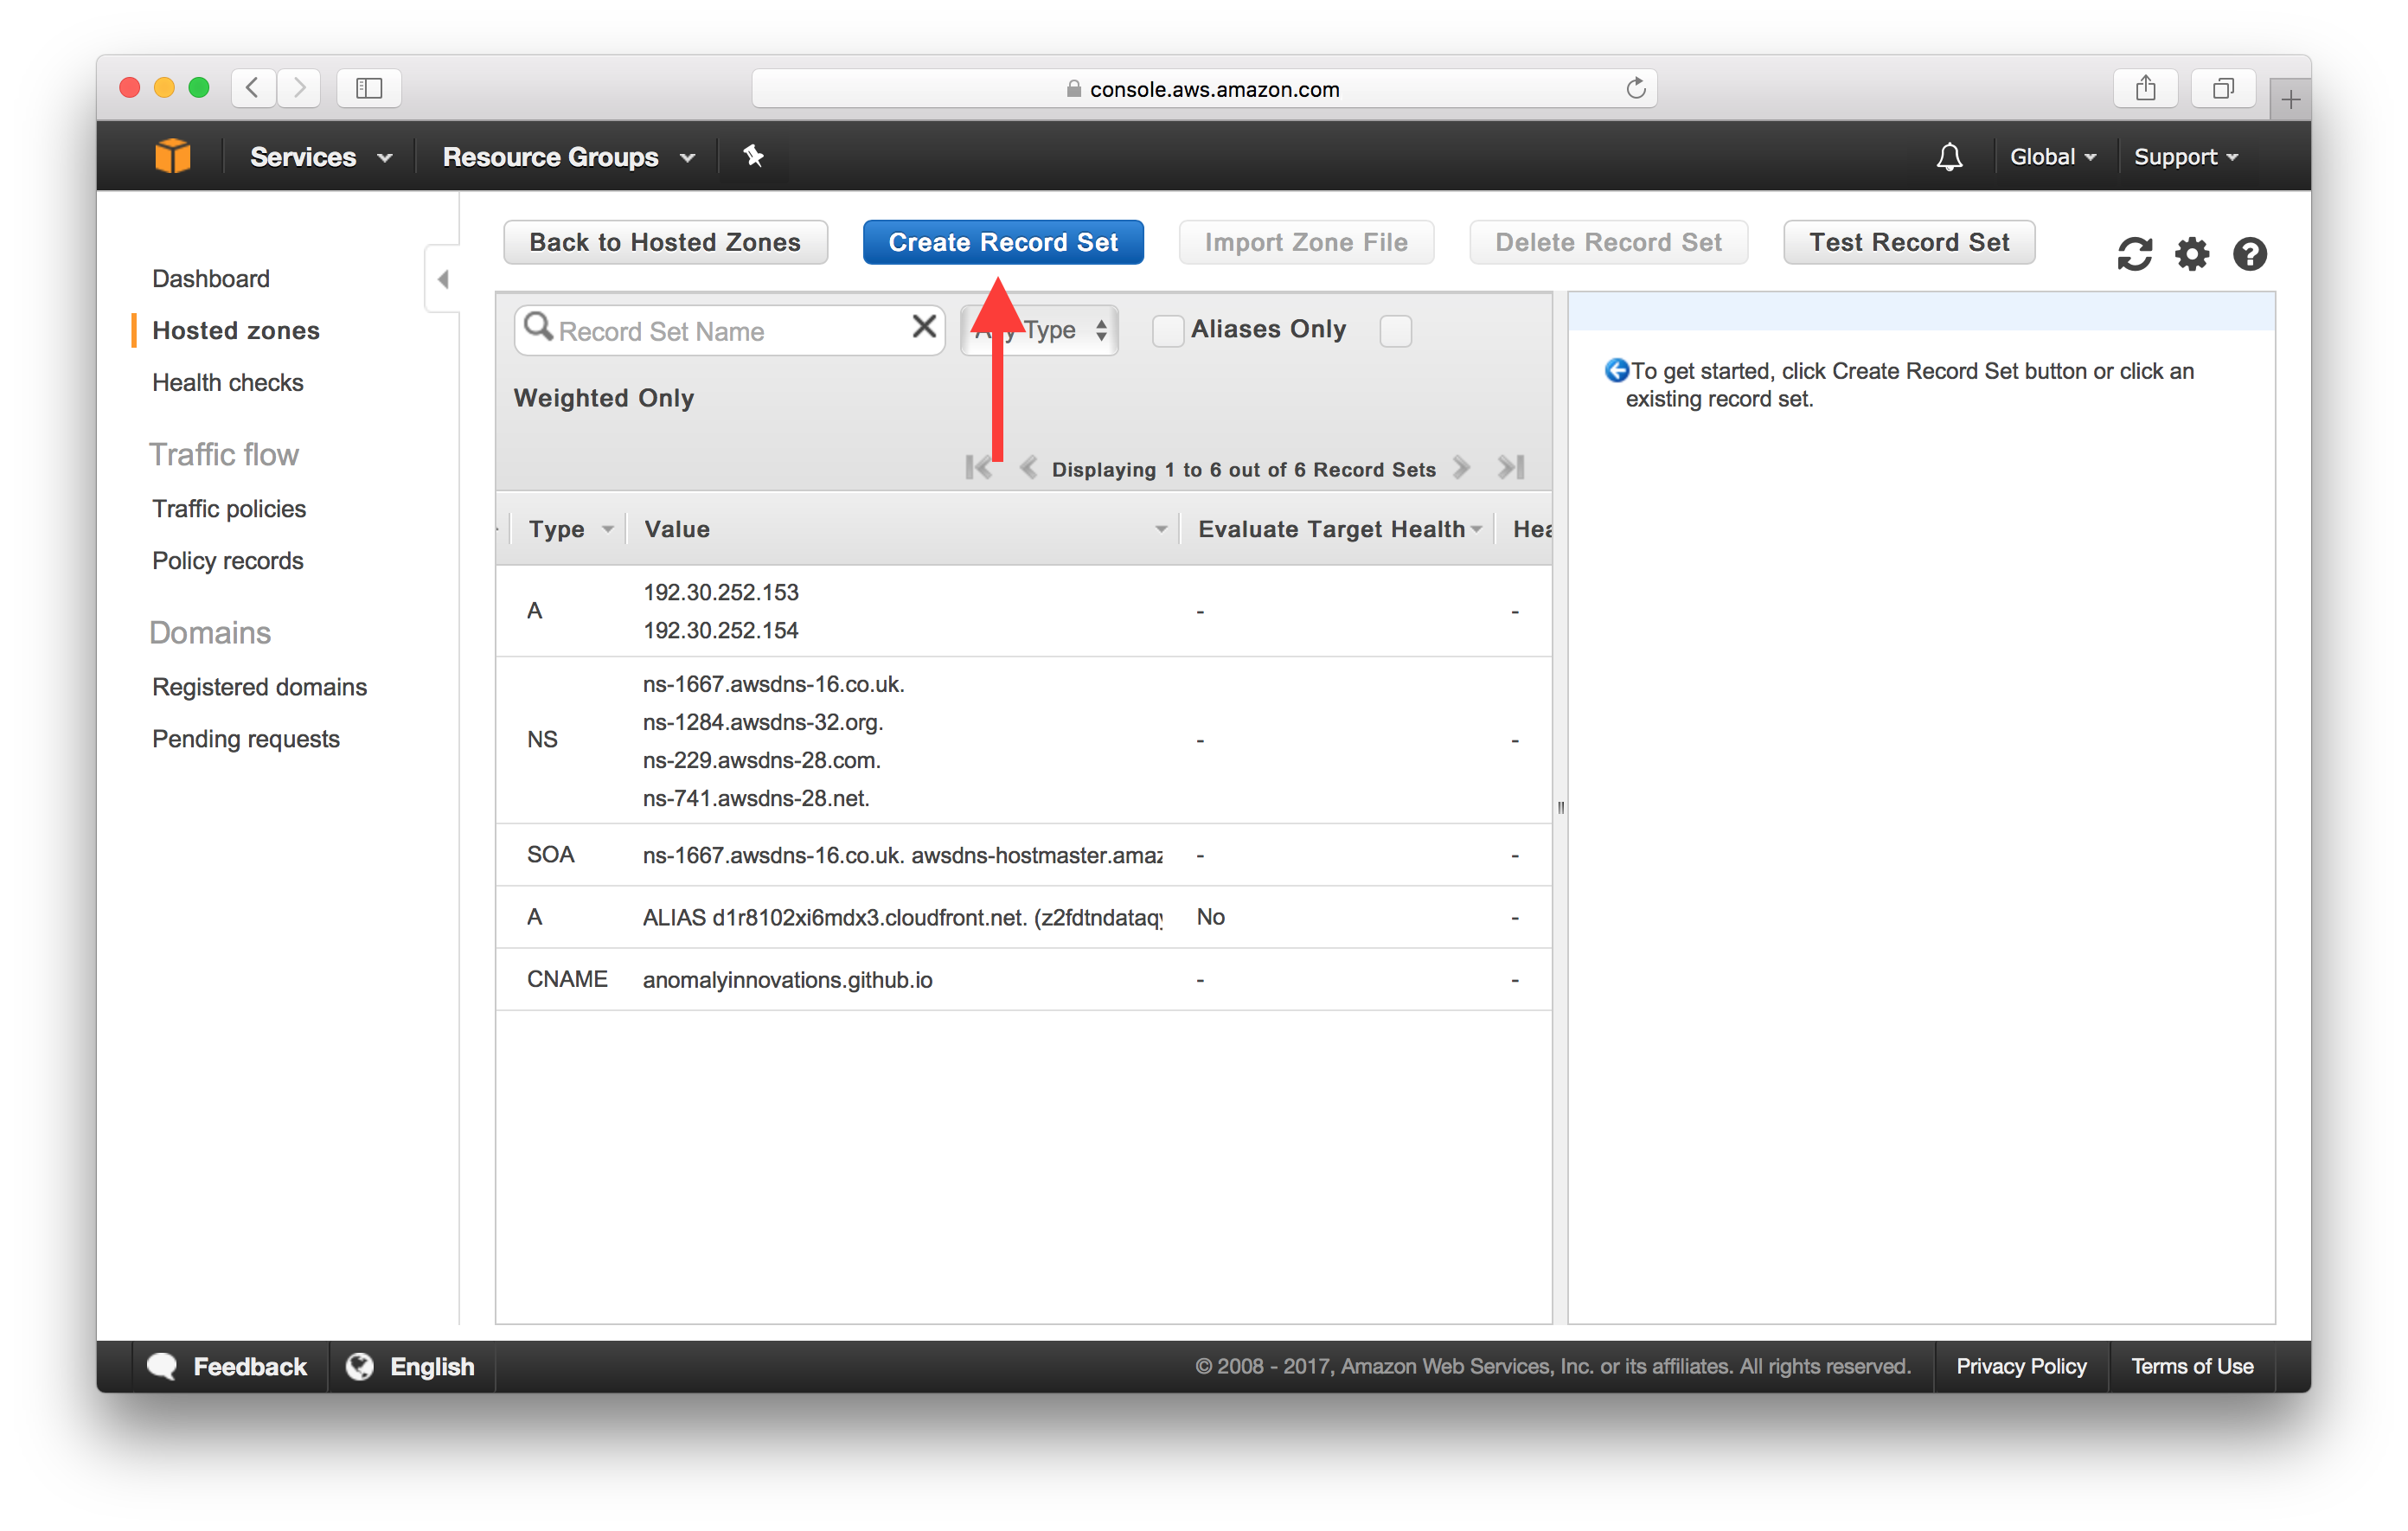
Head over to your domain in Route 53 and hit Create Record Set.
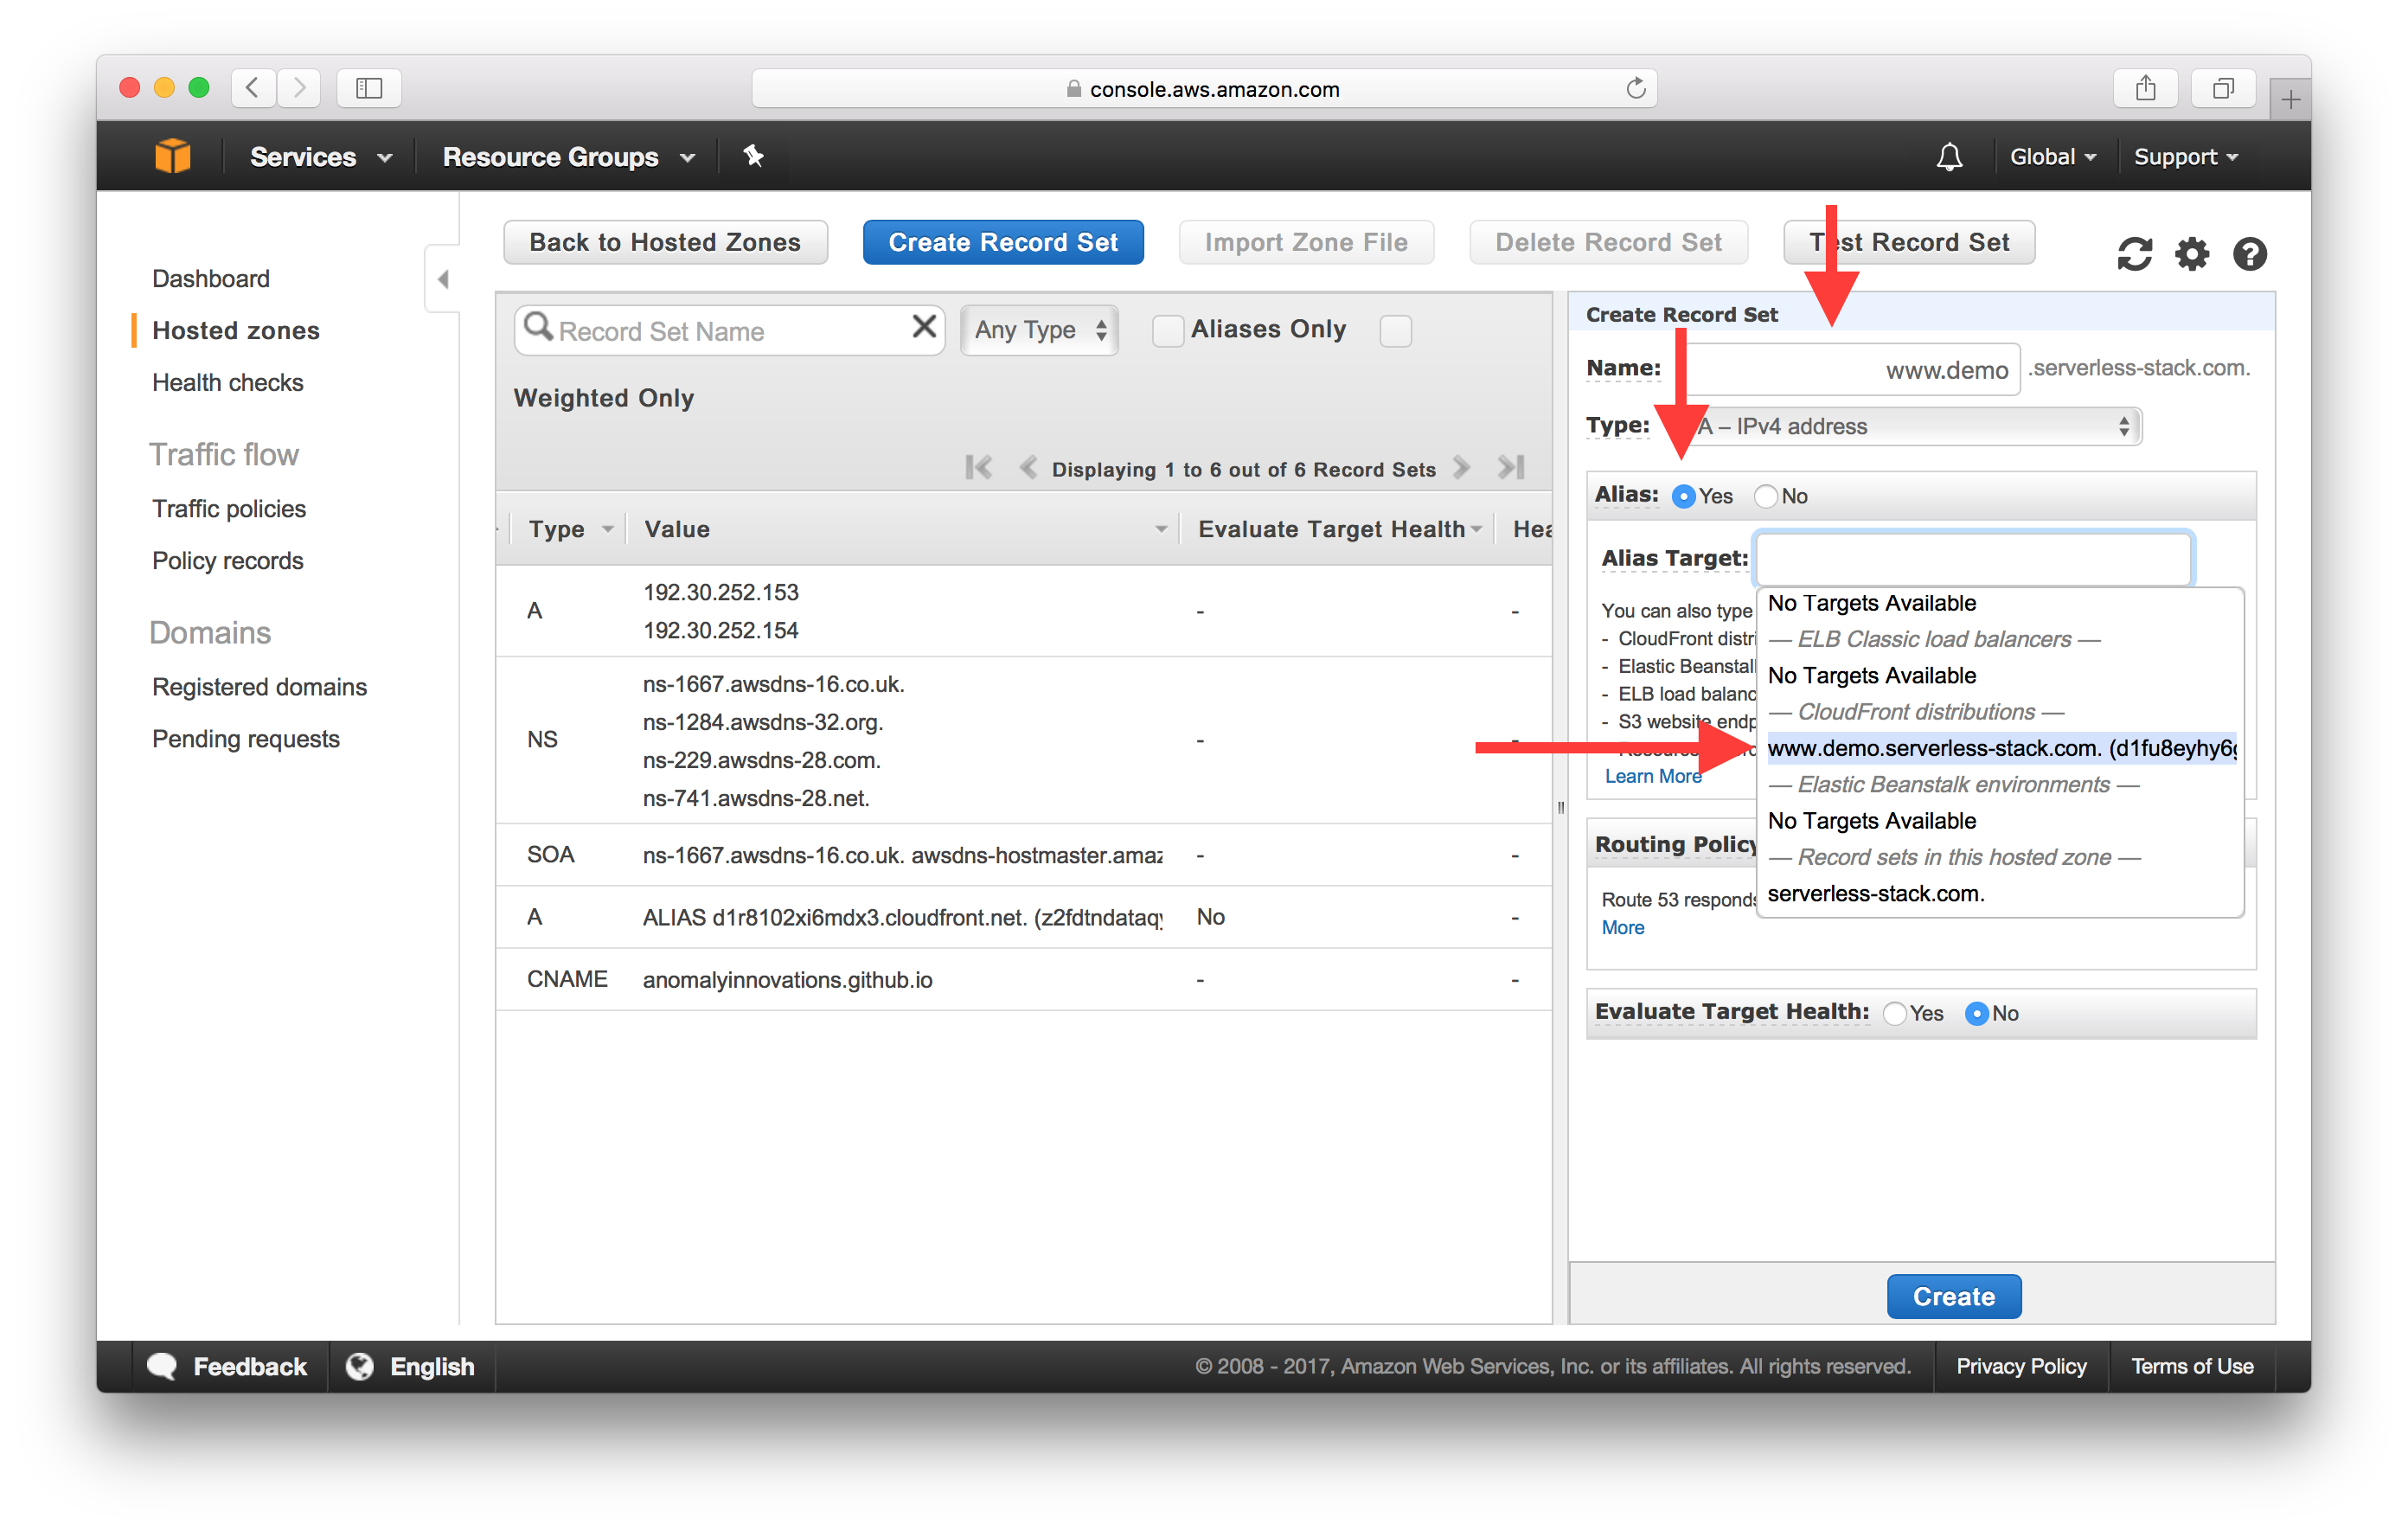
This time fill in www as the Name and select Alias as Yes. And pick your new CloudFront Distribution from the Alias Target dropdown.
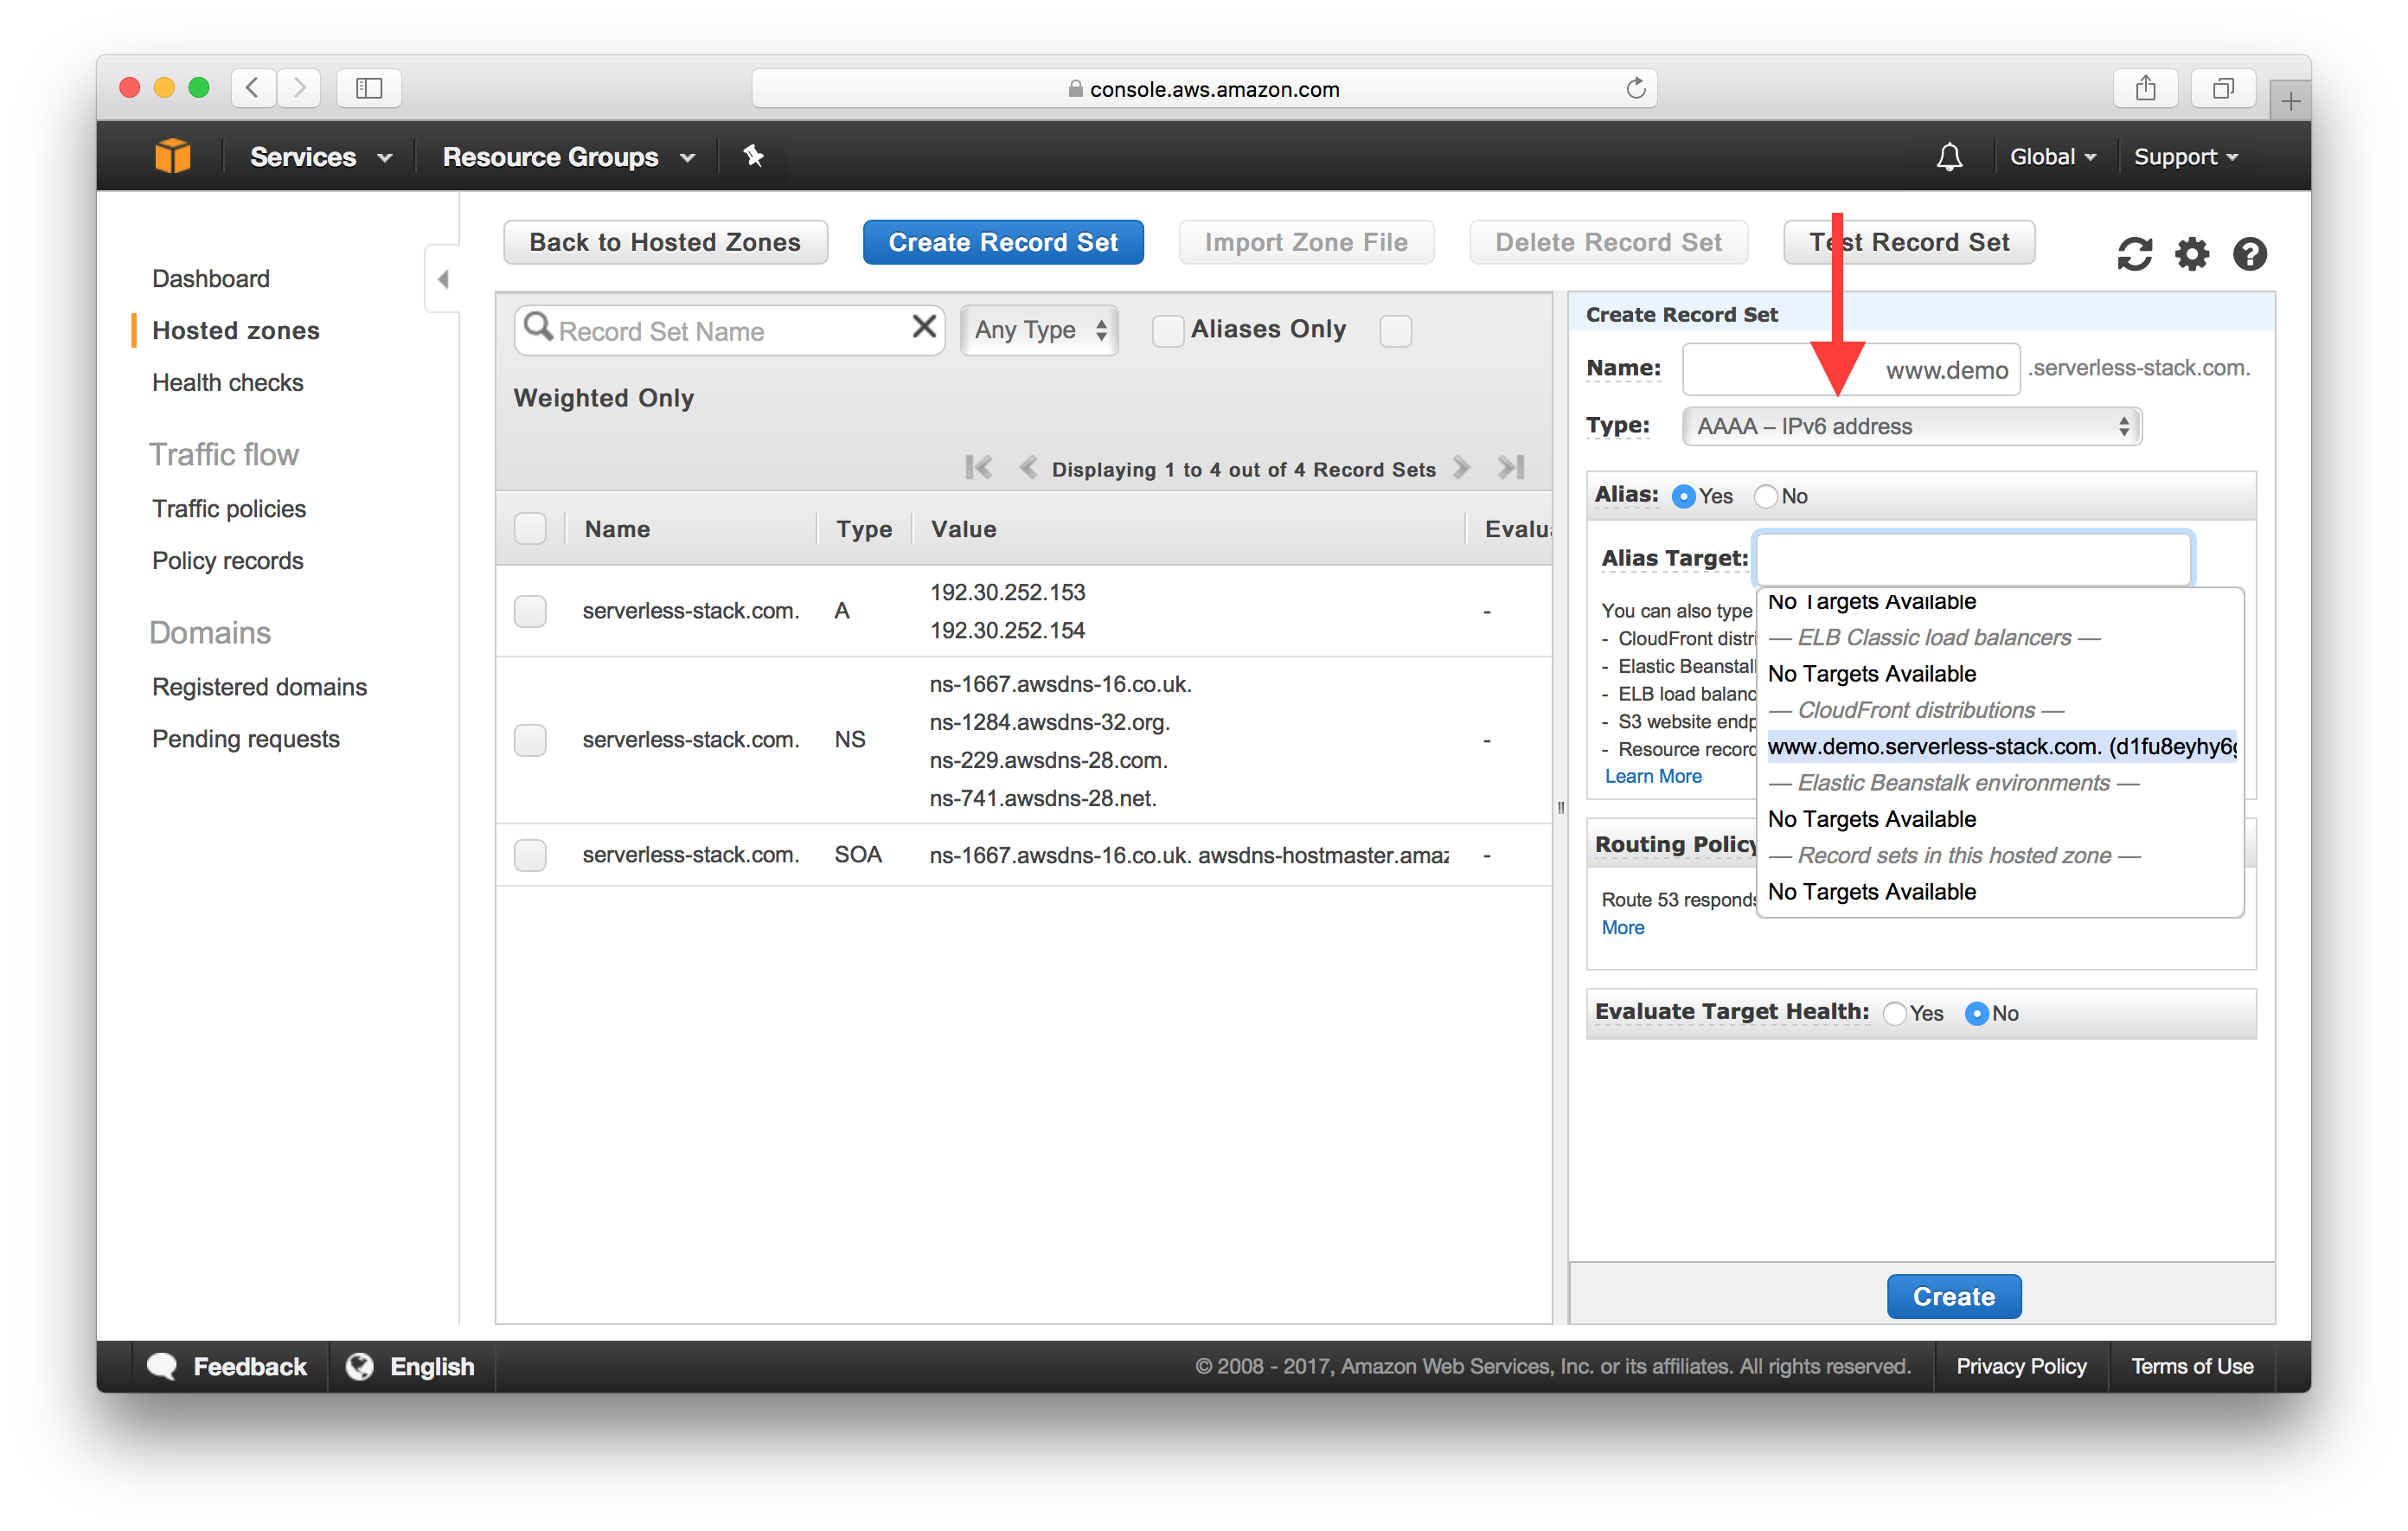
Add IPv6 Support
Just as before, we need to add an AAAA record to support IPv6.
Create a new Record Set with the exact same settings as before, except make sure to pick AAAA - IPv6 address as the Type.
And that’s it! Just give it some time for the DNS to propagate and if you visit your www version of your domain, it should redirect you to your non-www version.
Next up, let’s look at the process of deploying updates to our app.
For help and discussion
Comments on this chapter