Creating Feature Environments
Over the last couple of chapters we looked at how to work on Lambda and API Gateway locally. However, besides Lambda and API Gateway, your project will have other AWS services. To run your code locally, you have to simulate all the AWS services. Similar to serverless-offline, there are plugins like serverless-dynamodb-local and serverless-offline-sns that can simulate DynamoDB and SNS. However, mocking only takes you so far since they do not simulate IAM permissions and they are not always up to date with the services’ latest changes. You want to test your code with the real resources.
Serverless is really good at creating ephemeral environments. Let’s look at what the workflow looks like when you are trying to add a new feature to your app.
As an example we’ll add a feature that lets you like a note. We will add a new API endpoint /notes/{id}/like. We are going to work on this in a new feature branch and then deploy this using Seed.
Create a feature branch
We will create a new feature branch called like.
$ git checkout -b like
Since we are going to be using /notes/{id}/like as our endpoint we need to first export the /notes/{id} API path. Open the serverless.yml in the services/notes-api service, and append to the resource outputs.
ApiGatewayResourceNotesIdVarId:
  Value:
    Ref: ApiGatewayResourceNotesIdVar
  Export:
    Name: ${self:custom.stage}-ExtApiGatewayResourceNotesIdVarId
Our resource outputs should now look like:
...
  - Outputs:
      ApiGatewayRestApiId:
        Value:
          Ref: ApiGatewayRestApi
        Export:
          Name: ${self:custom.stage}-ExtApiGatewayRestApiId

      ApiGatewayRestApiRootResourceId:
        Value:
           Fn::GetAtt:
            - ApiGatewayRestApi
            - RootResourceId
        Export:
          Name: ${self:custom.stage}-ExtApiGatewayRestApiRootResourceId

      ApiGatewayResourceNotesIdVarId:
        Value:
          Ref: ApiGatewayResourceNotesIdVar
        Export:
          Name: ${self:custom.stage}-ExtApiGatewayResourceNotesIdVarId
Let’s create the like-api service.
$ cd services
$ mkdir like-api
$ cd like-api
Add a serverless.yml.
service: notes-app-ext-like-api

plugins:
  - serverless-bundle
  - serverless-offline

custom: ${file(../../serverless.common.yml):custom}

package:
  individually: true

provider:
  name: aws
  runtime: nodejs12.x
  stage: dev
  region: us-east-1
  tracing:
    lambda: true

  apiGateway:
    restApiId: !ImportValue ${self:custom.stage}-ExtApiGatewayRestApiId
    restApiRootResourceId: !ImportValue ${self:custom.stage}-ExtApiGatewayRestApiRootResourceId
    restApiResources:
      /notes/{id}: !ImportValue ${self:custom.stage}-ExtApiGatewayResourceNotesIdVarId

  environment:
    stage: ${self:custom.stage}

  iamRoleStatements:
    - ${file(../../serverless.common.yml):lambdaPolicyXRay}

functions:
  like:
    handler: like.main
    events:
      - http:
          path: /notes/{id}/like
          method: post
          cors: true
          authorizer: aws_iam
Again, the like-api will share the same API endpoint as the notes-api service.
Add the handler file like.js.
import { success } from "../../libs/response-lib";

export async function main(event, context) {
  // Business logic code for liking a post

  return success({ status: true });
}
Now before we push our Git branch, let’s enable the branch workflow in Seed.
Enable branch workflow in Seed
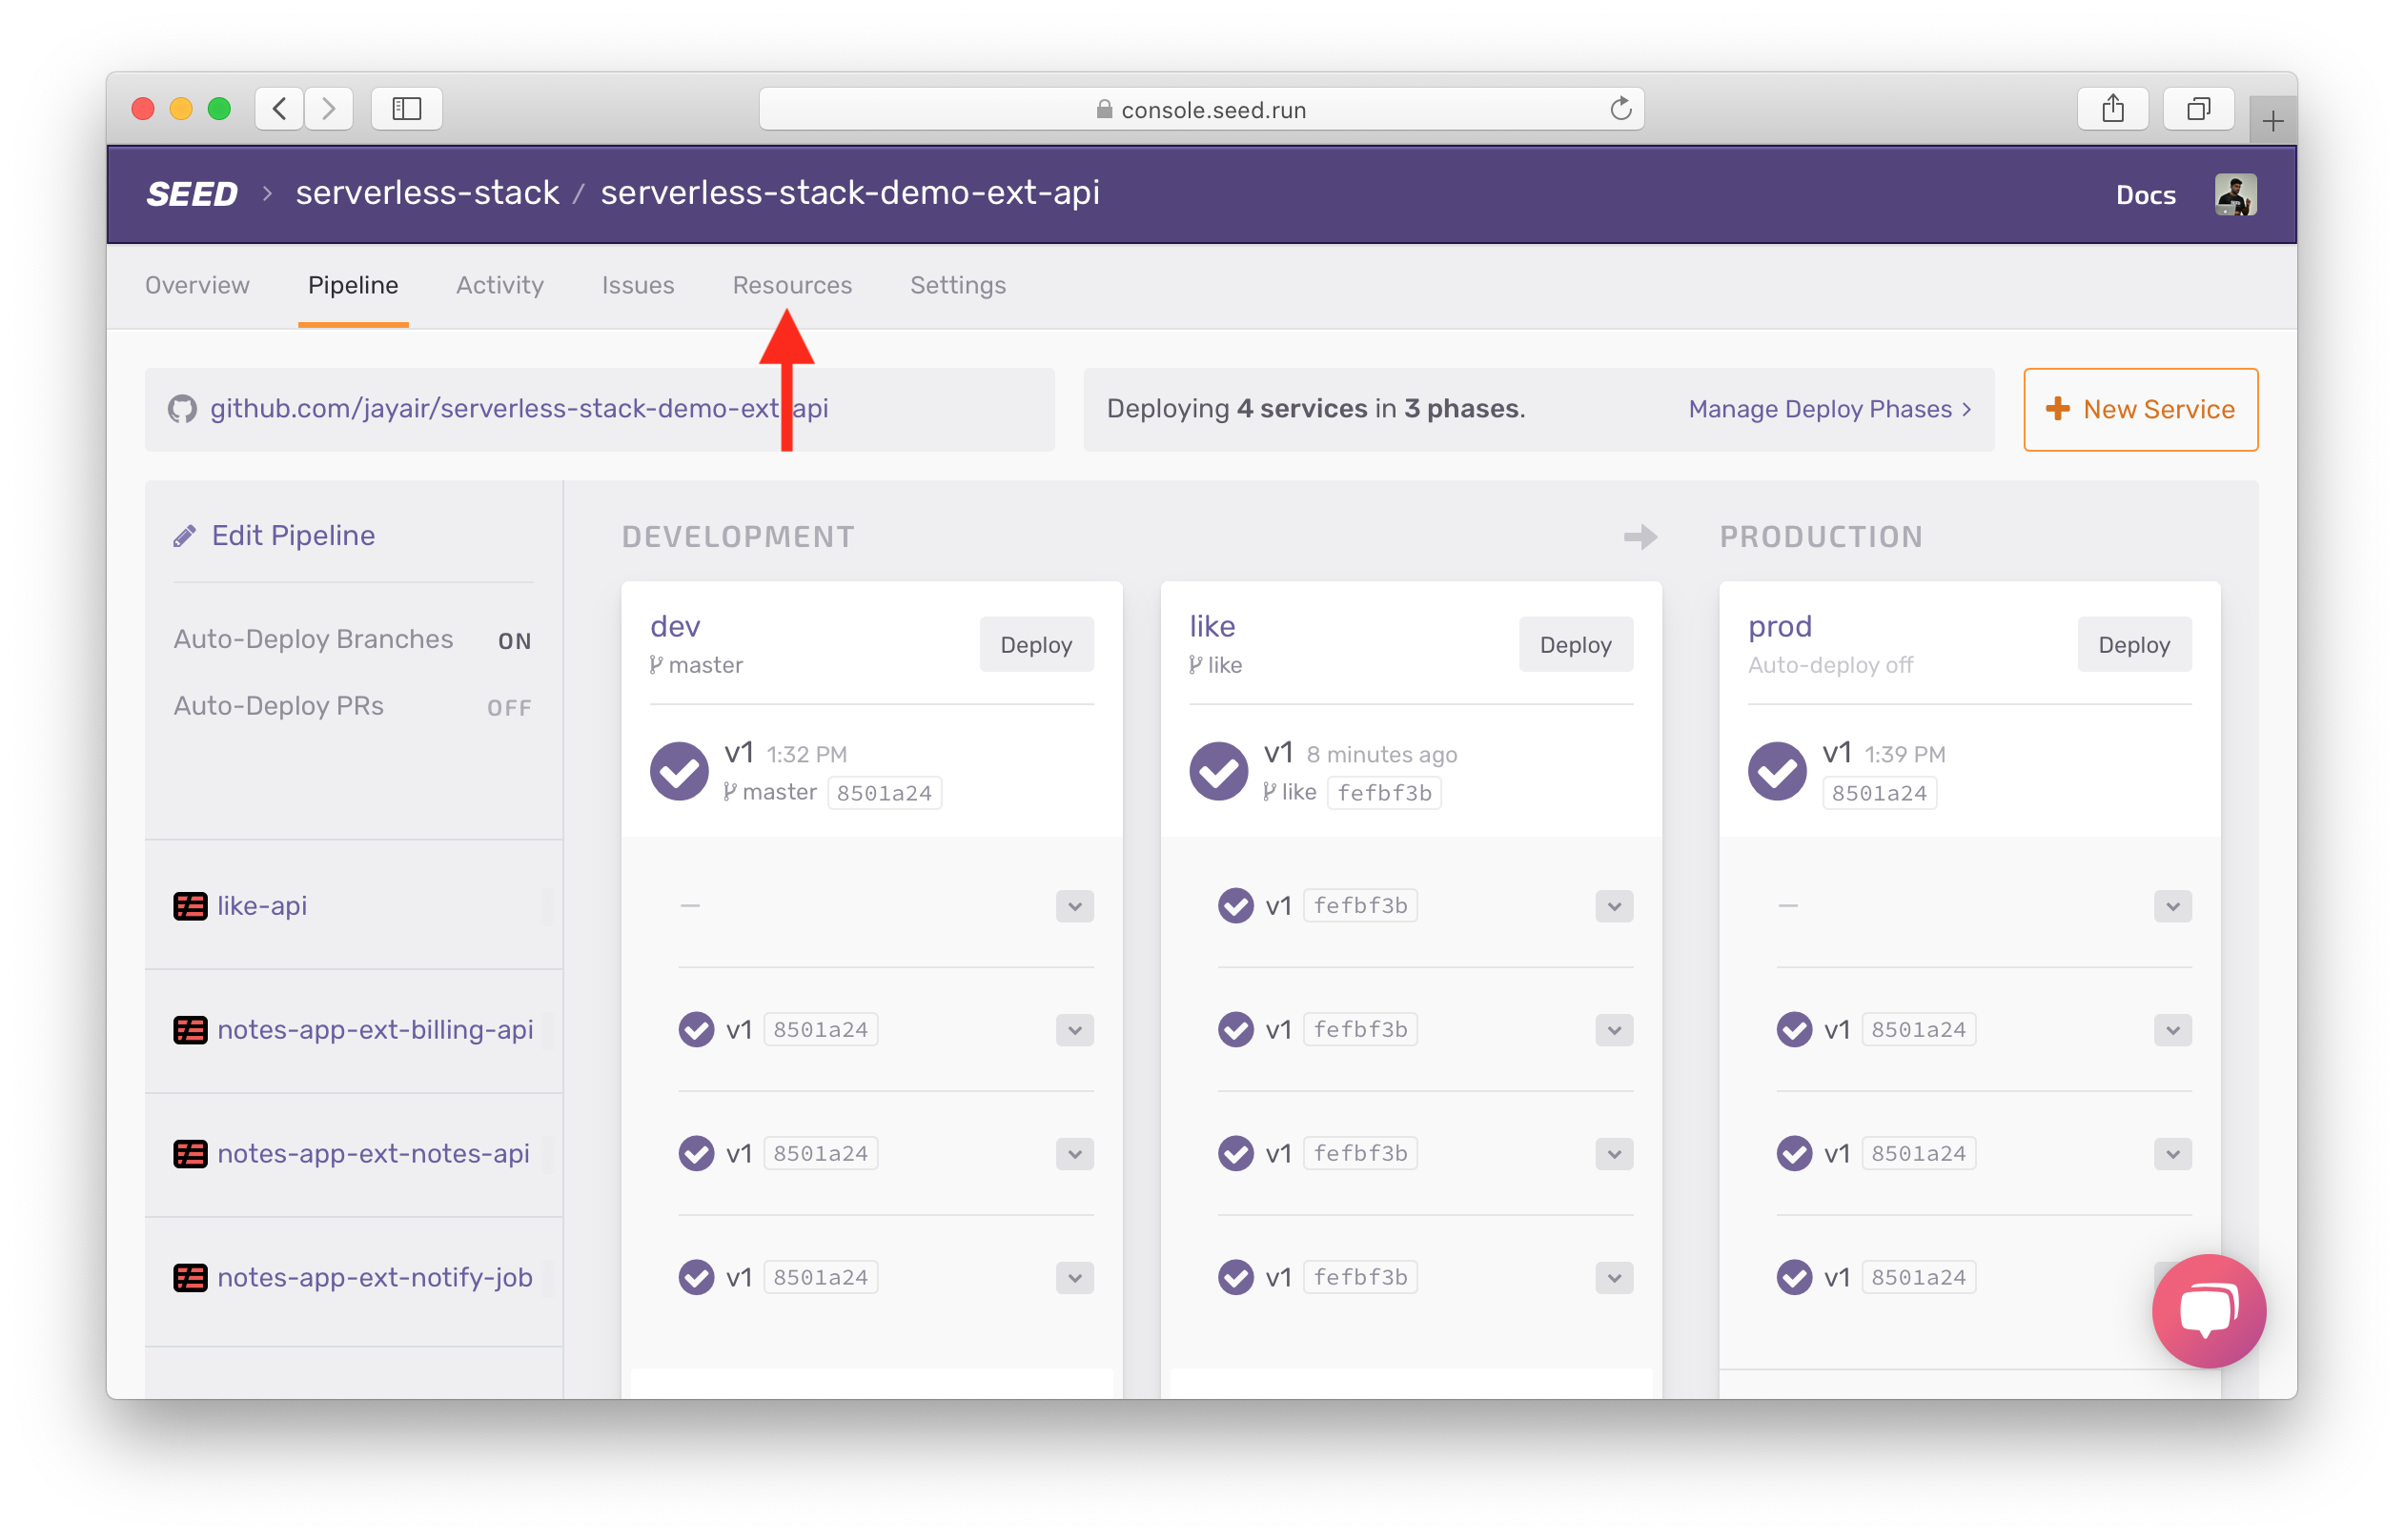
Go to your app on Seed and head over to the Pipeline tab and hit Edit Pipeline.
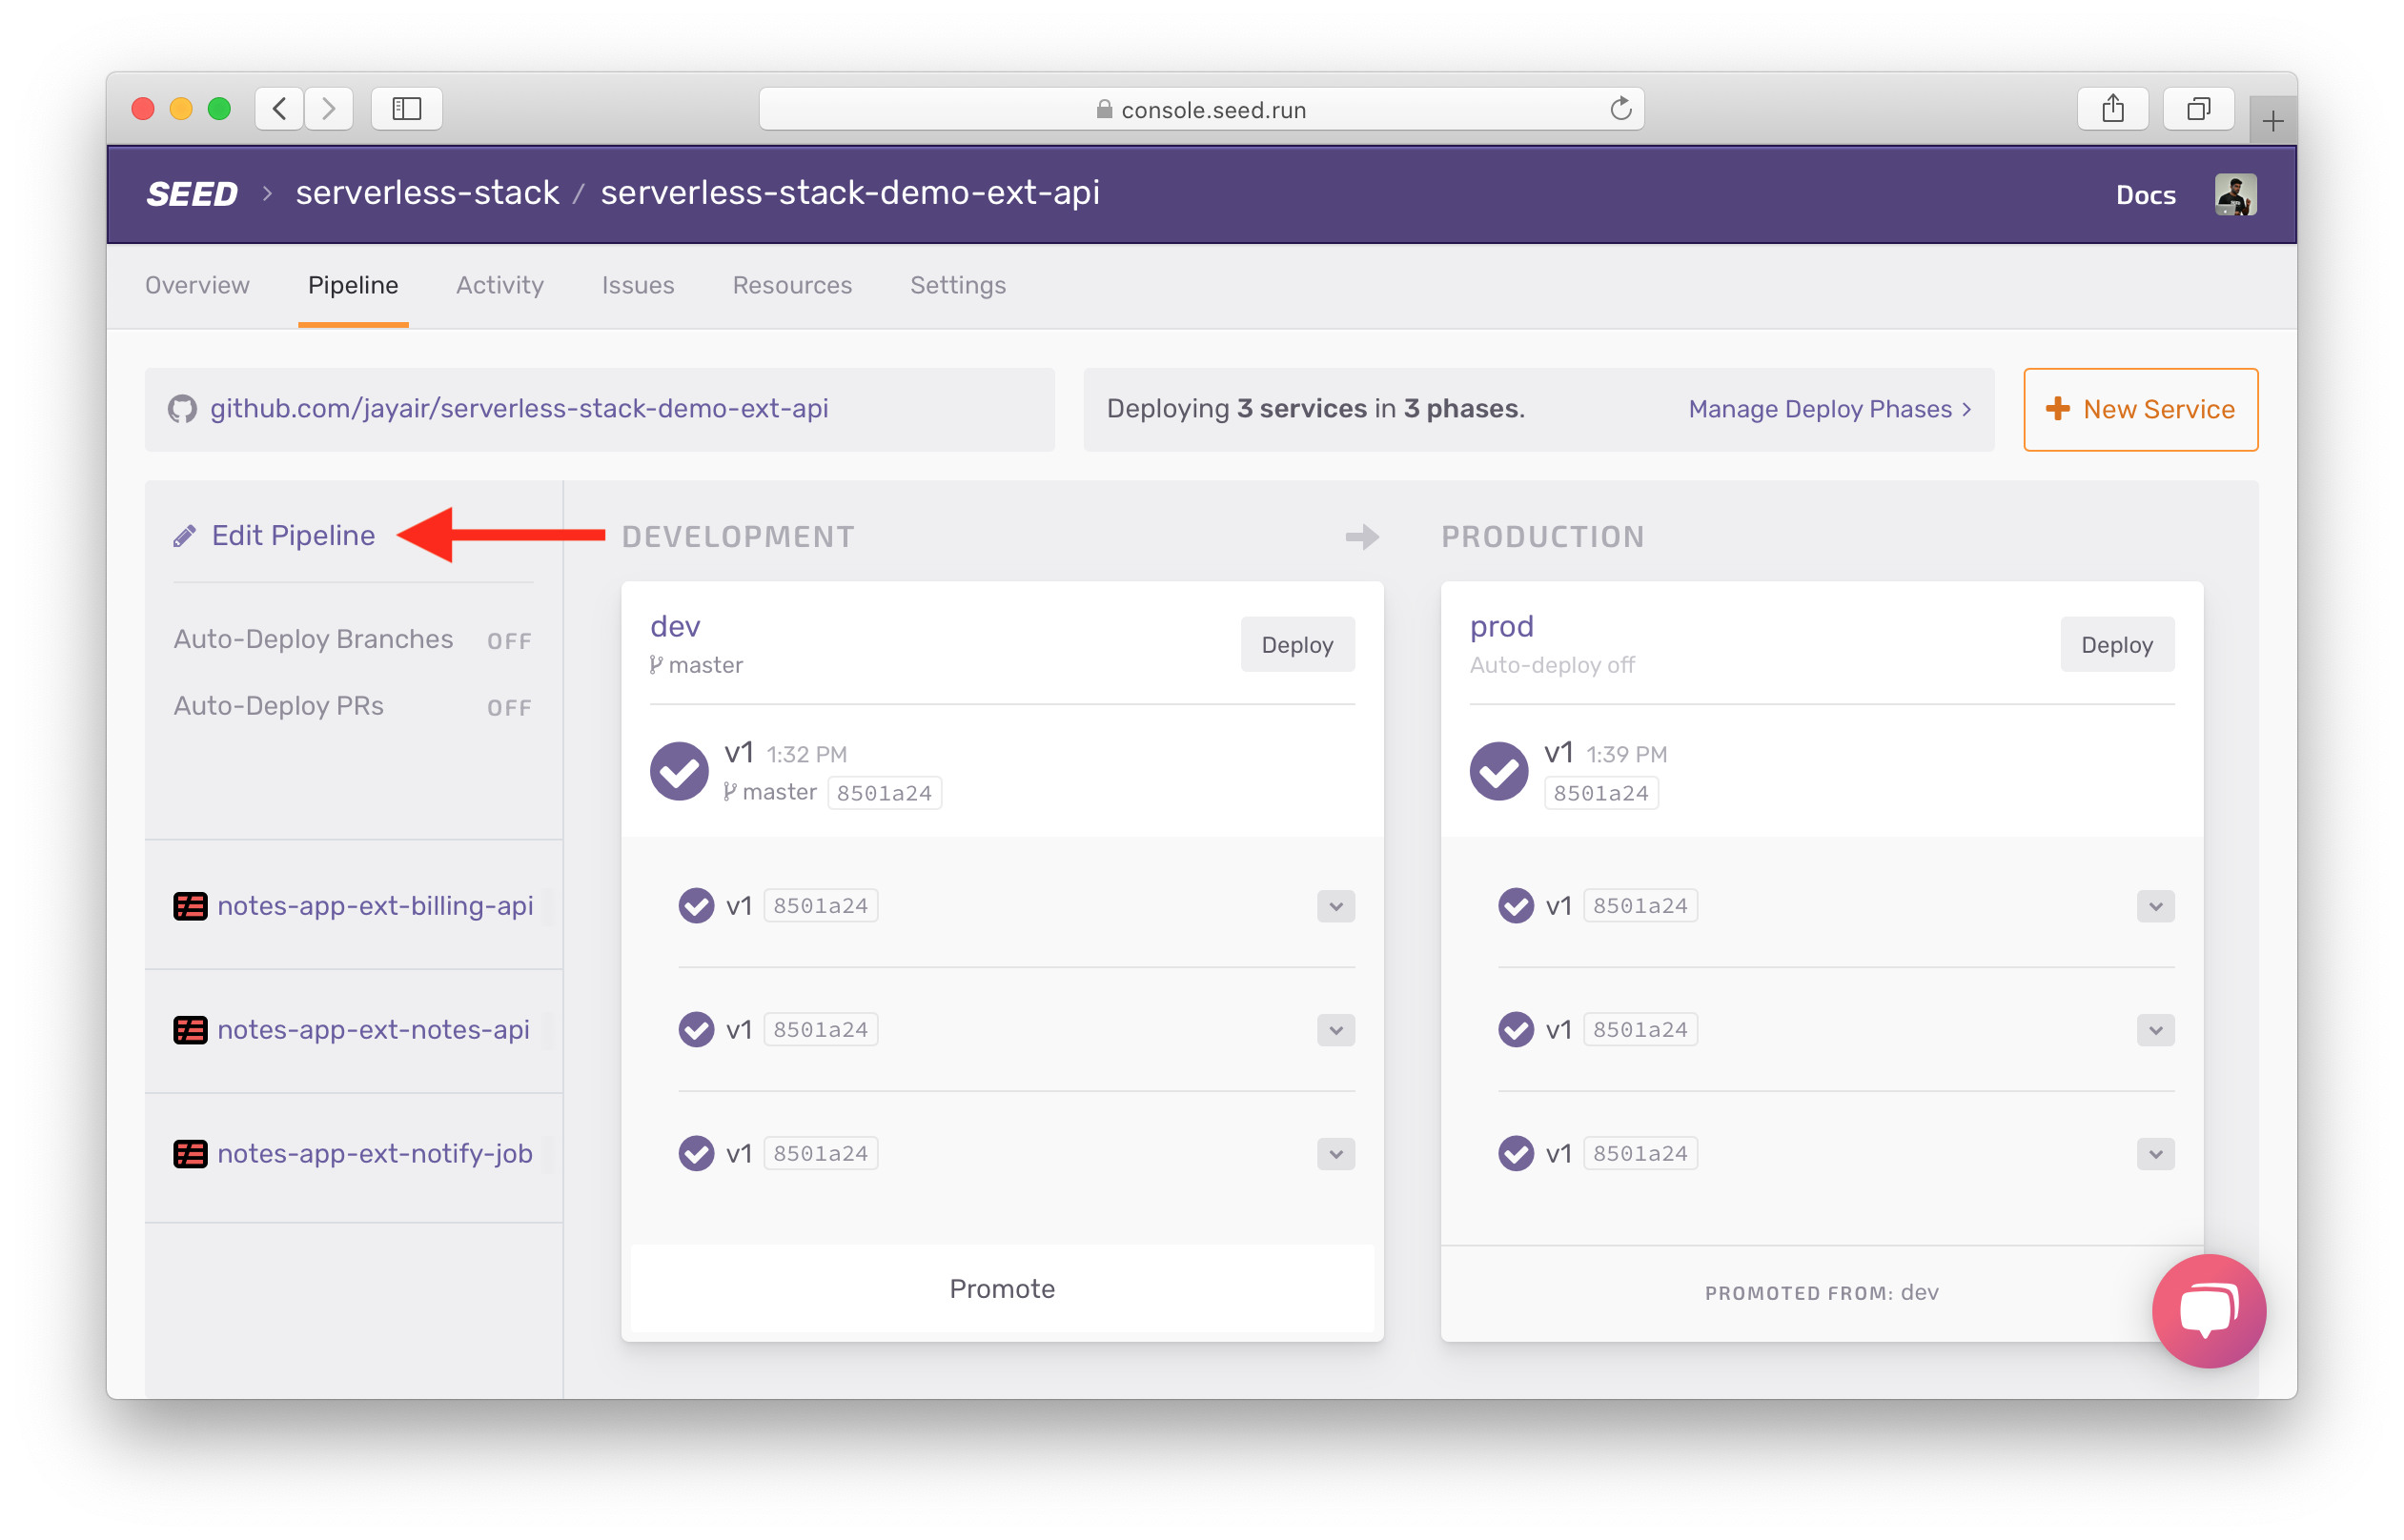
Enable Auto-deploy branches.
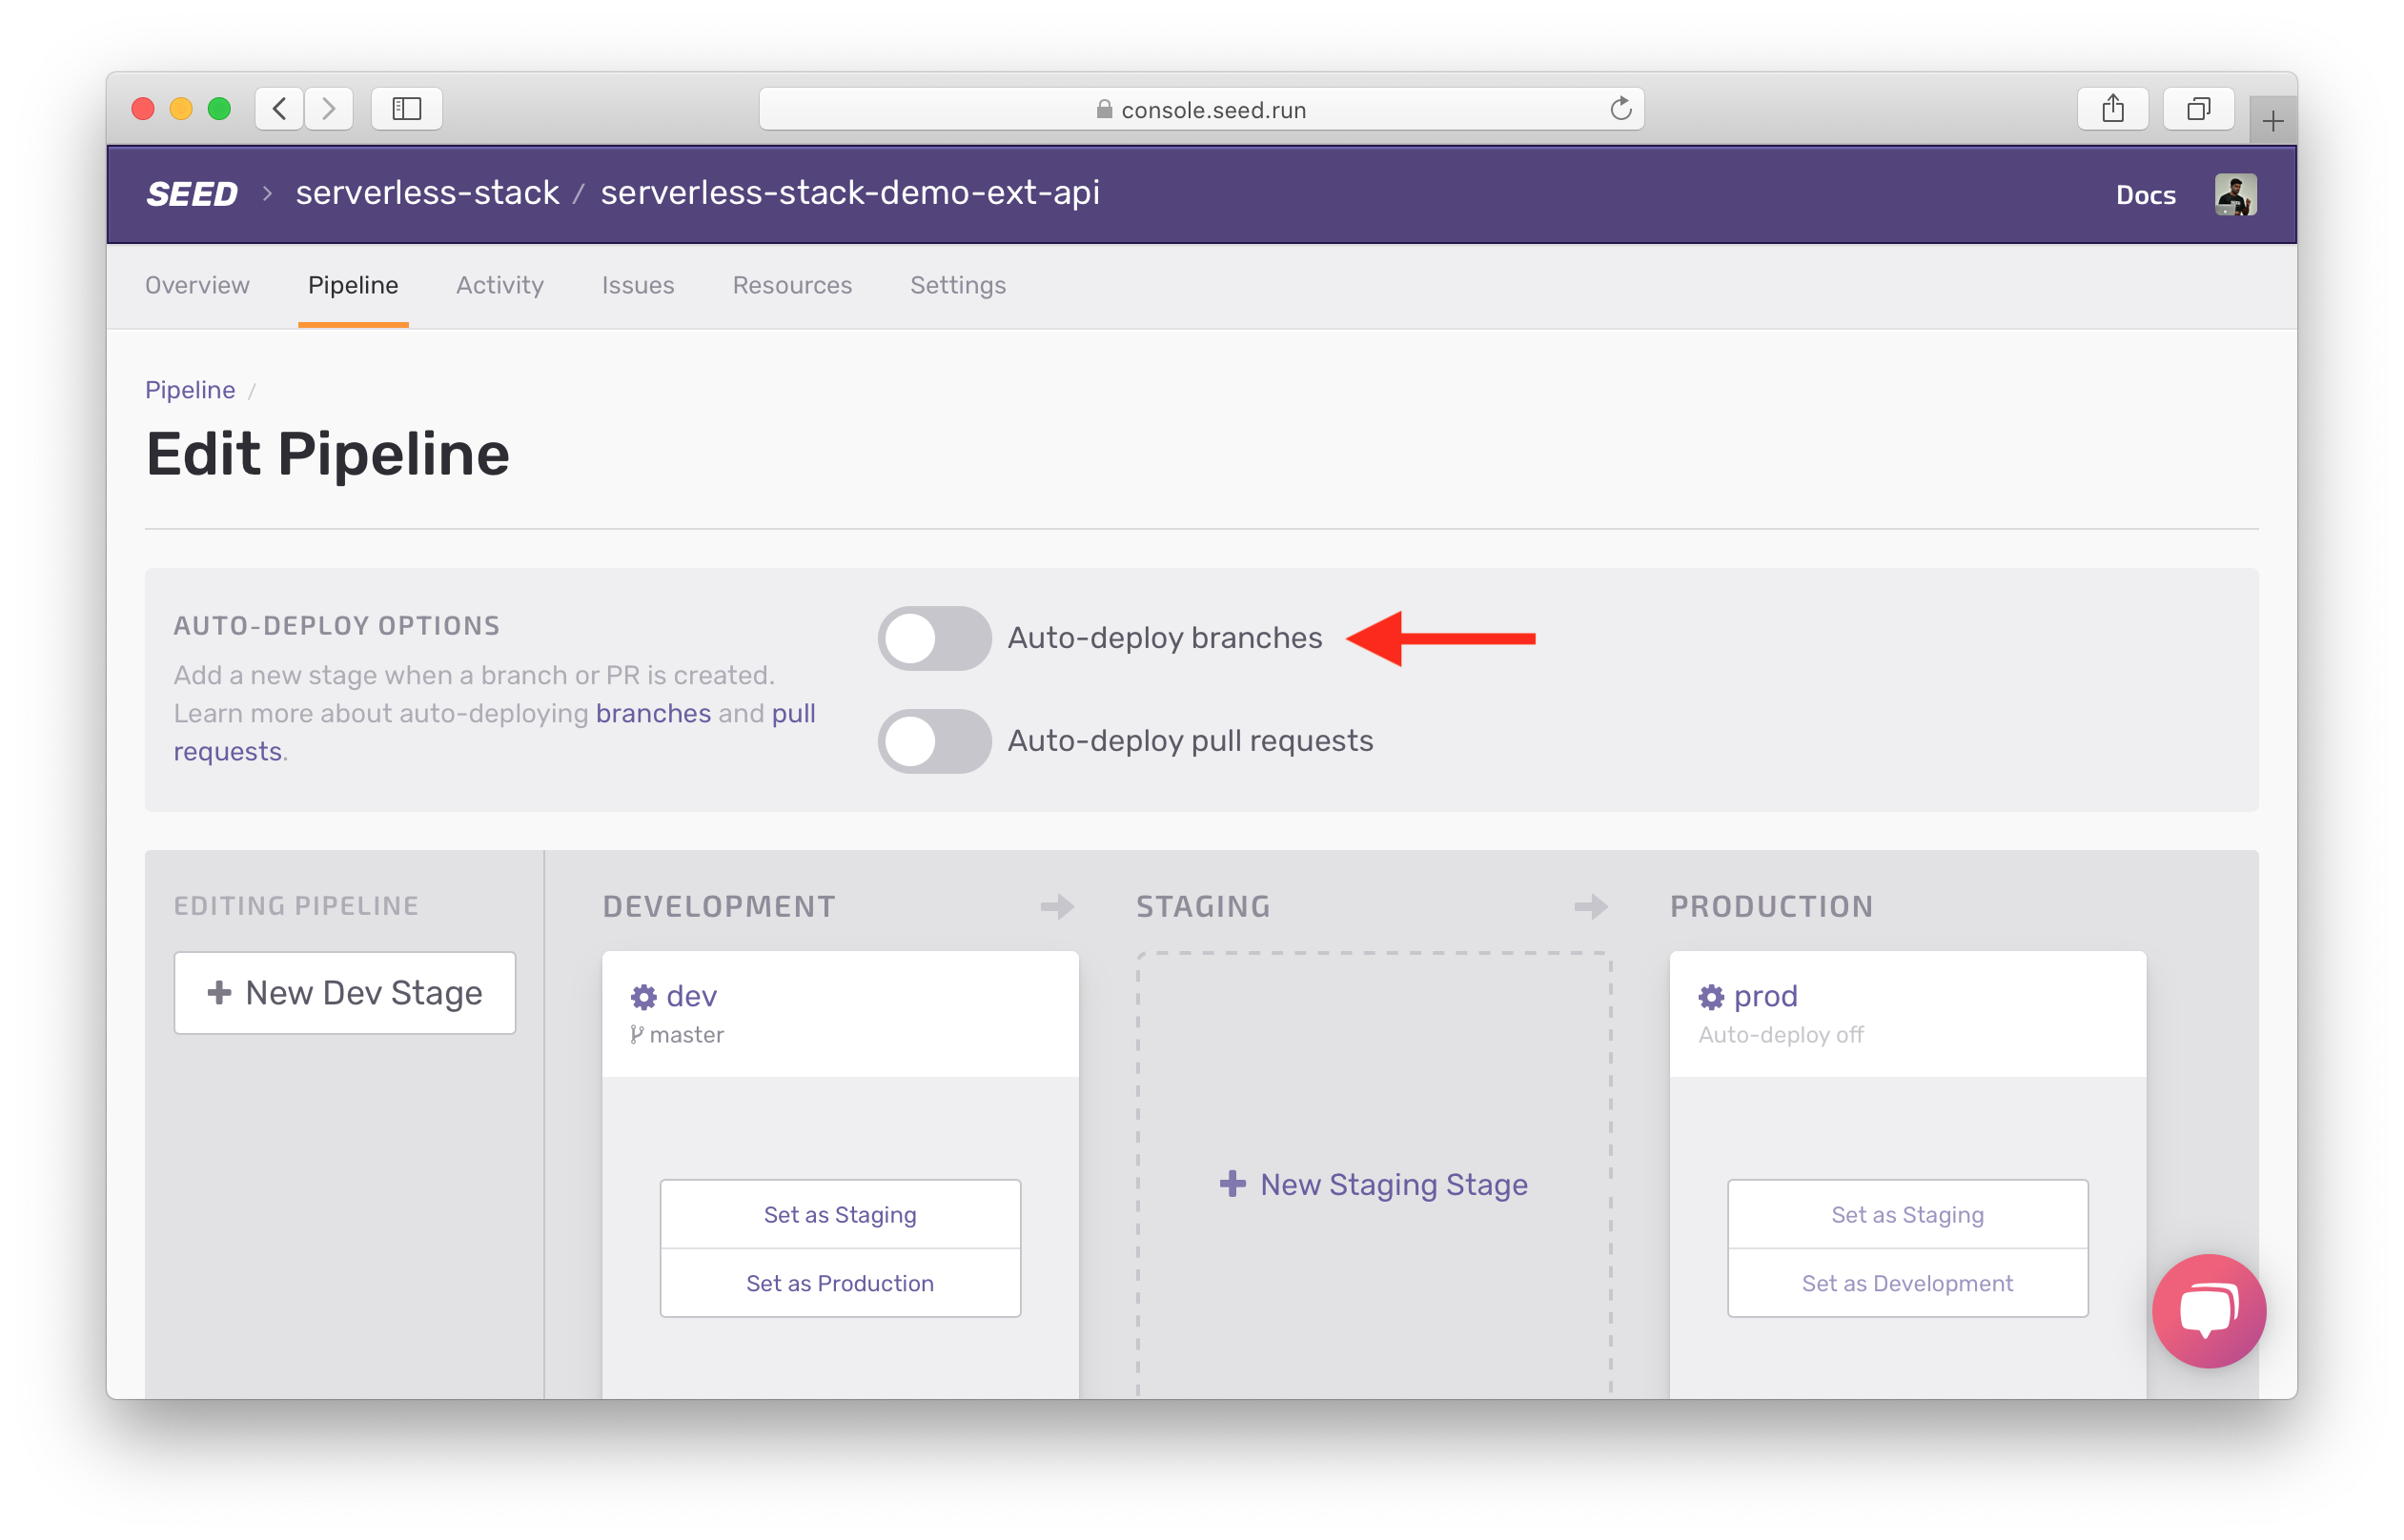
Select the dev stage, since we want the stage to be deployed into the Development AWS account. Click Enable.

Click Pipeline to head back.

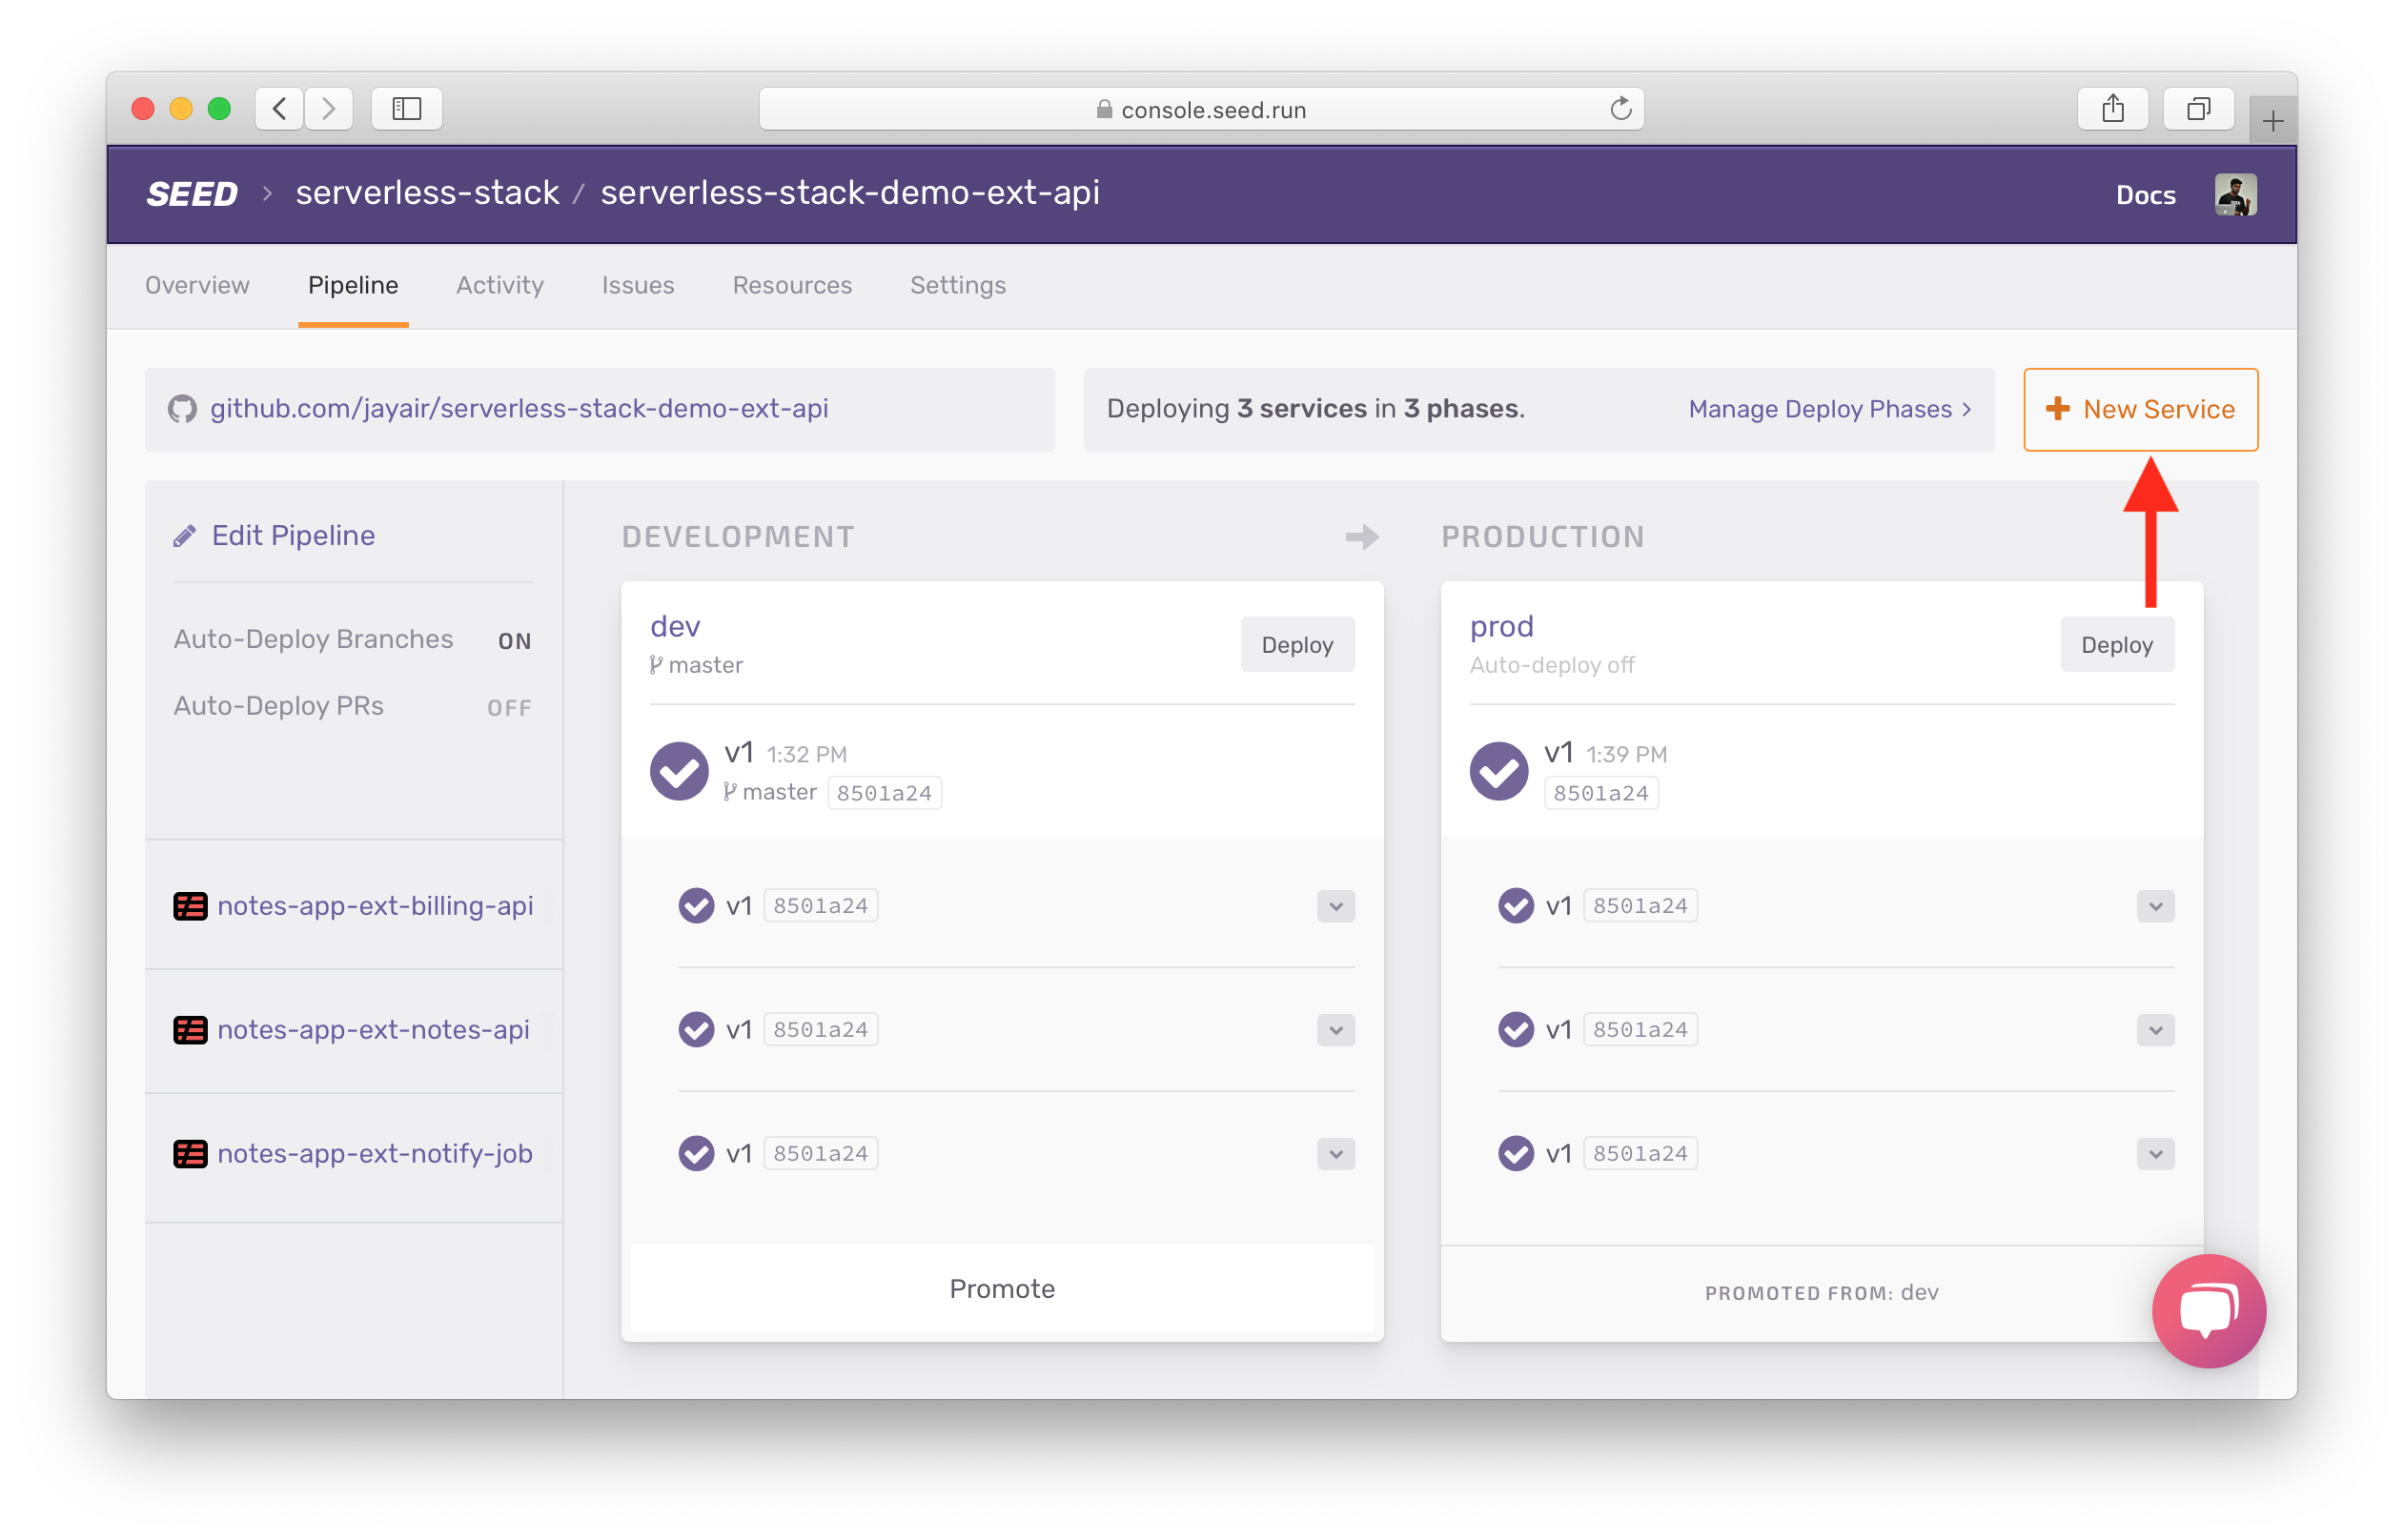
Add the new service to Seed
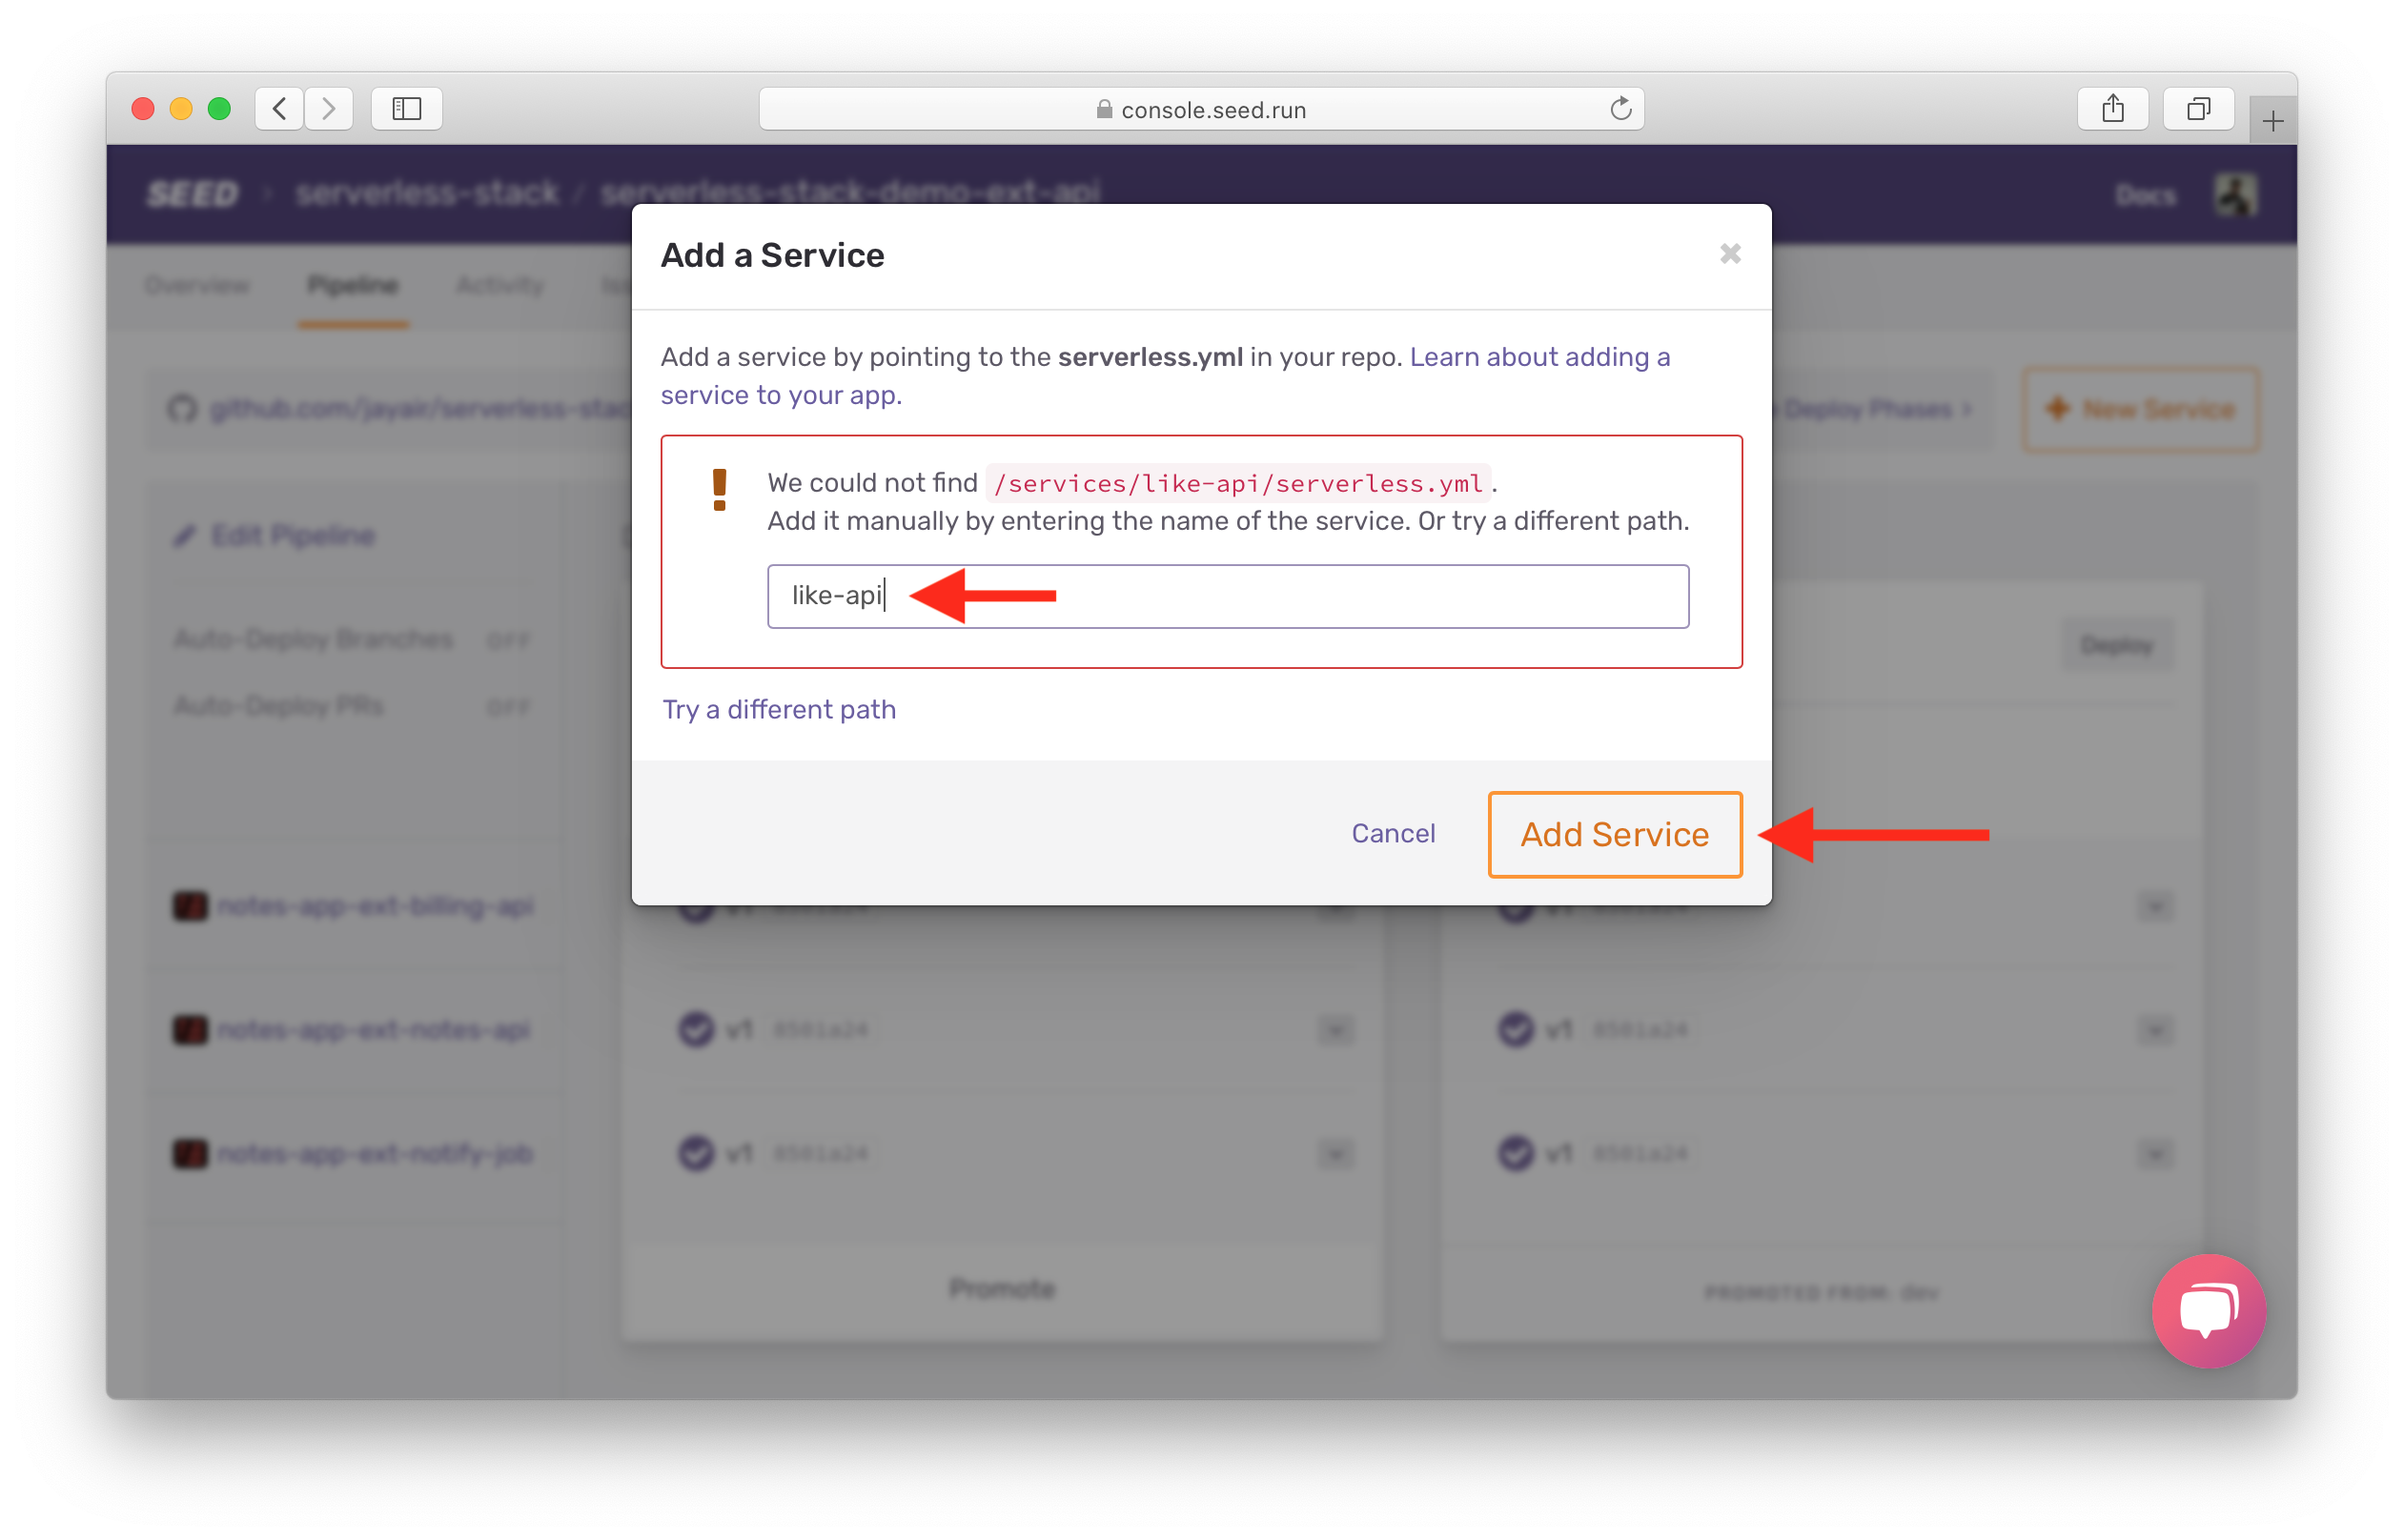
Click on Add a Service.
Enter the path to the service services/like-api and click Search.
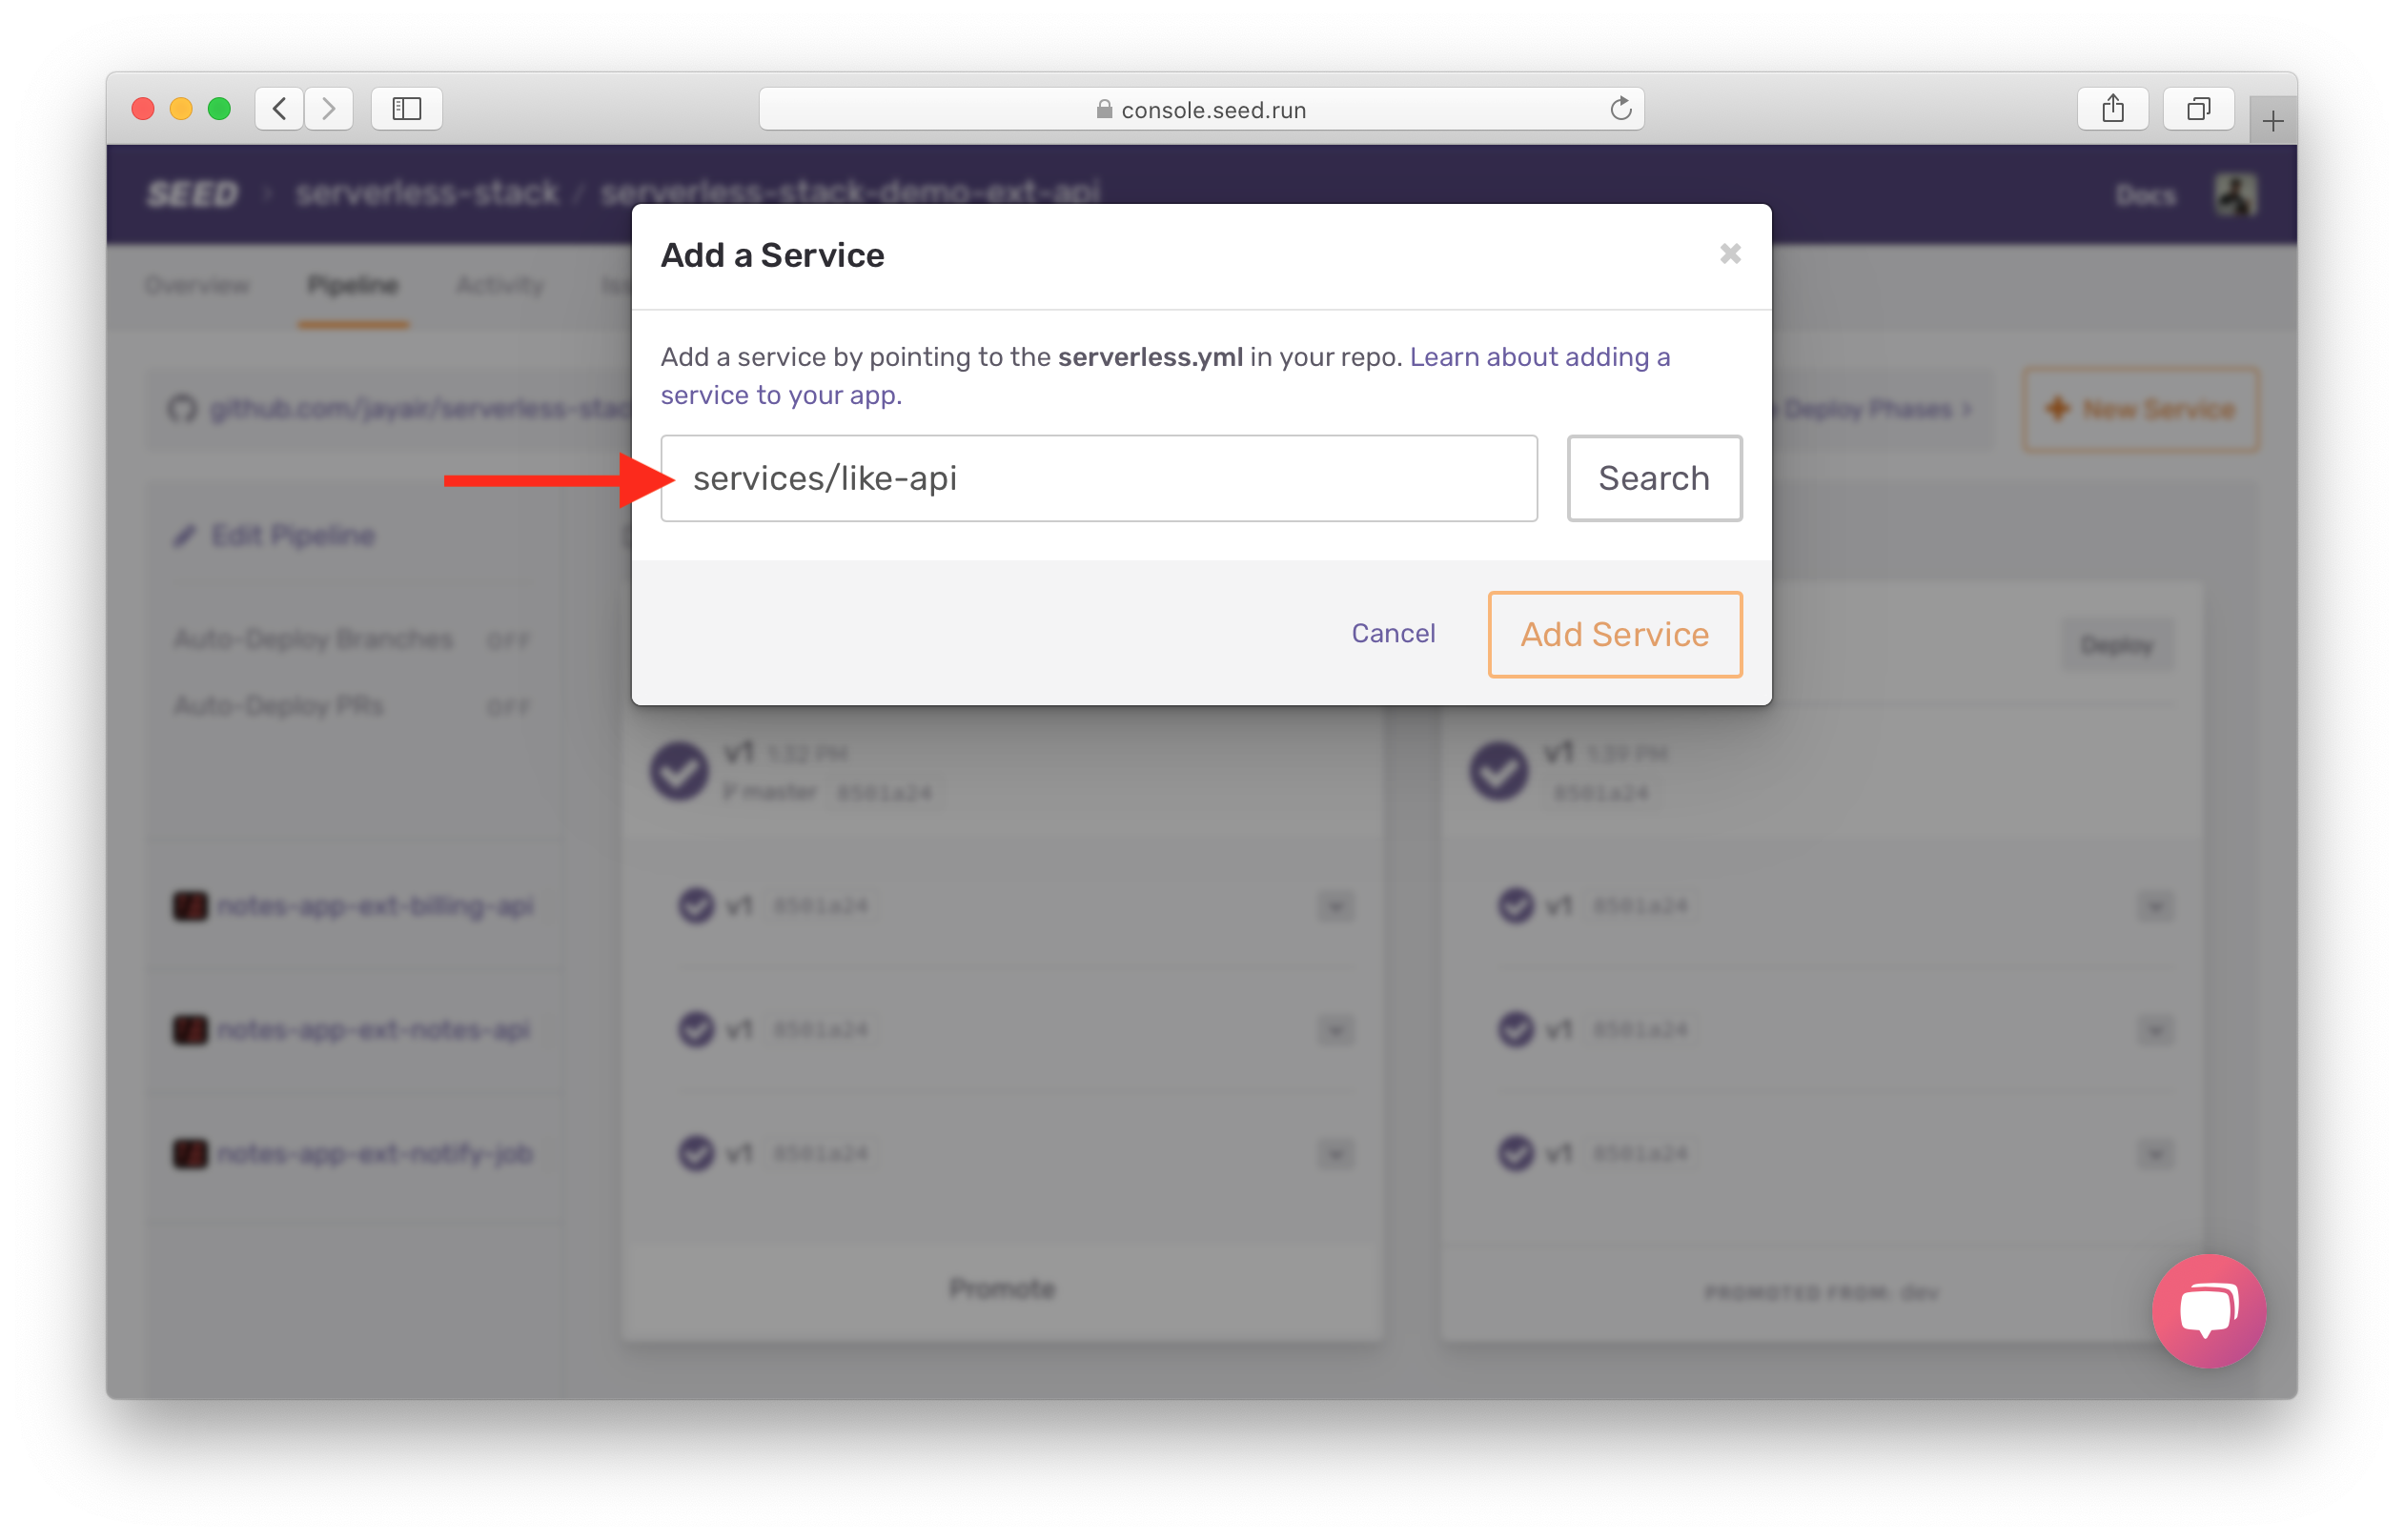
Since the code has not been committed to Git yet, Seed is not able to find the serverless.yml of the service. That’s totally fine. We’ll specify a name for the service like-api. Then hit Add Service.
This should add the new service across all your stages.
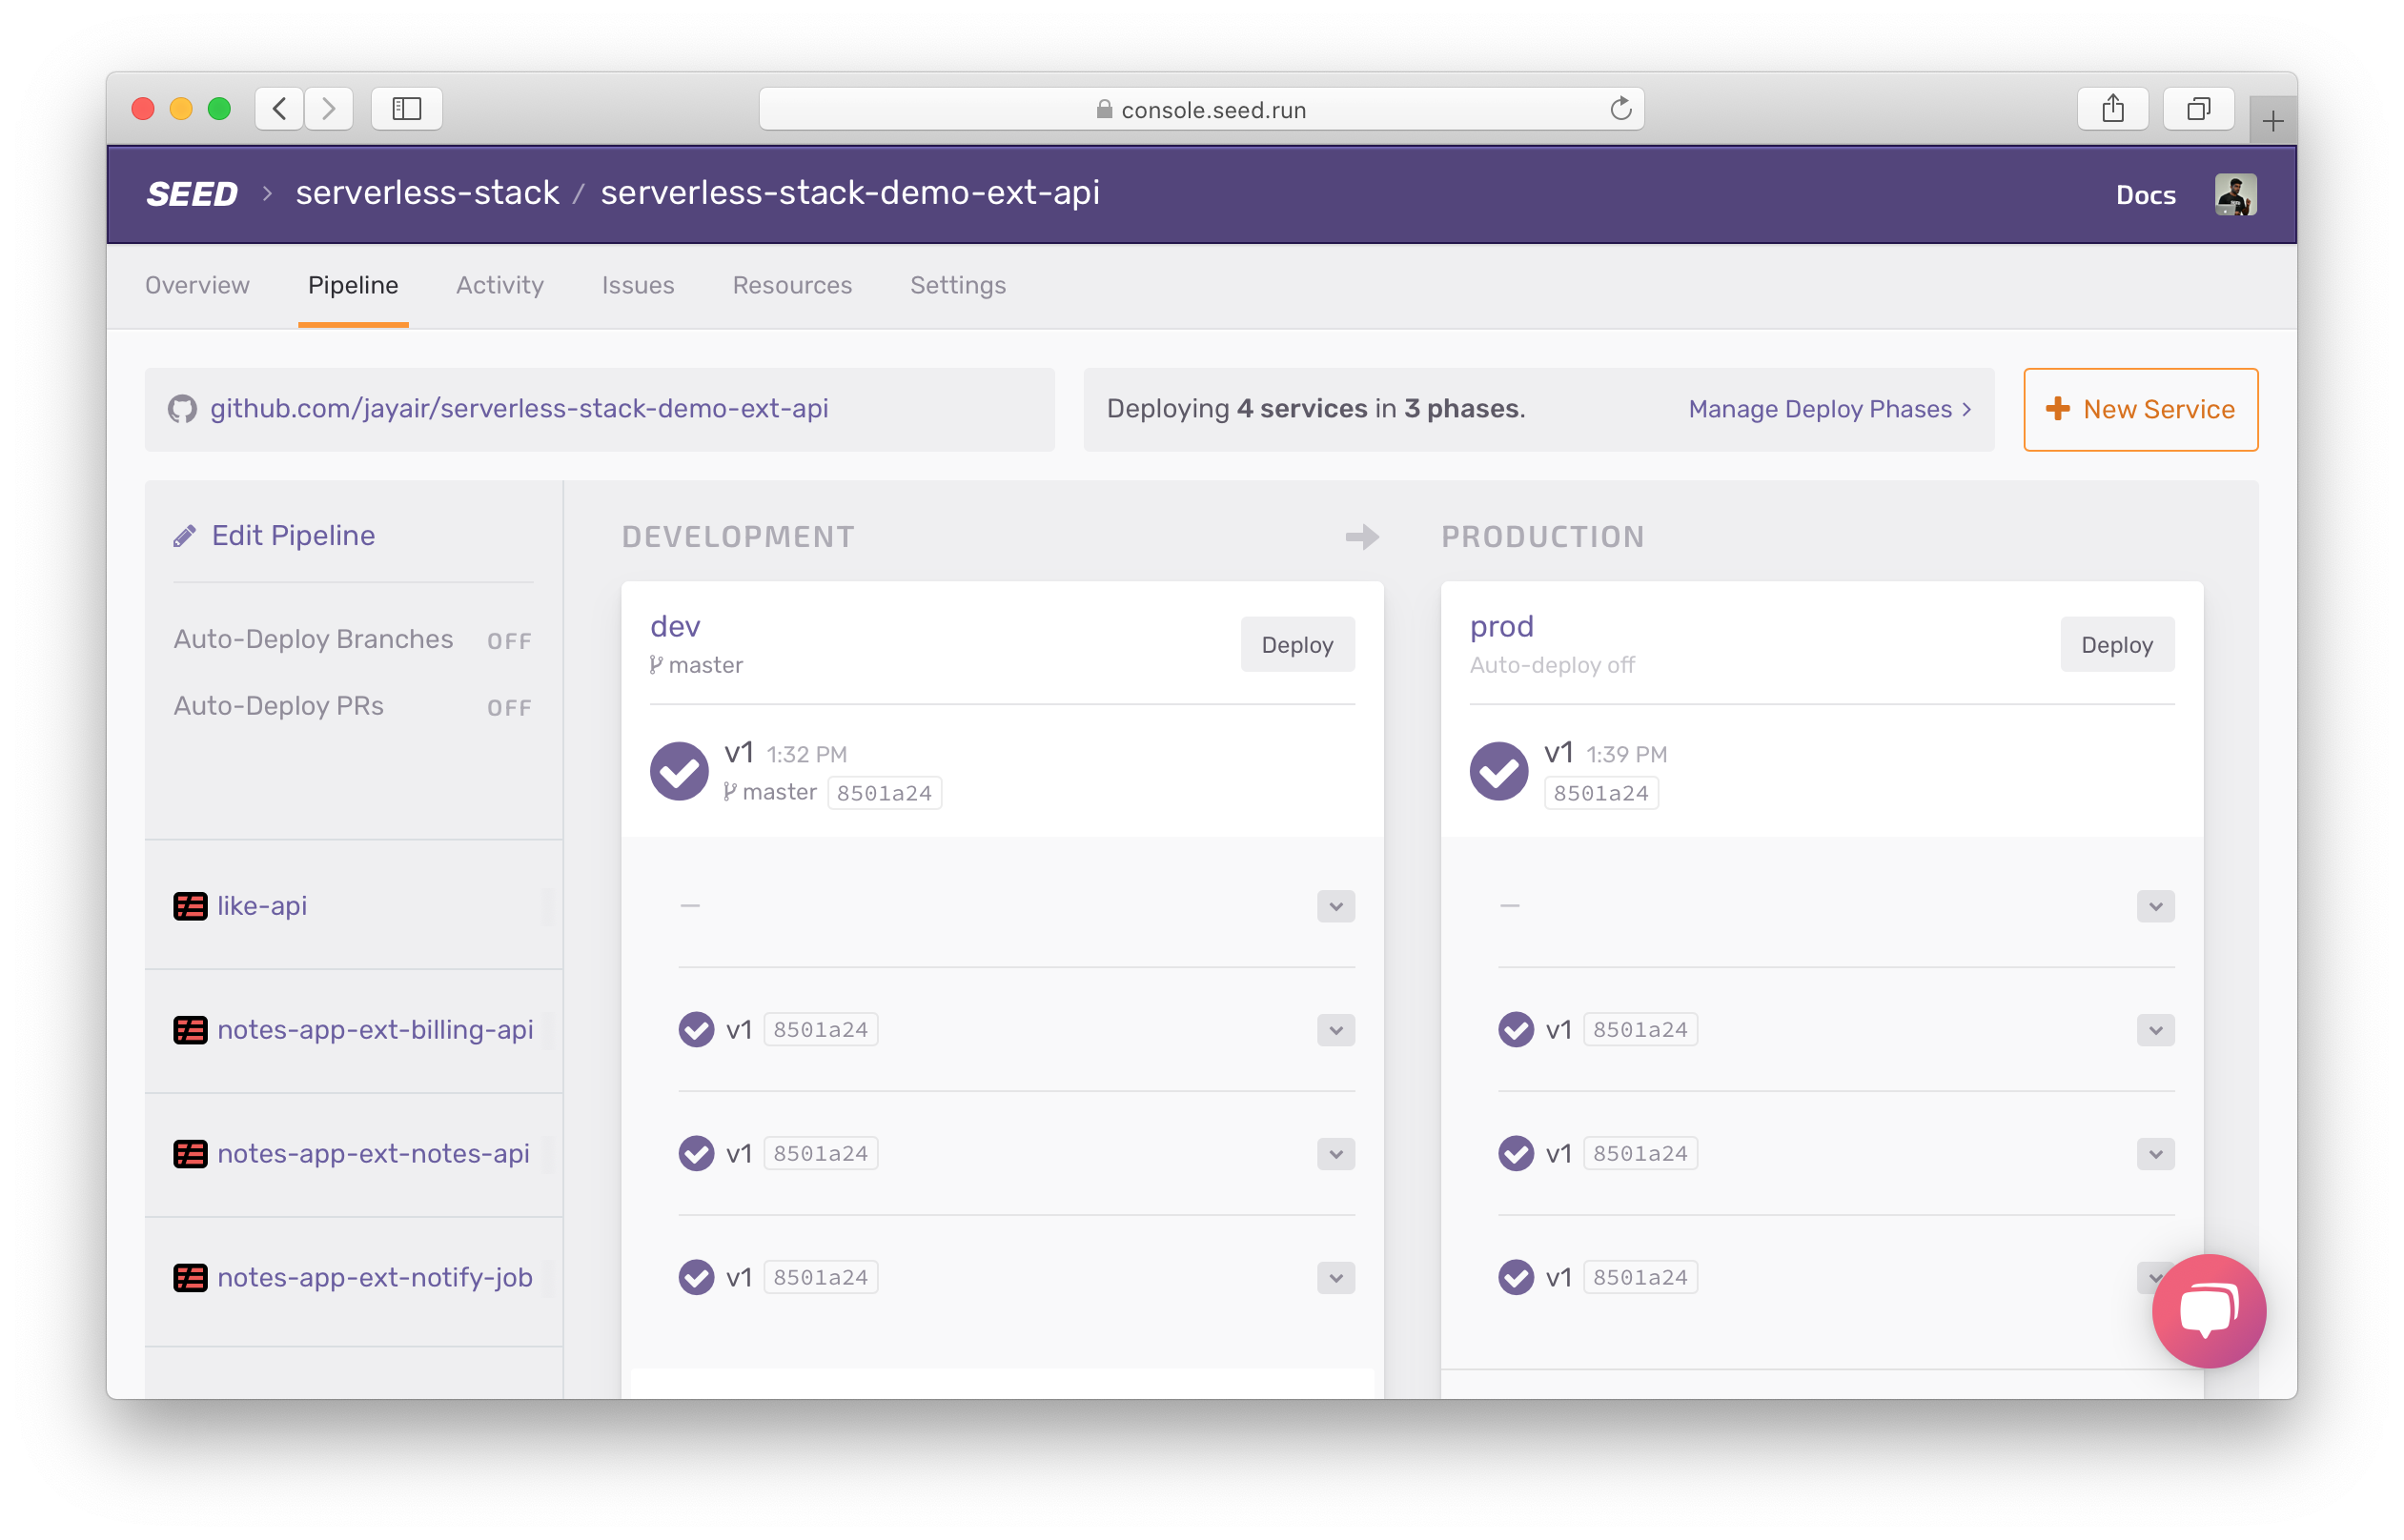
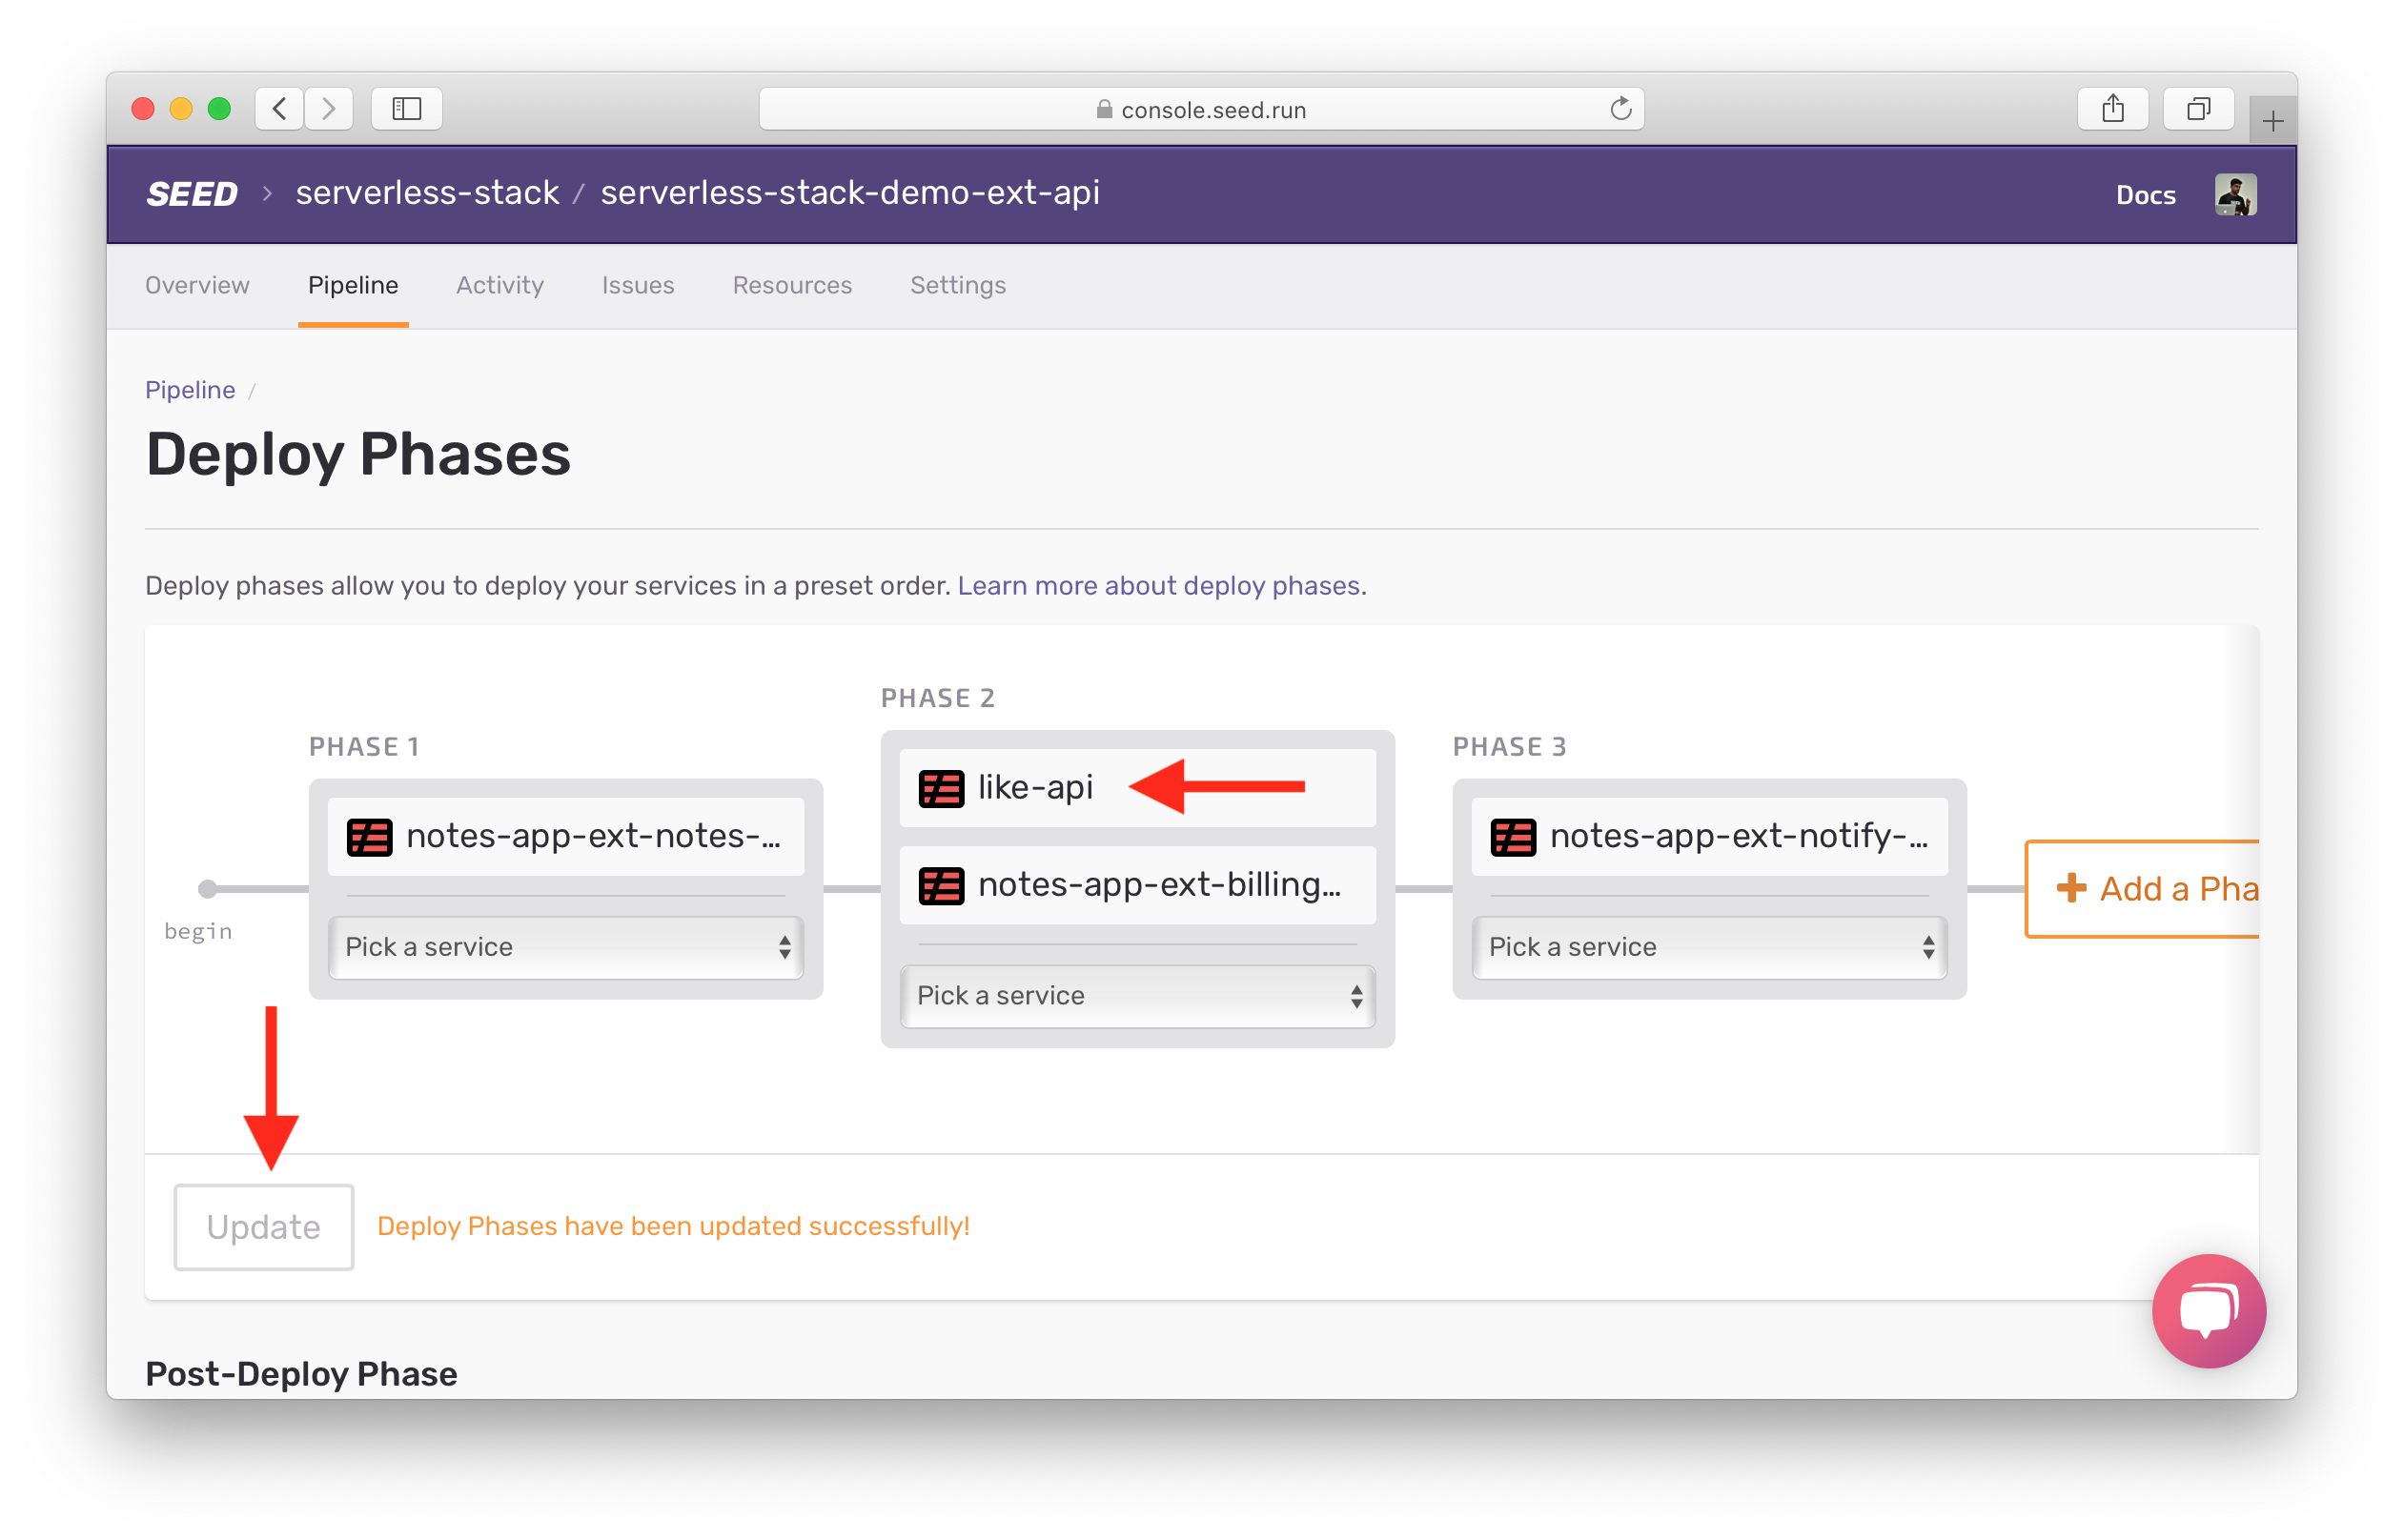
By default, the new service is added to the last deploy phase. Let’s click on Manage Deploy Phases, and move it to Phase 2. This is because it’s dependent on the API Gateway resources exported by notes-api.
Git push to deploy new feature
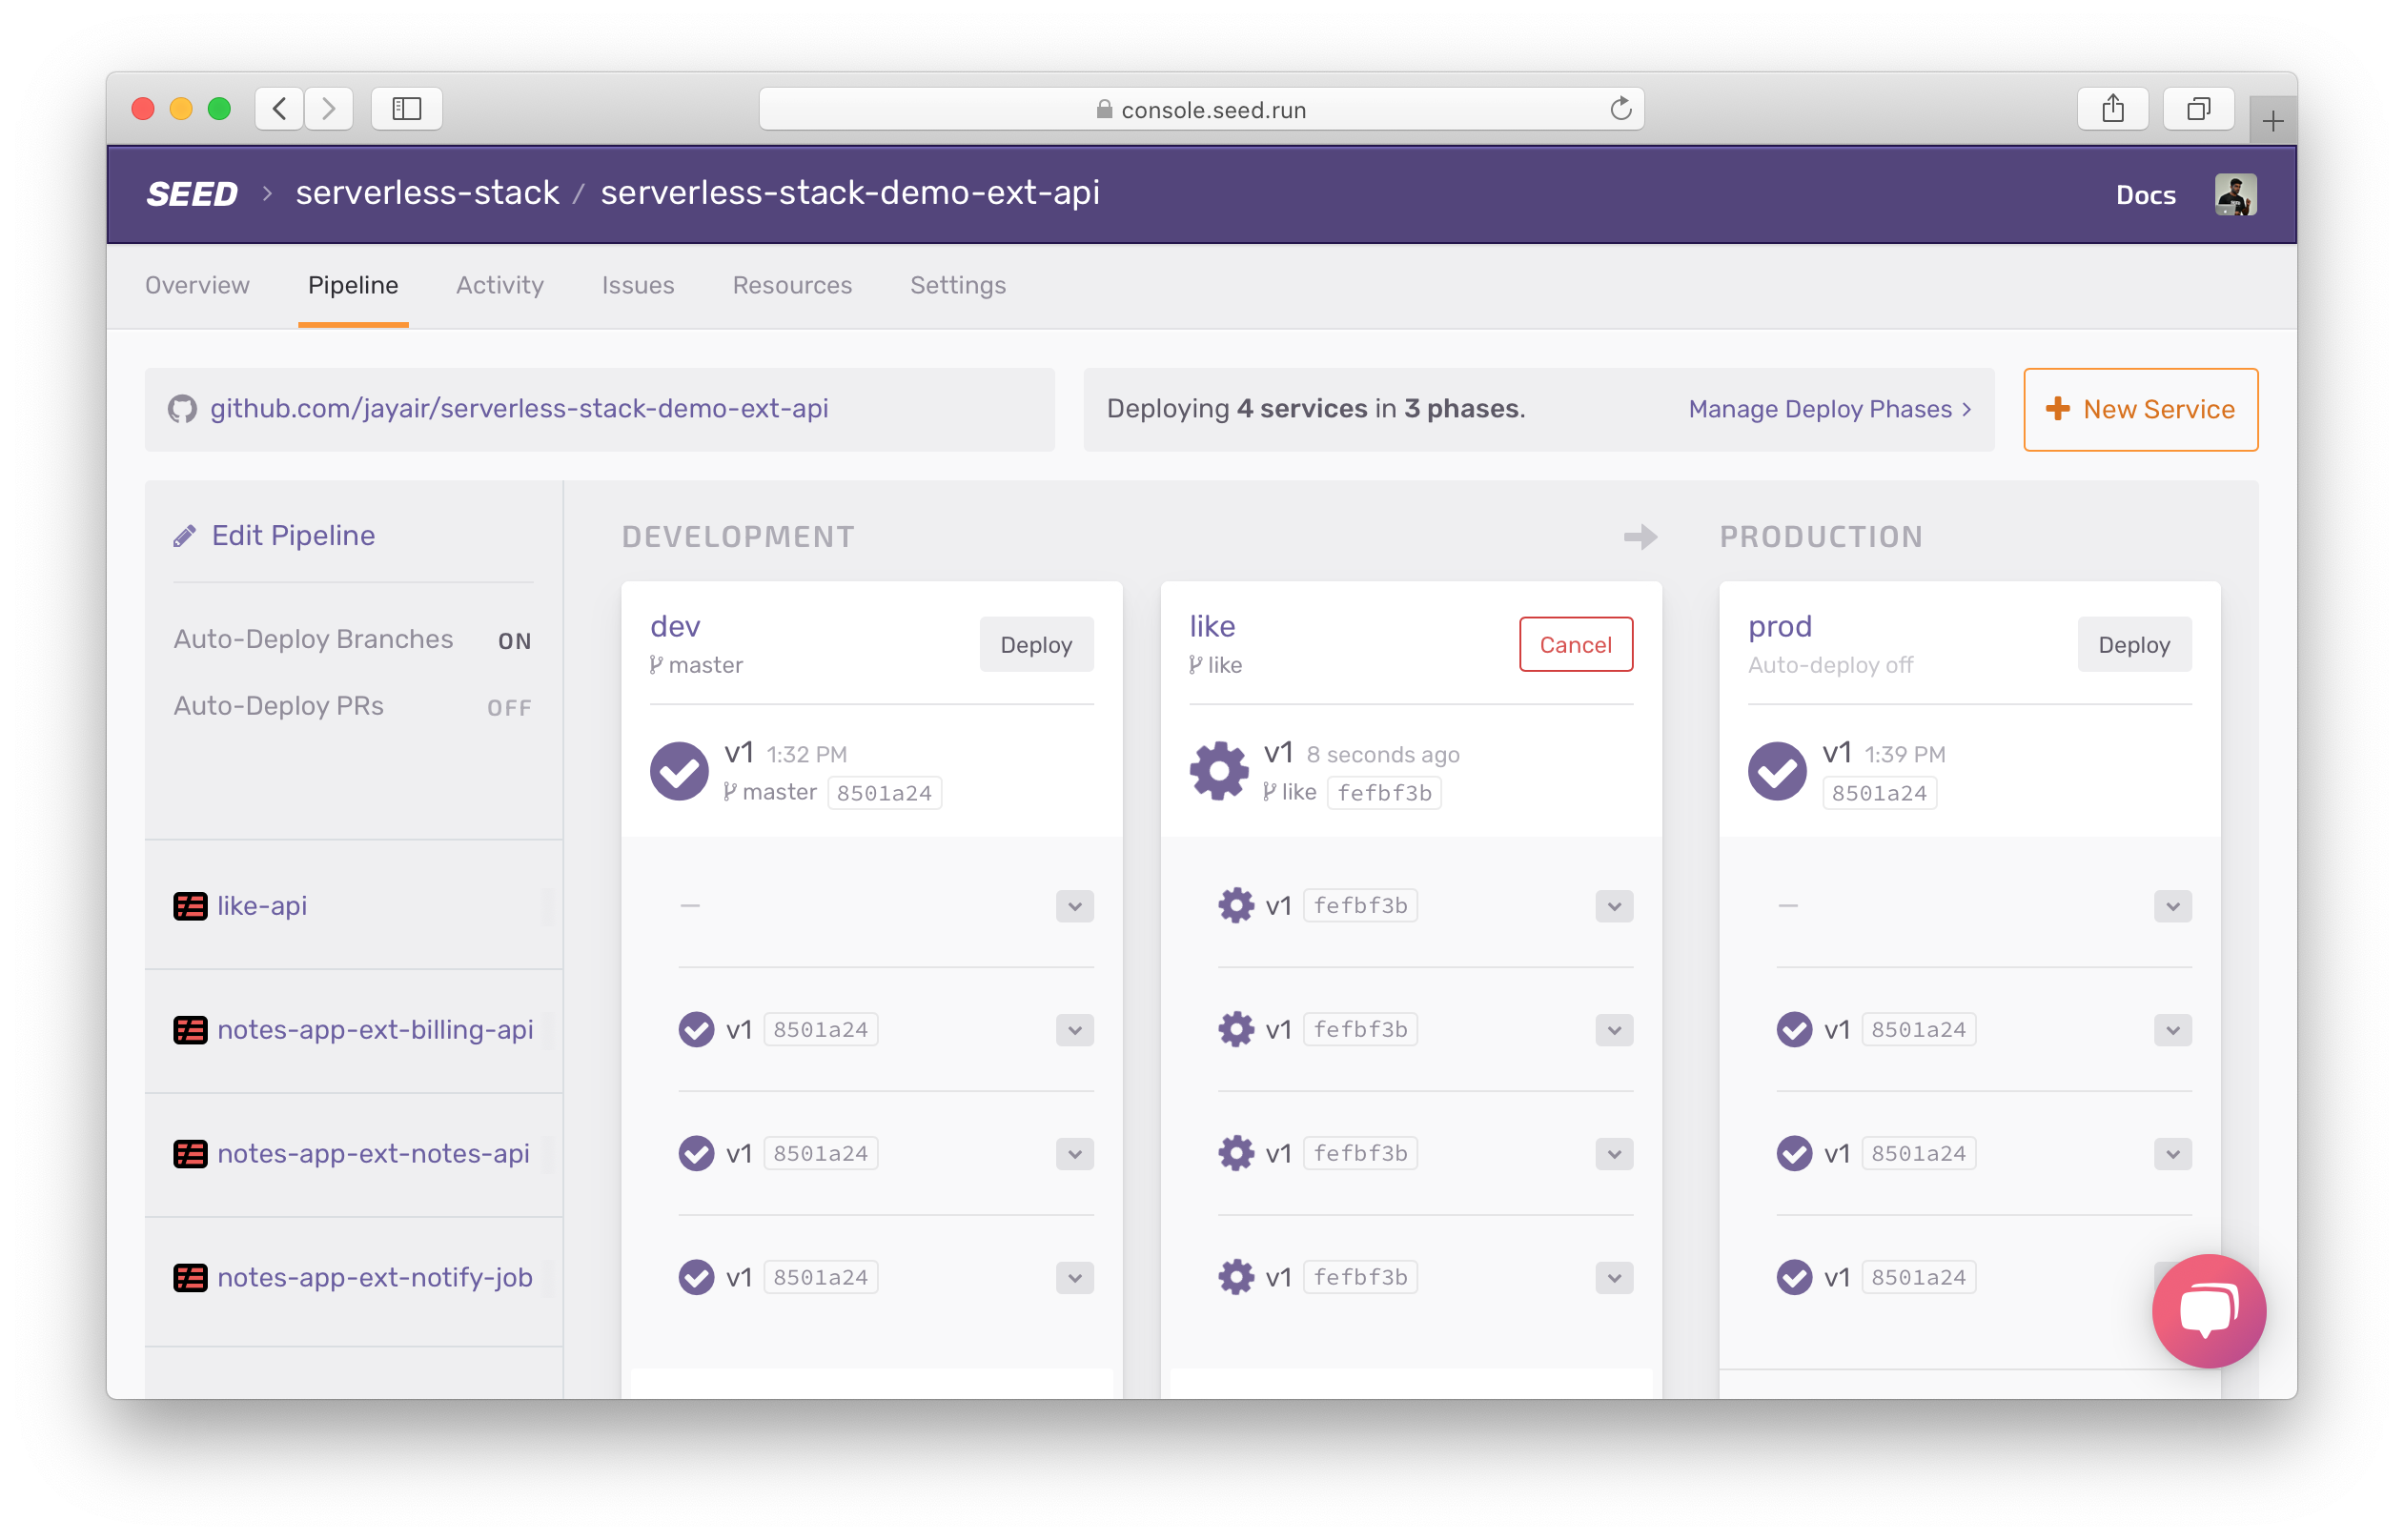
Now we are ready to create our new feature environment. Go back to our command line, and then push the code to the like branch.
$ git add .
$ git commit -m "Add like API"
$ git push --set-upstream origin like
Back in Seed, a new stage called like is created and is being deployed automatically.
After the new stage successfully deploys, you can get the API endpoint in the stage’s resources page. Head over to the Resources tab.
And select the like stage.
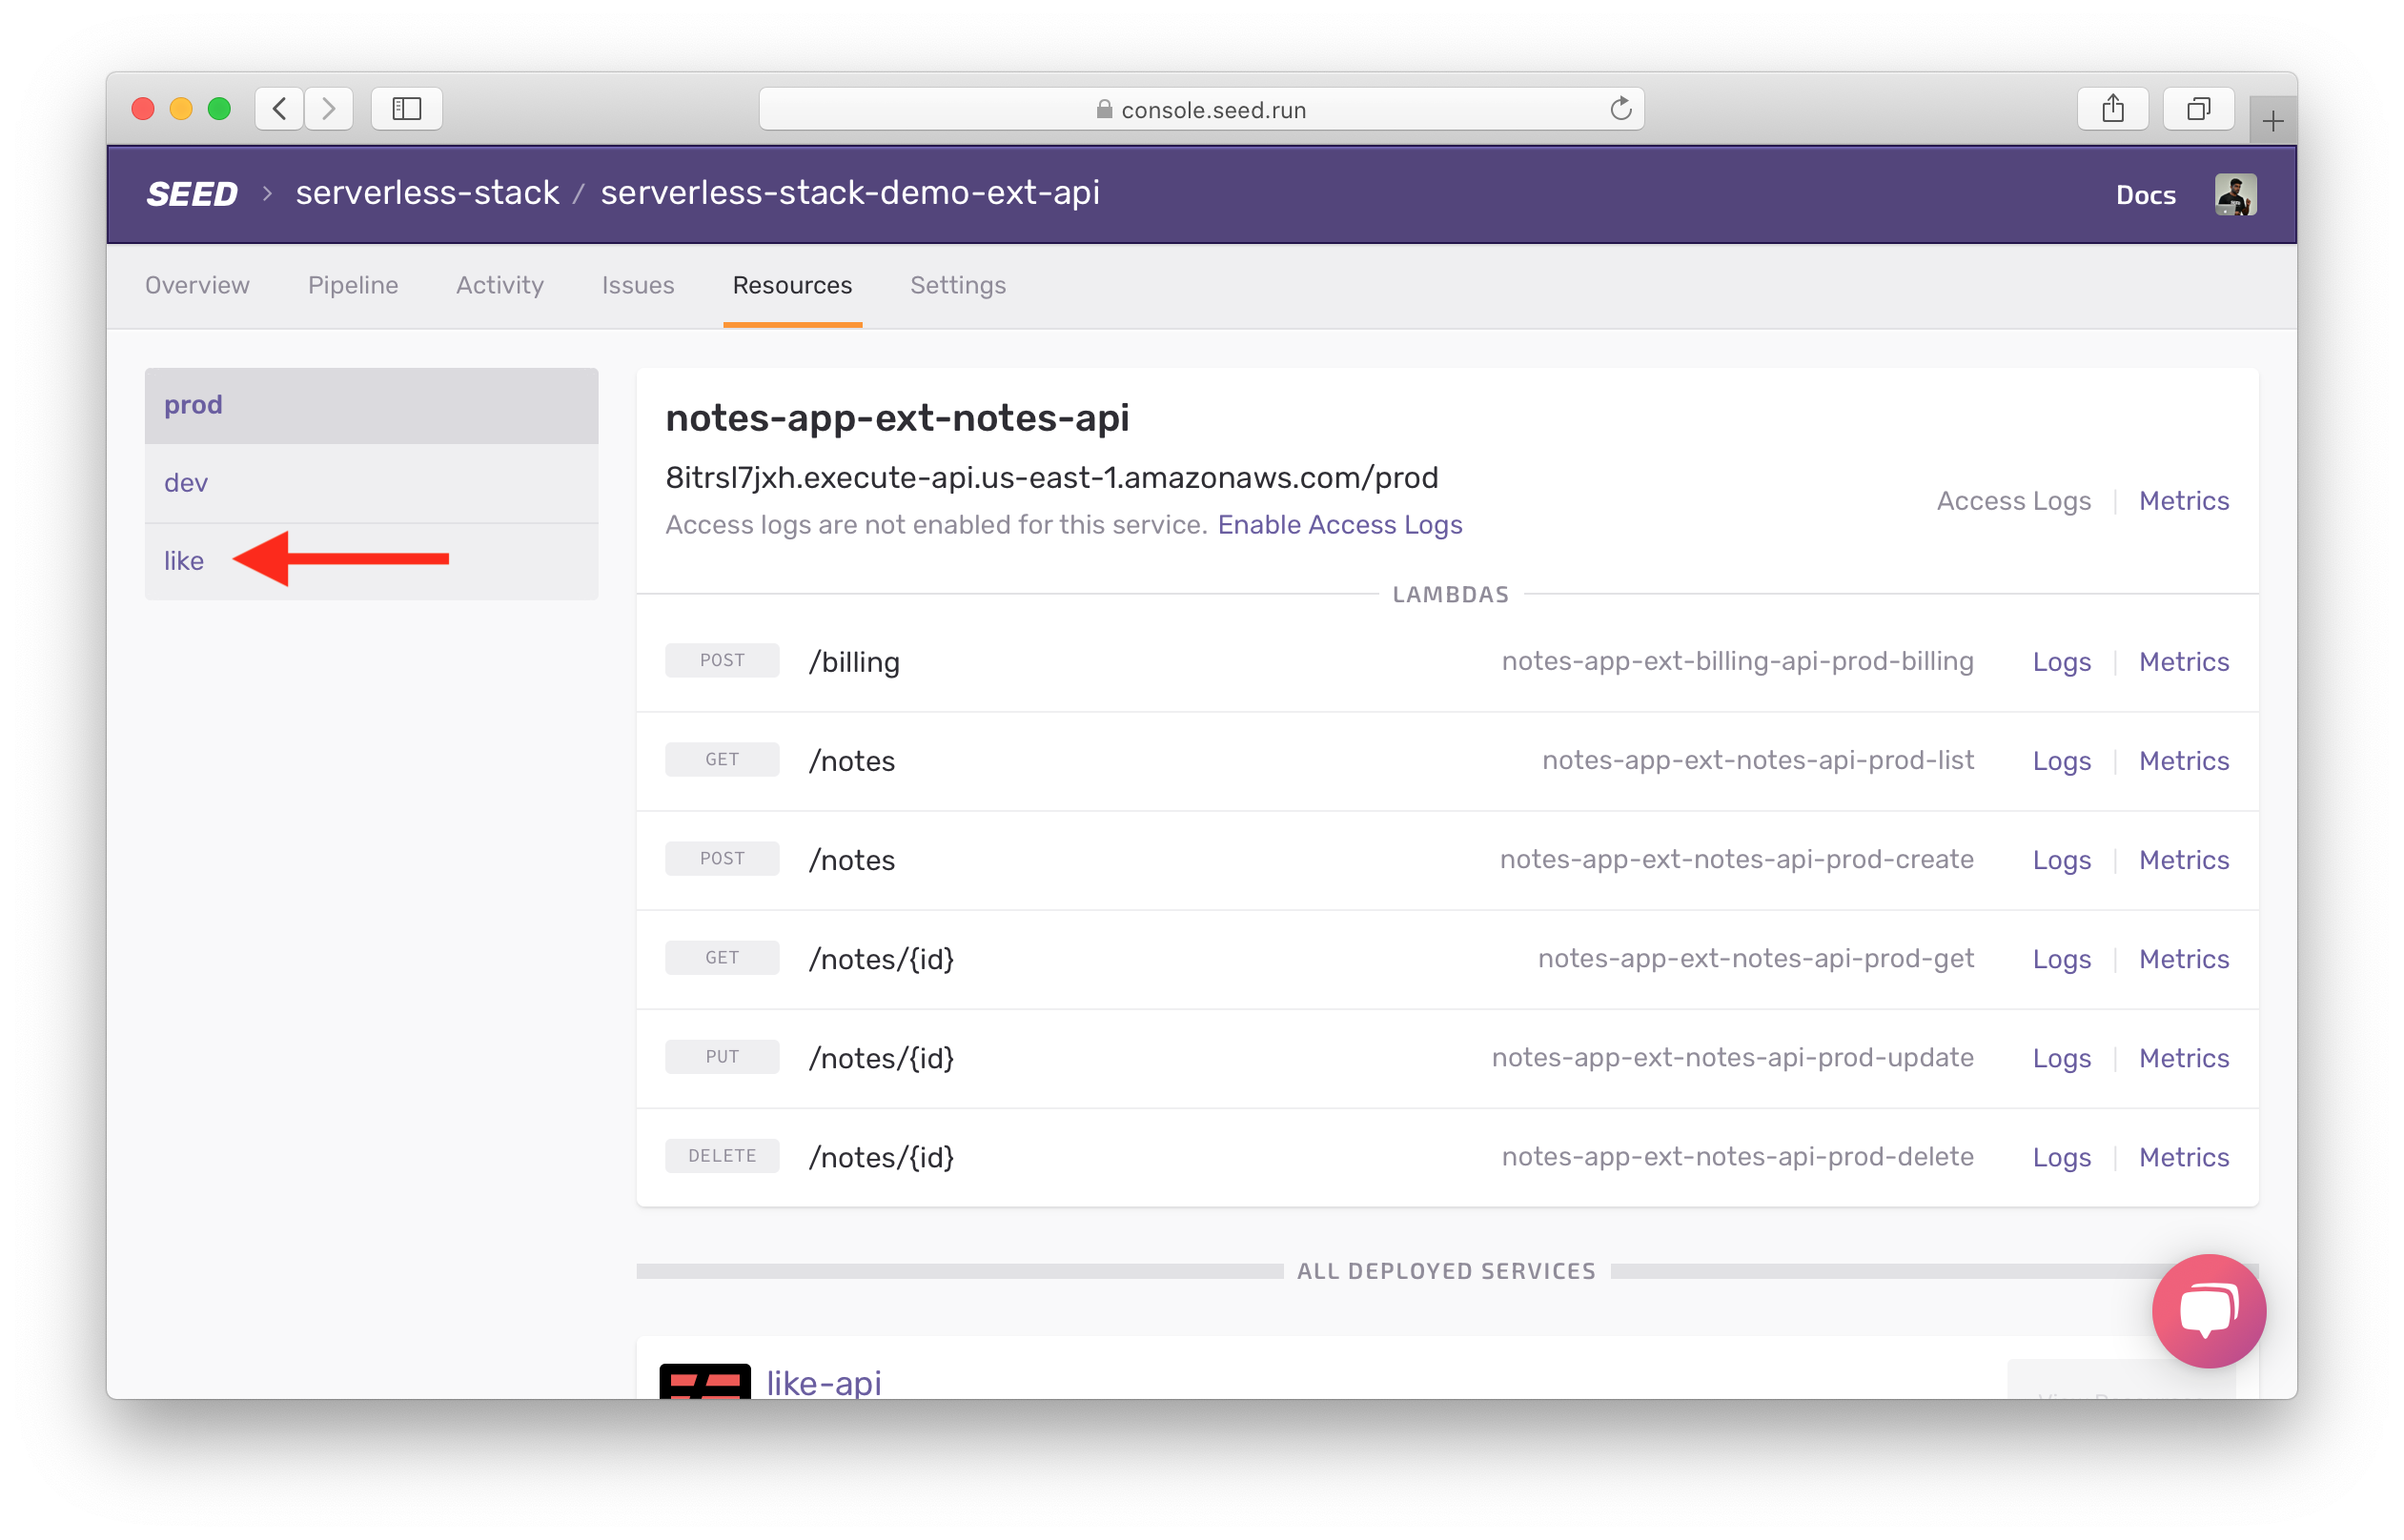
You will see the API Gateway endpoint for the like stage and the API path for the like handler.
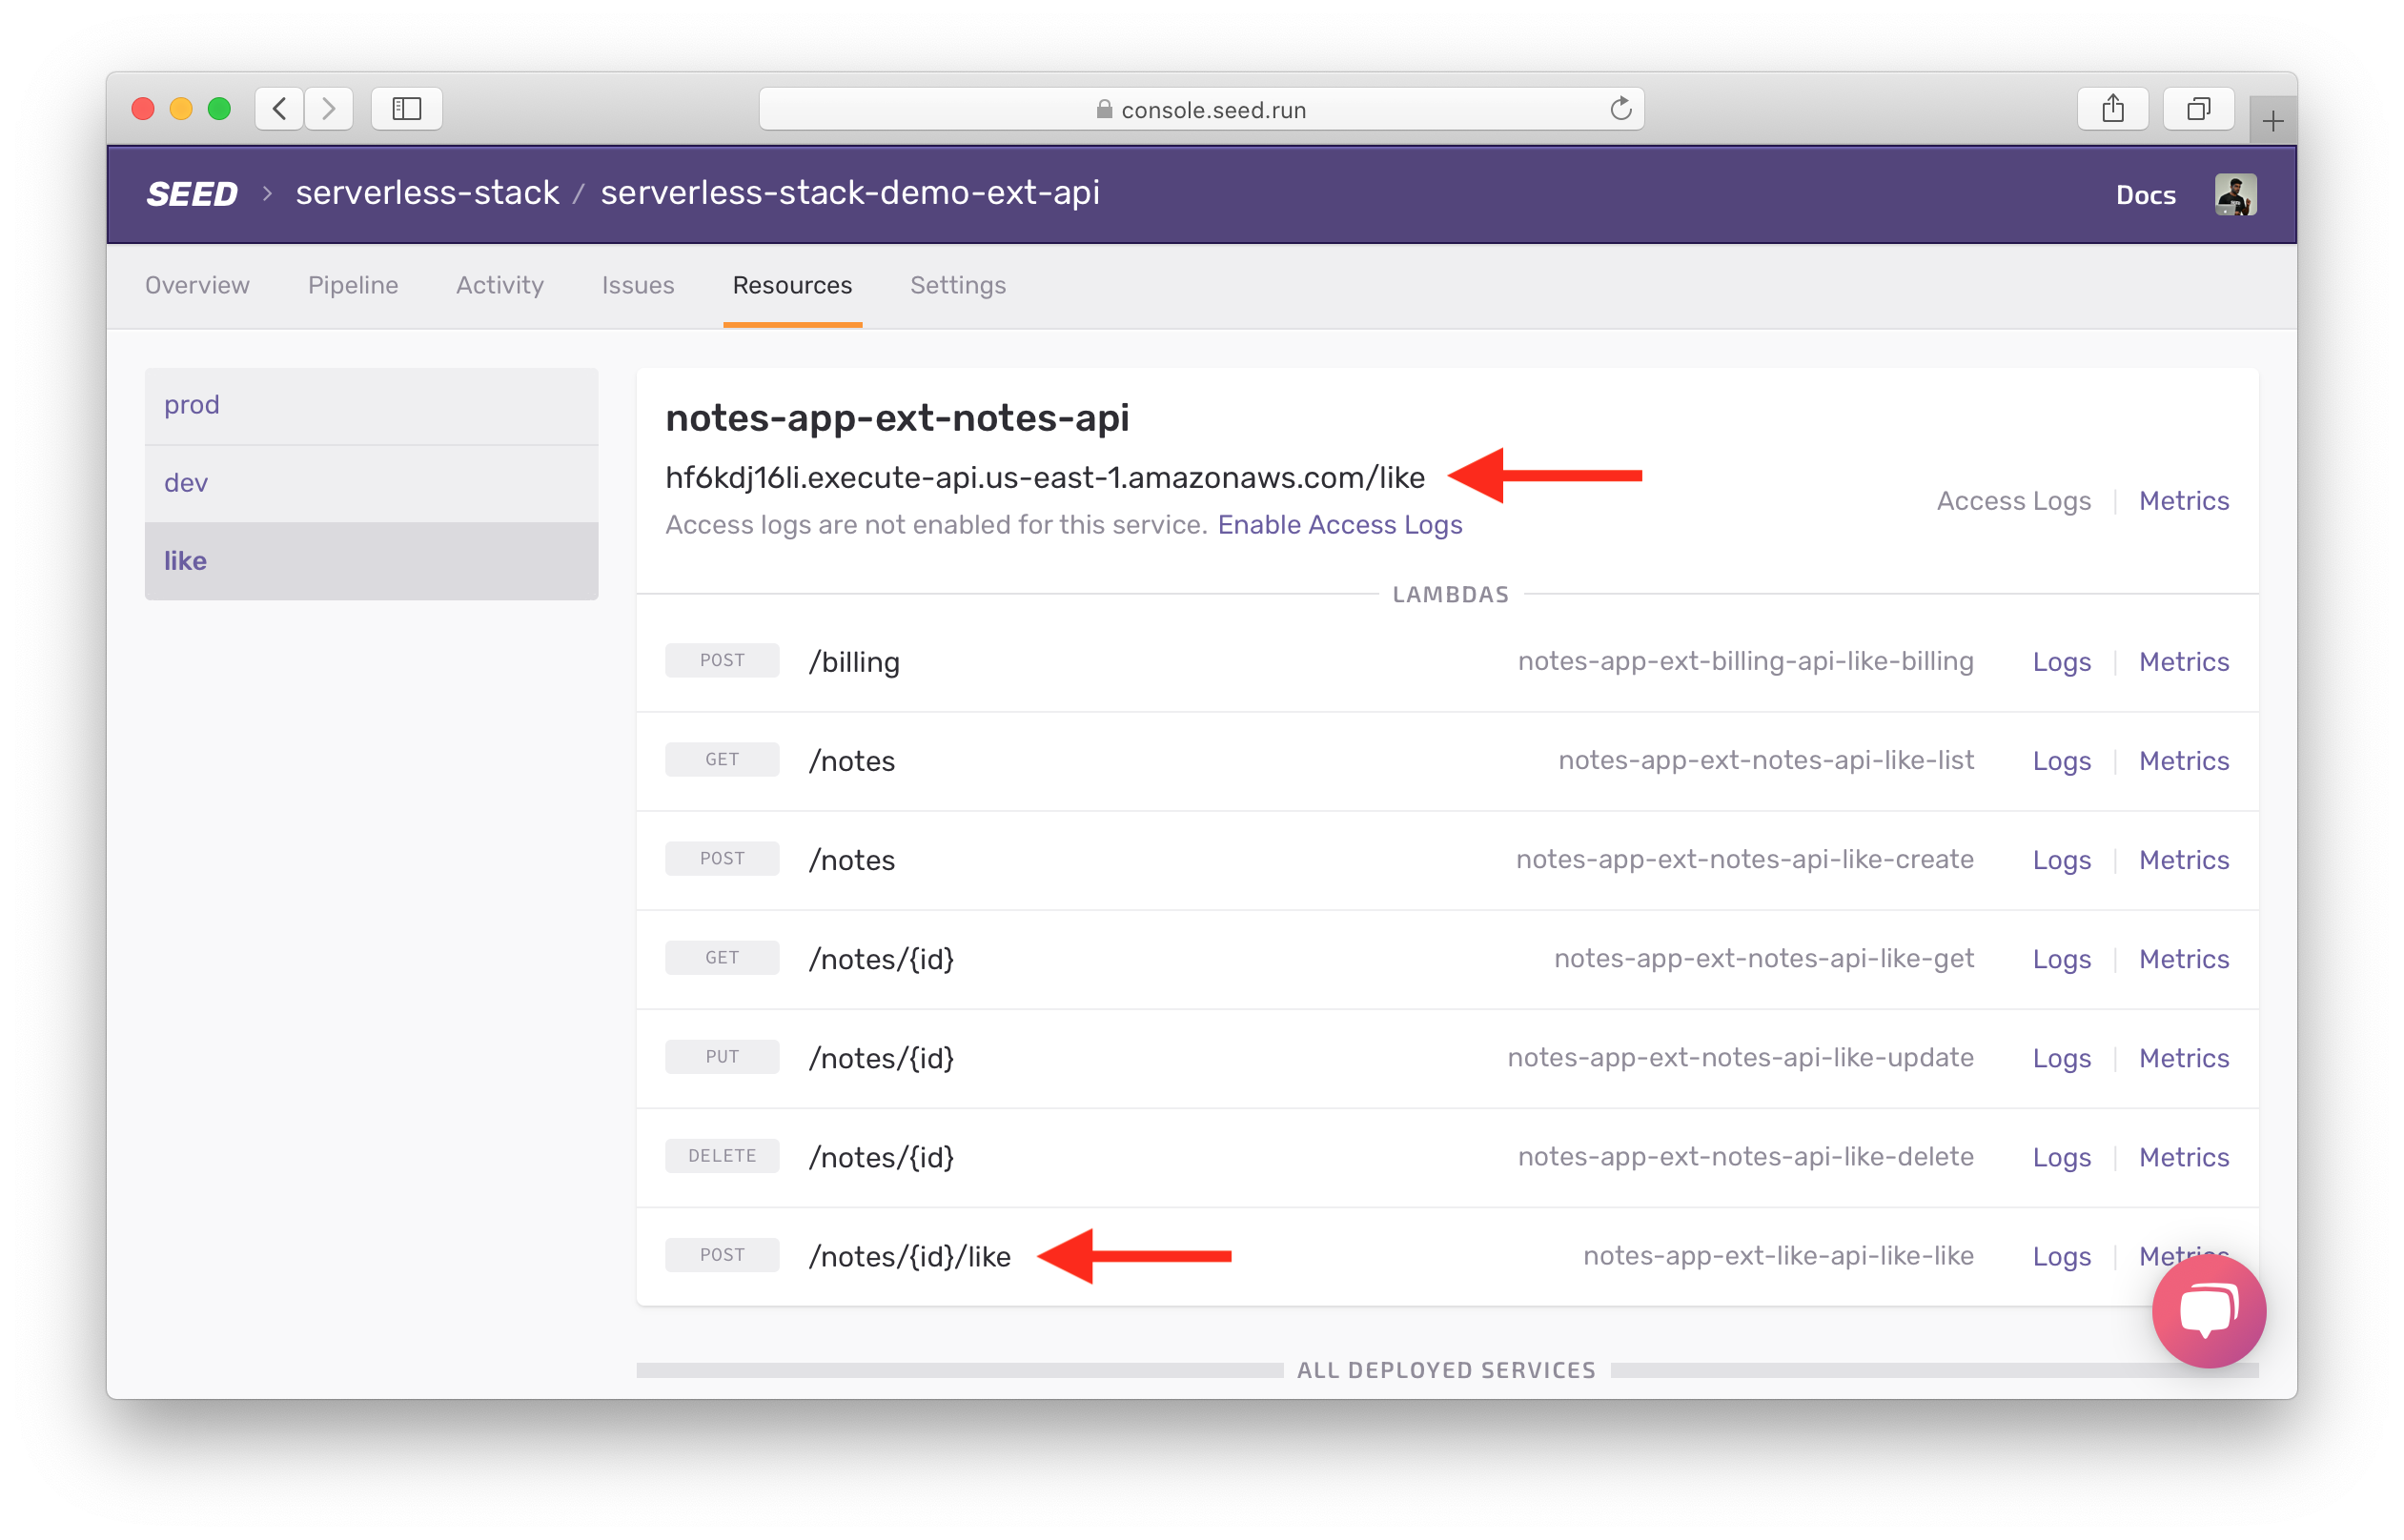
You can now use the endpoint in your frontend for further testing and development.
Now that our new feature environment has been created, let’s quickly look at the flow for working on your new feature.
Working on new feature environments locally
Once the environment has been created, we want to continue working on the feature. A common problem people run into is that serverless deploy takes very long to execute. And running serverless deploy for every change just does not work.
Why is ‘serverless deploy’ slow?
When you run serverless deploy, Serverless Framework does two things:
- Package the Lambda code into zip files.
- Build a CloudFormation template with all the resources defined in
serverless.yml.
The code is uploaded to S3 and the template is submitted to CloudFormation.
There are a couple of things that are causing the slowness here:
- When working on a feature, most of the changes are code changes. It is not necessary to rebuild and resubmit the CloudFormation template for every code change.
- When making a code change, a lot of the times you are only changing one Lambda function. In this case, it’s not necessary to repackage the code for all Lambda functions in the service.
Deploying individual functions
Fortunately, there is a way to deploy individual functions using the serverless deploy -f command. Let’s take a look at an example.
Say we change our new like.js code to:
import { success } from "../../libs/response-lib";

export async function main(event, context) {
  // Business logic code for liking a post

  console.log("adding some debug code to test");

  return success({ status: true });
}
To deploy the code for this function, run:
$ cd services/like-api
$ serverless deploy -f like -s like
Deploying an individual function should be much quicker than deploying the entire stack.
Deploy multiple functions
Sometimes a code change can affect multiple functions at the same time. For example, if you changed a shared library, you have to redeploy all the services importing the library.
However, there isn’t a convenient way to deploy multiple Lambda functions. If you can easily tell which Lambda functions are affected, deploy them individually. If there are many functions involved, run serverless deploy -s like to deploy all of them. Just to be on the safe side.
Now let’s assume we are done working on our new feature and we want our team lead to review our code before we promote it to production. To do this we are going to create a pull request environment. Let’s look at how to do that next.
For help and discussion
Comments on this chapter