Create a CloudFront Distribution
Now that we have our app up and running on S3, let’s serve it out globally through CloudFront. To do this we need to create an AWS CloudFront Distribution.
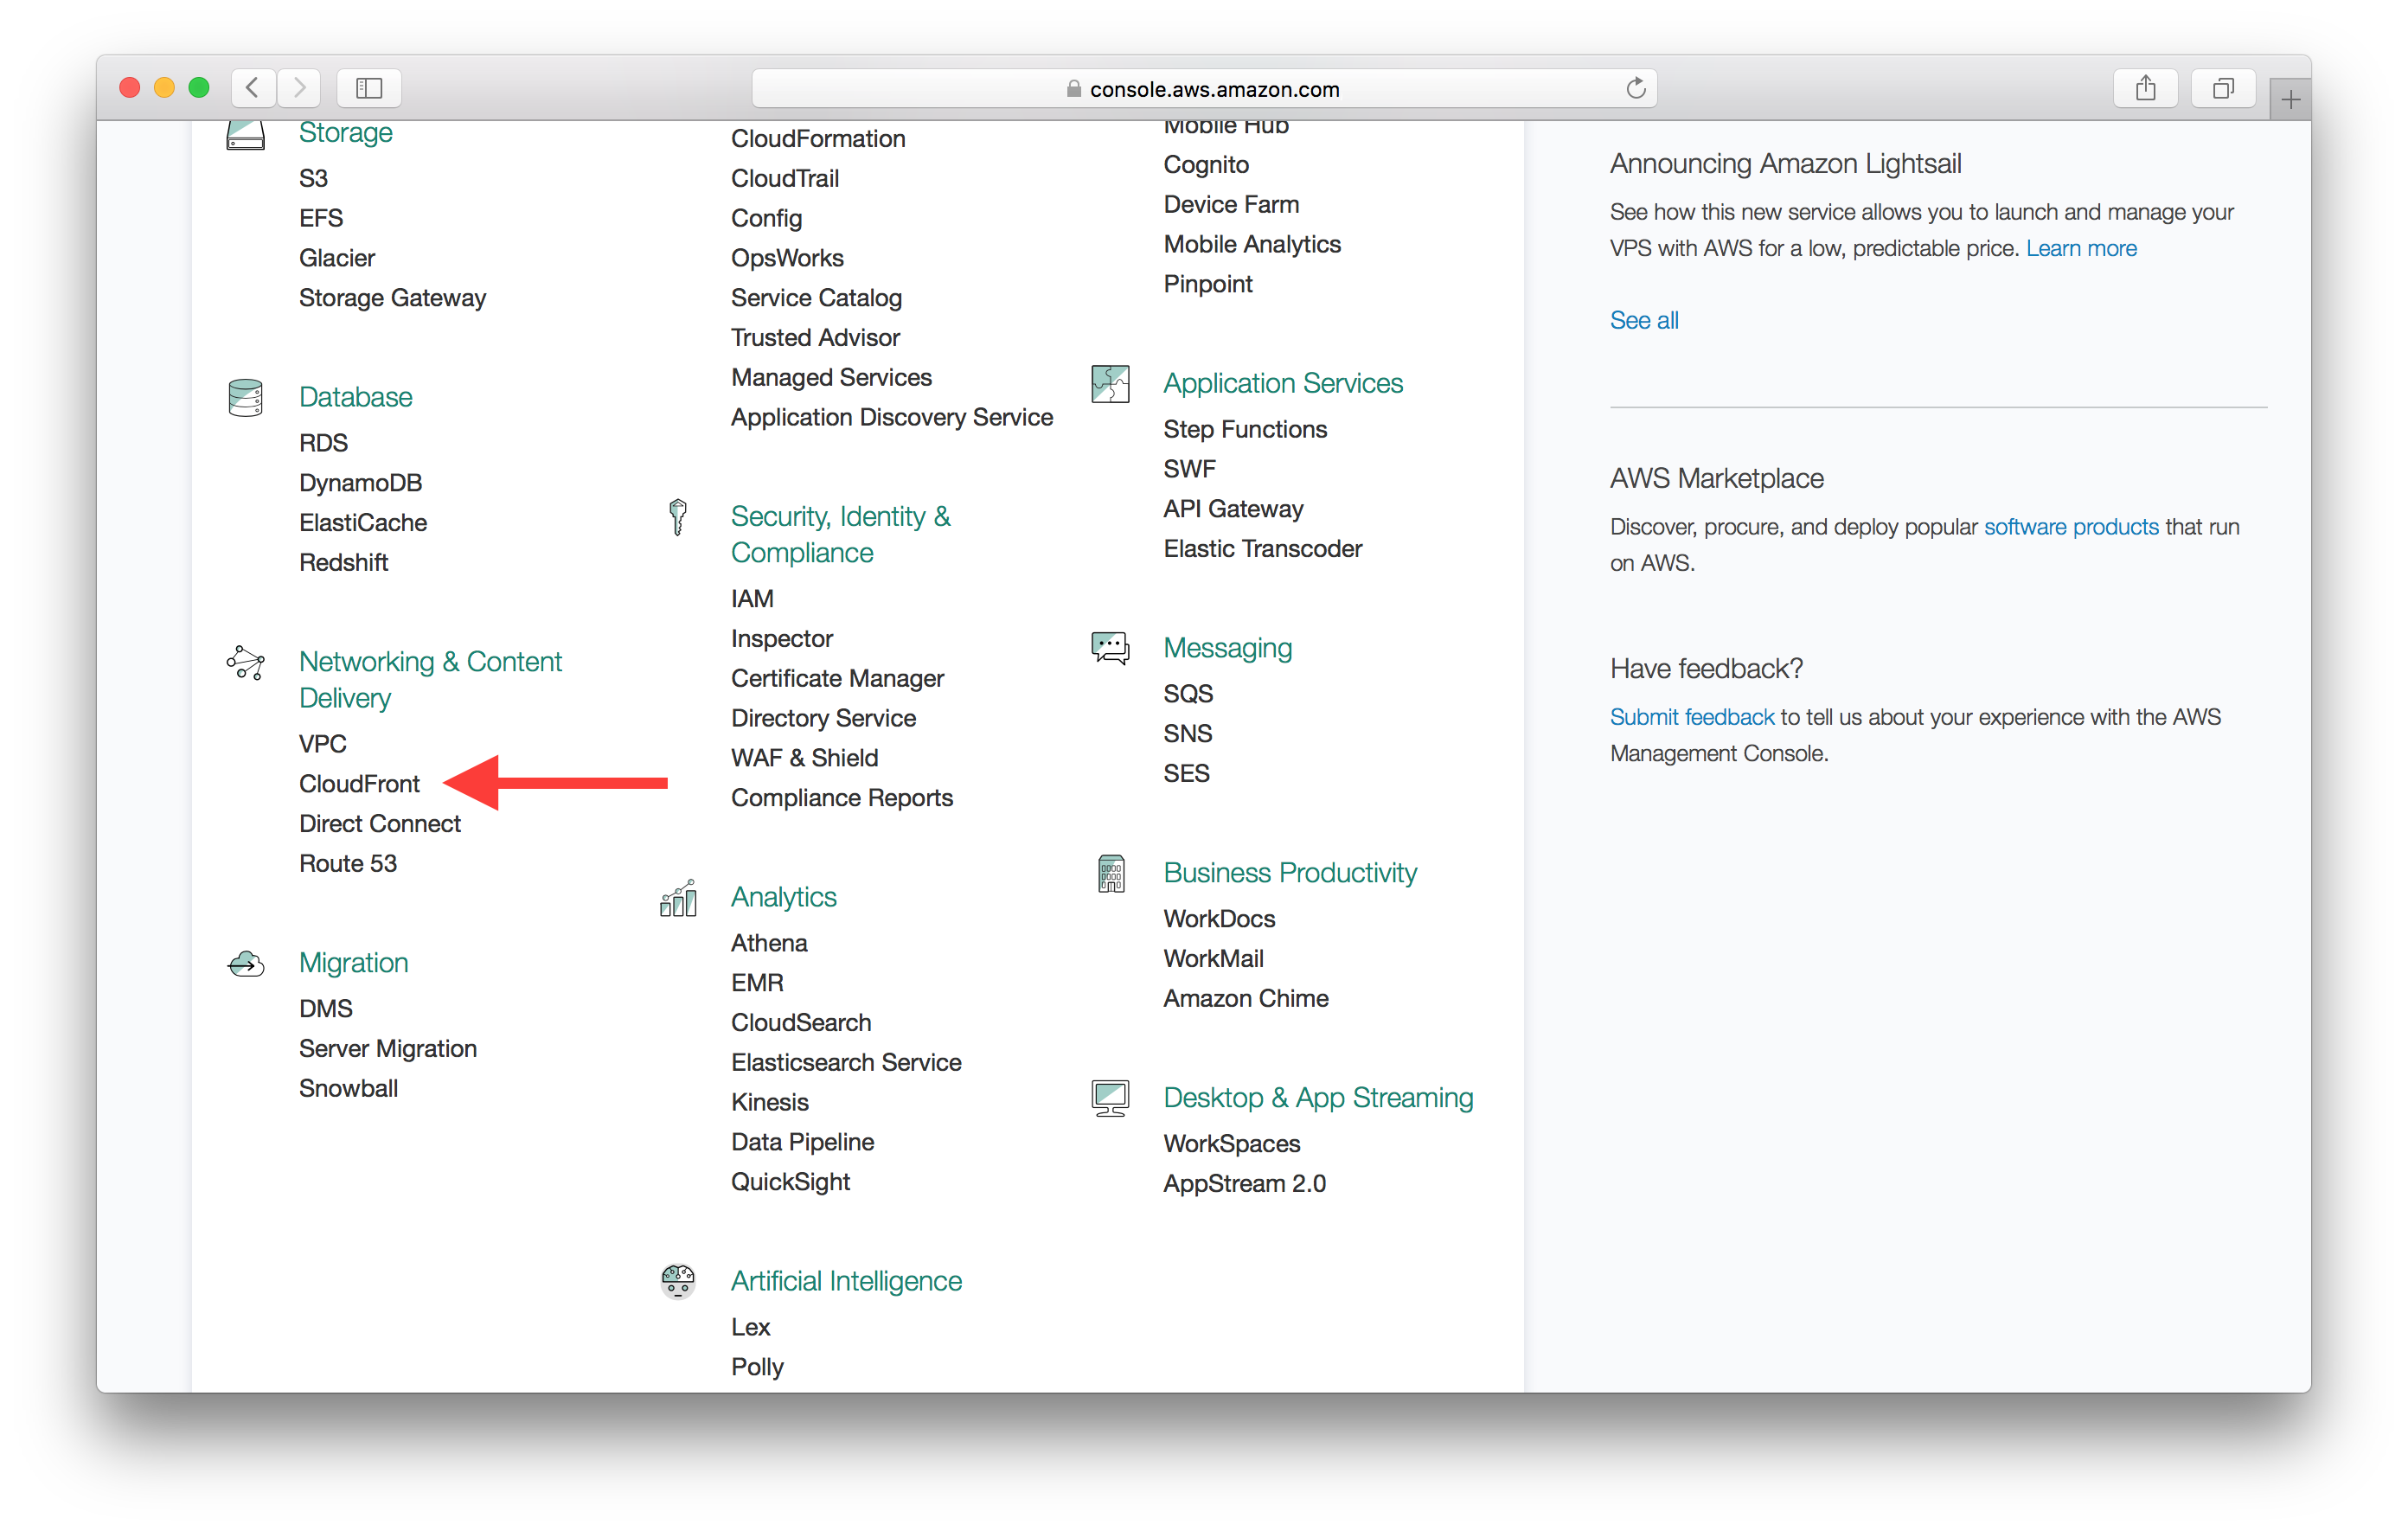
Select CloudFront from the list of services in your AWS Console.
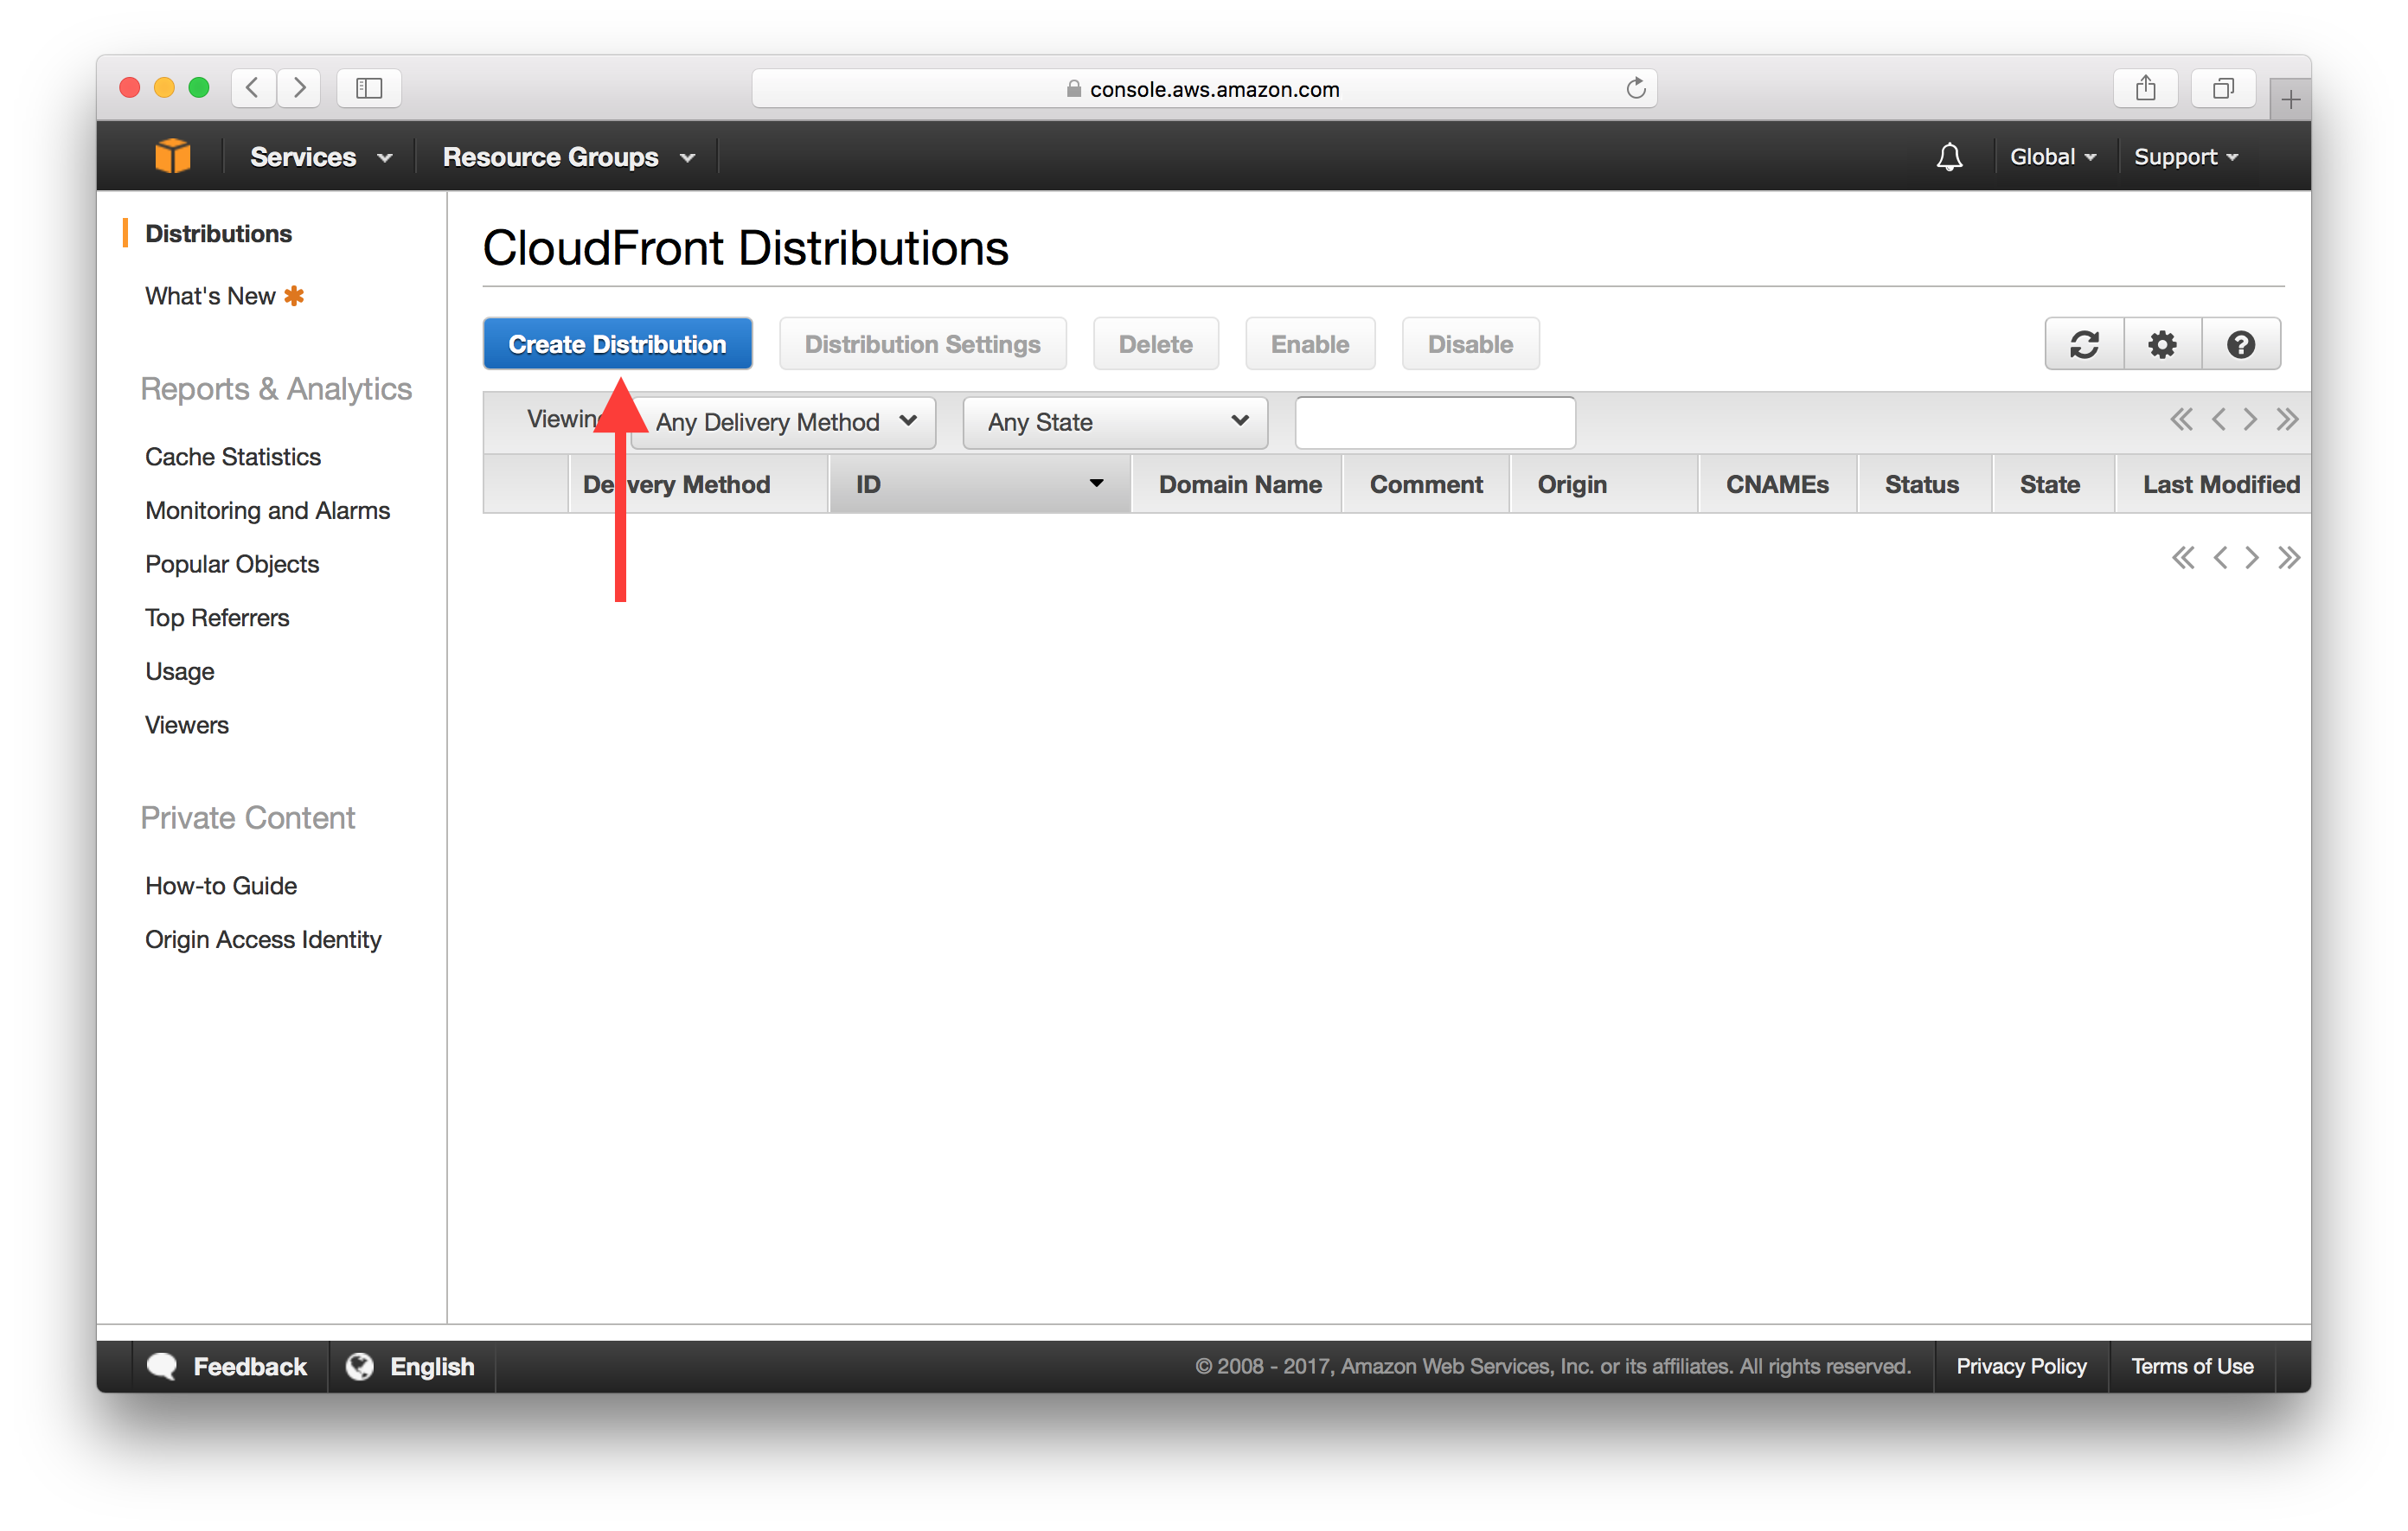
Then select Create Distribution.
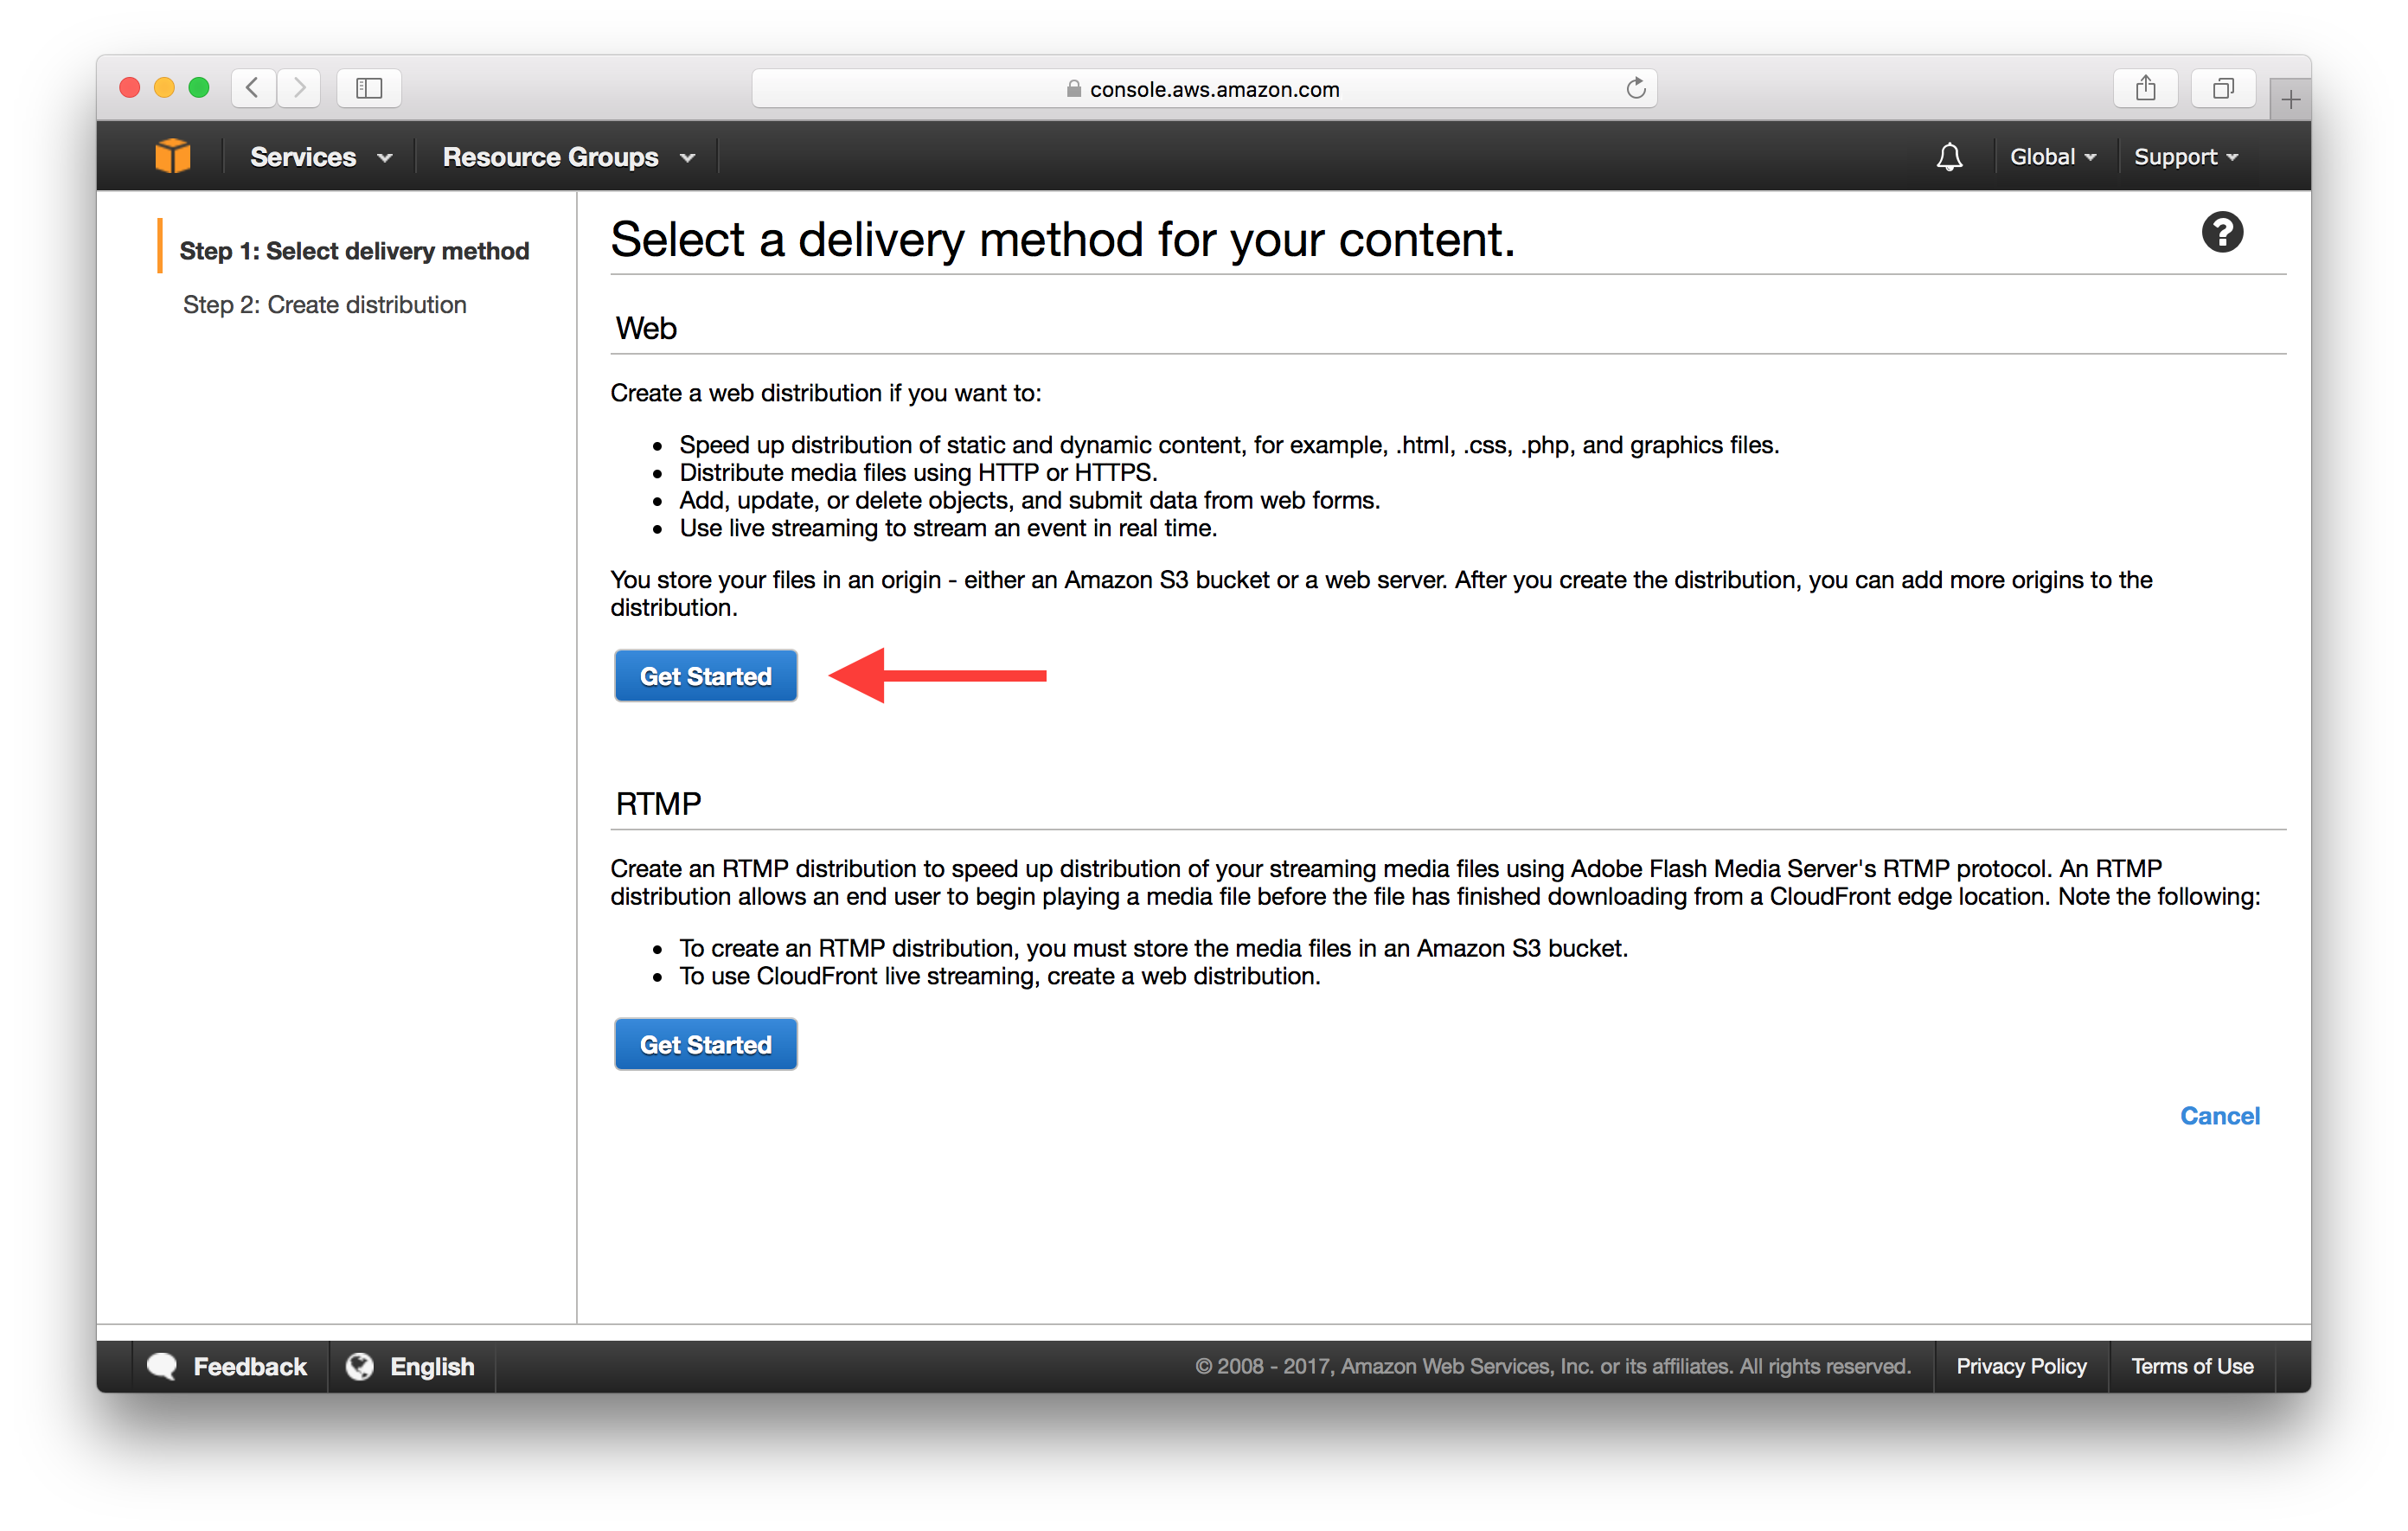
And then in the Web section select Get Started.
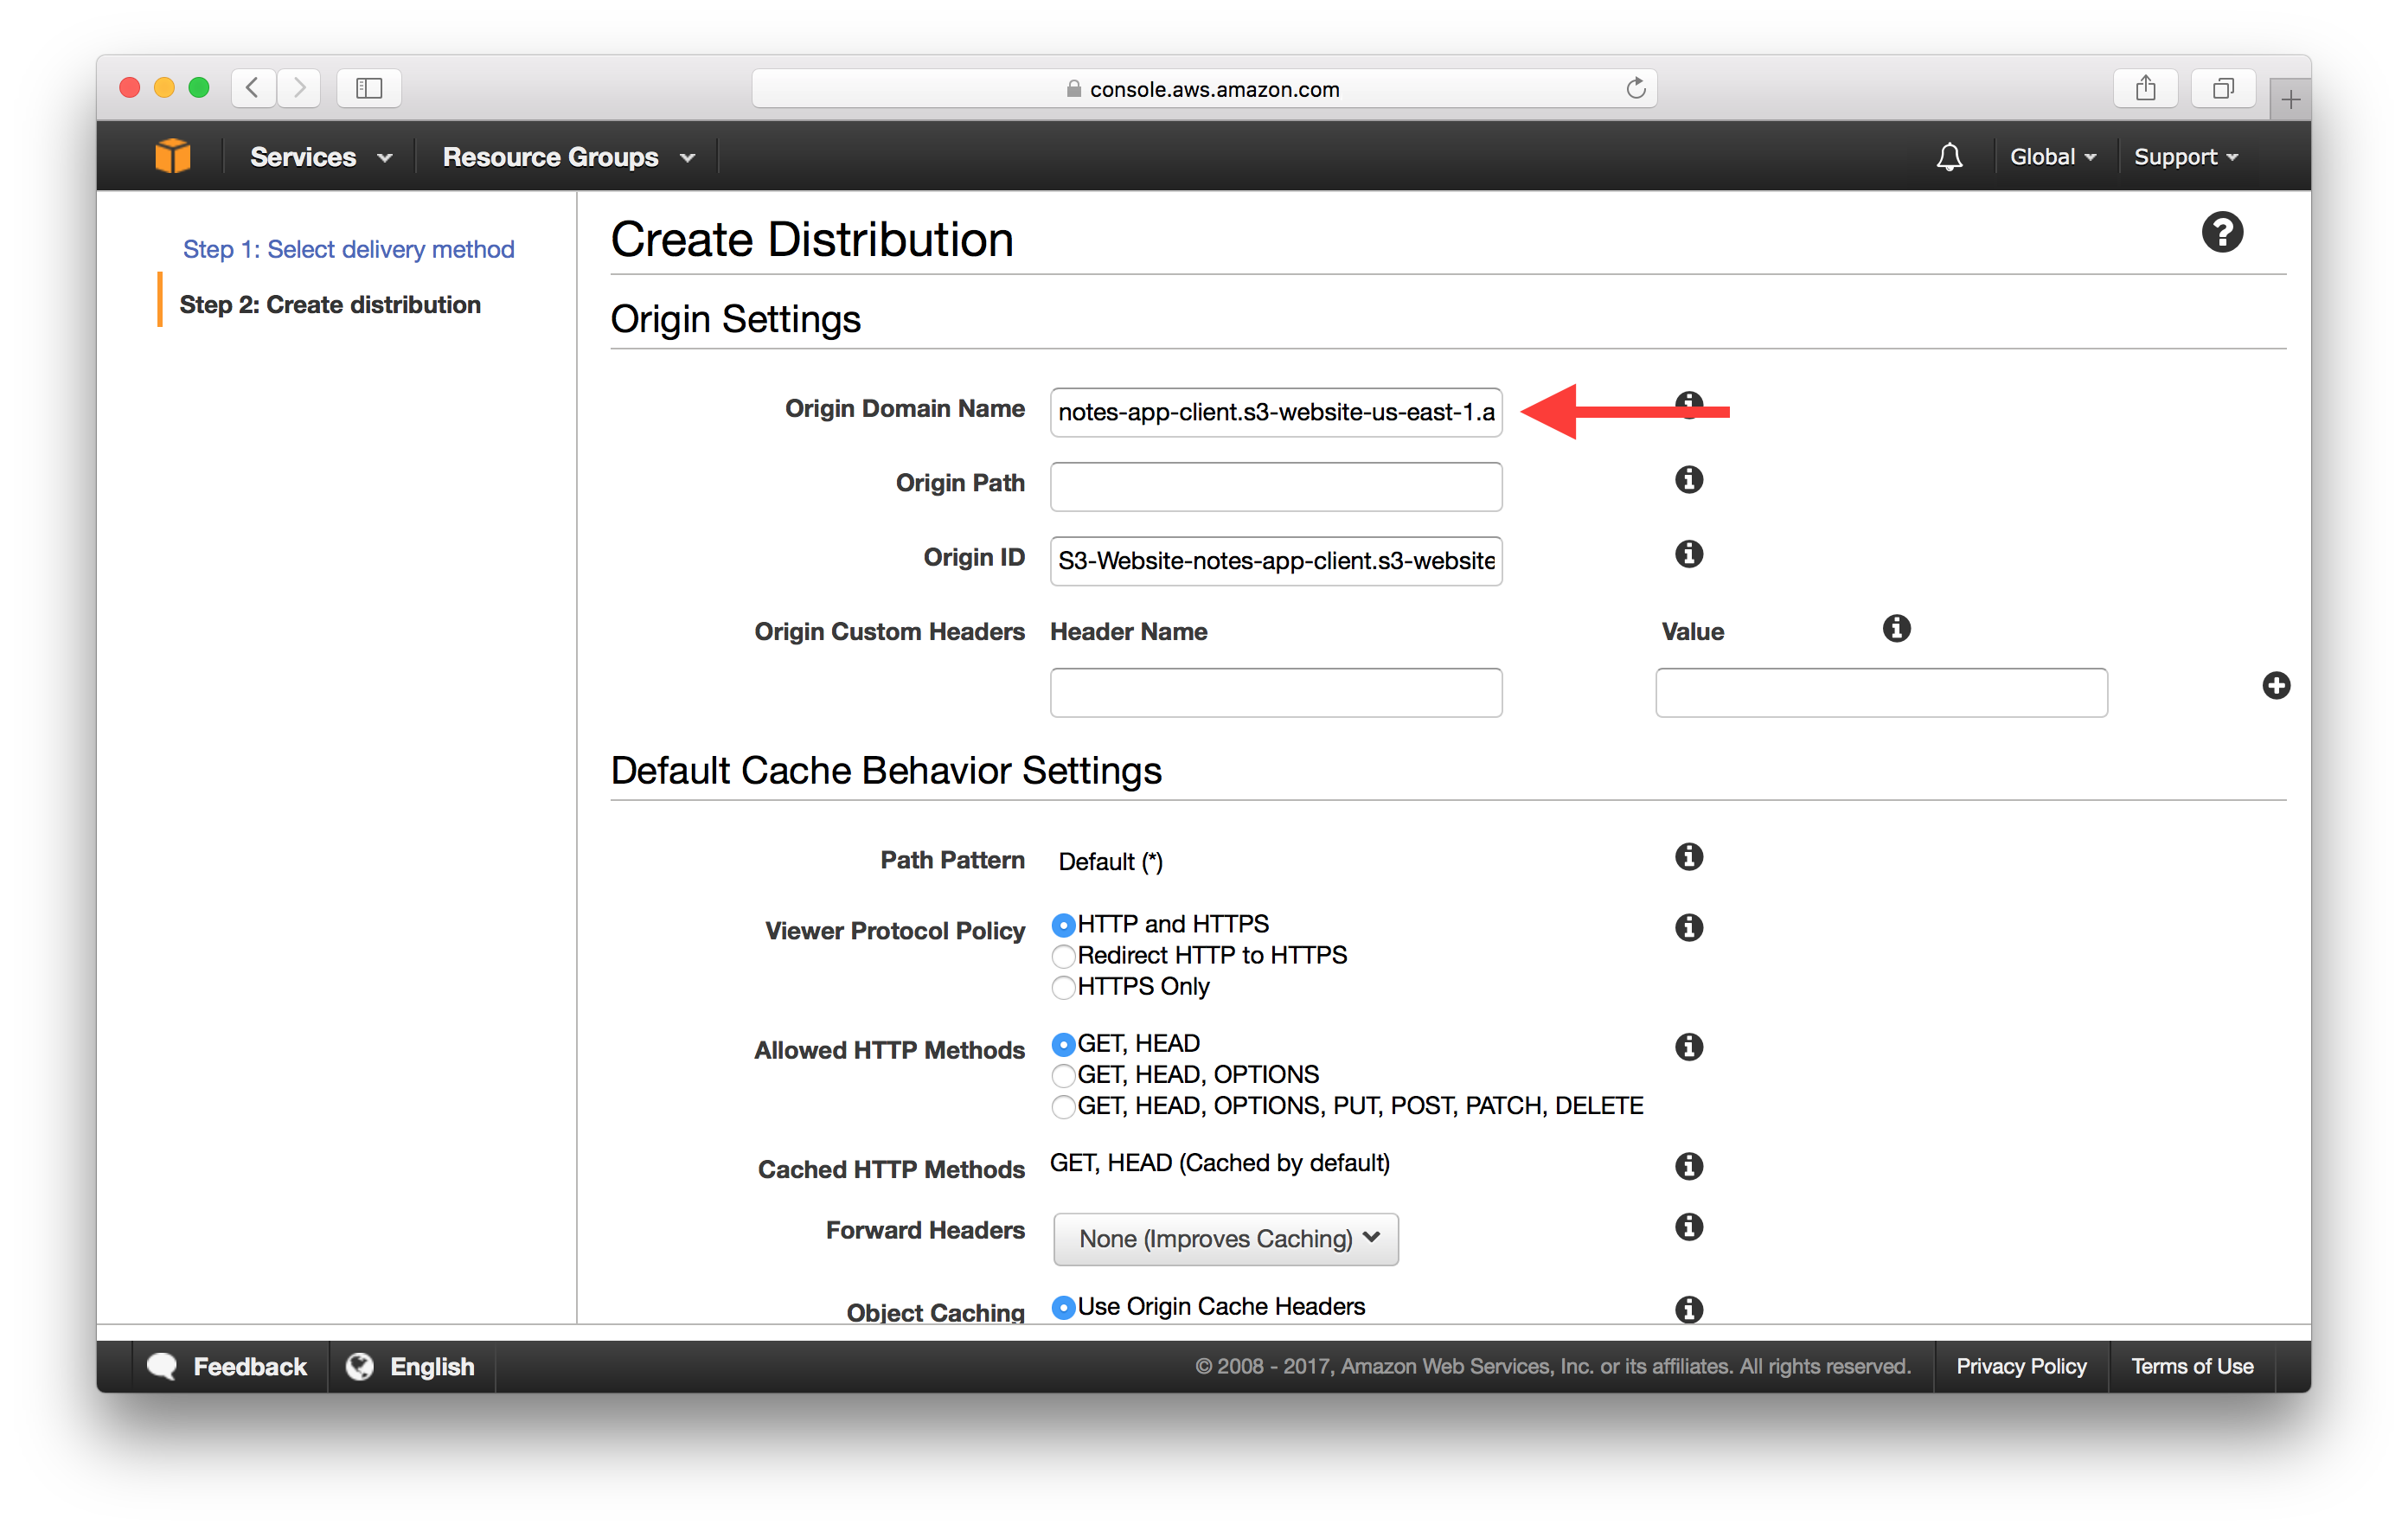
In the Create Distribution form we need to start by specifying the Origin Domain Name for our Web CloudFront Distribution. This field is pre-filled with a few options including the S3 bucket we created. But we are not going to select on the options in the dropdown. This is because the options here are the REST API endpoints for the S3 bucket instead of the one that is set up as a static website.
You can grab the S3 website endpoint from the Static website hosting panel for your S3 bucket. We had configured this in the previous chapter. Copy the URL in the Endpoint field.

And paste that URL in the Origin Domain Name field. In my case it is, http://notes-app-client.s3-website-us-east-1.amazonaws.com.
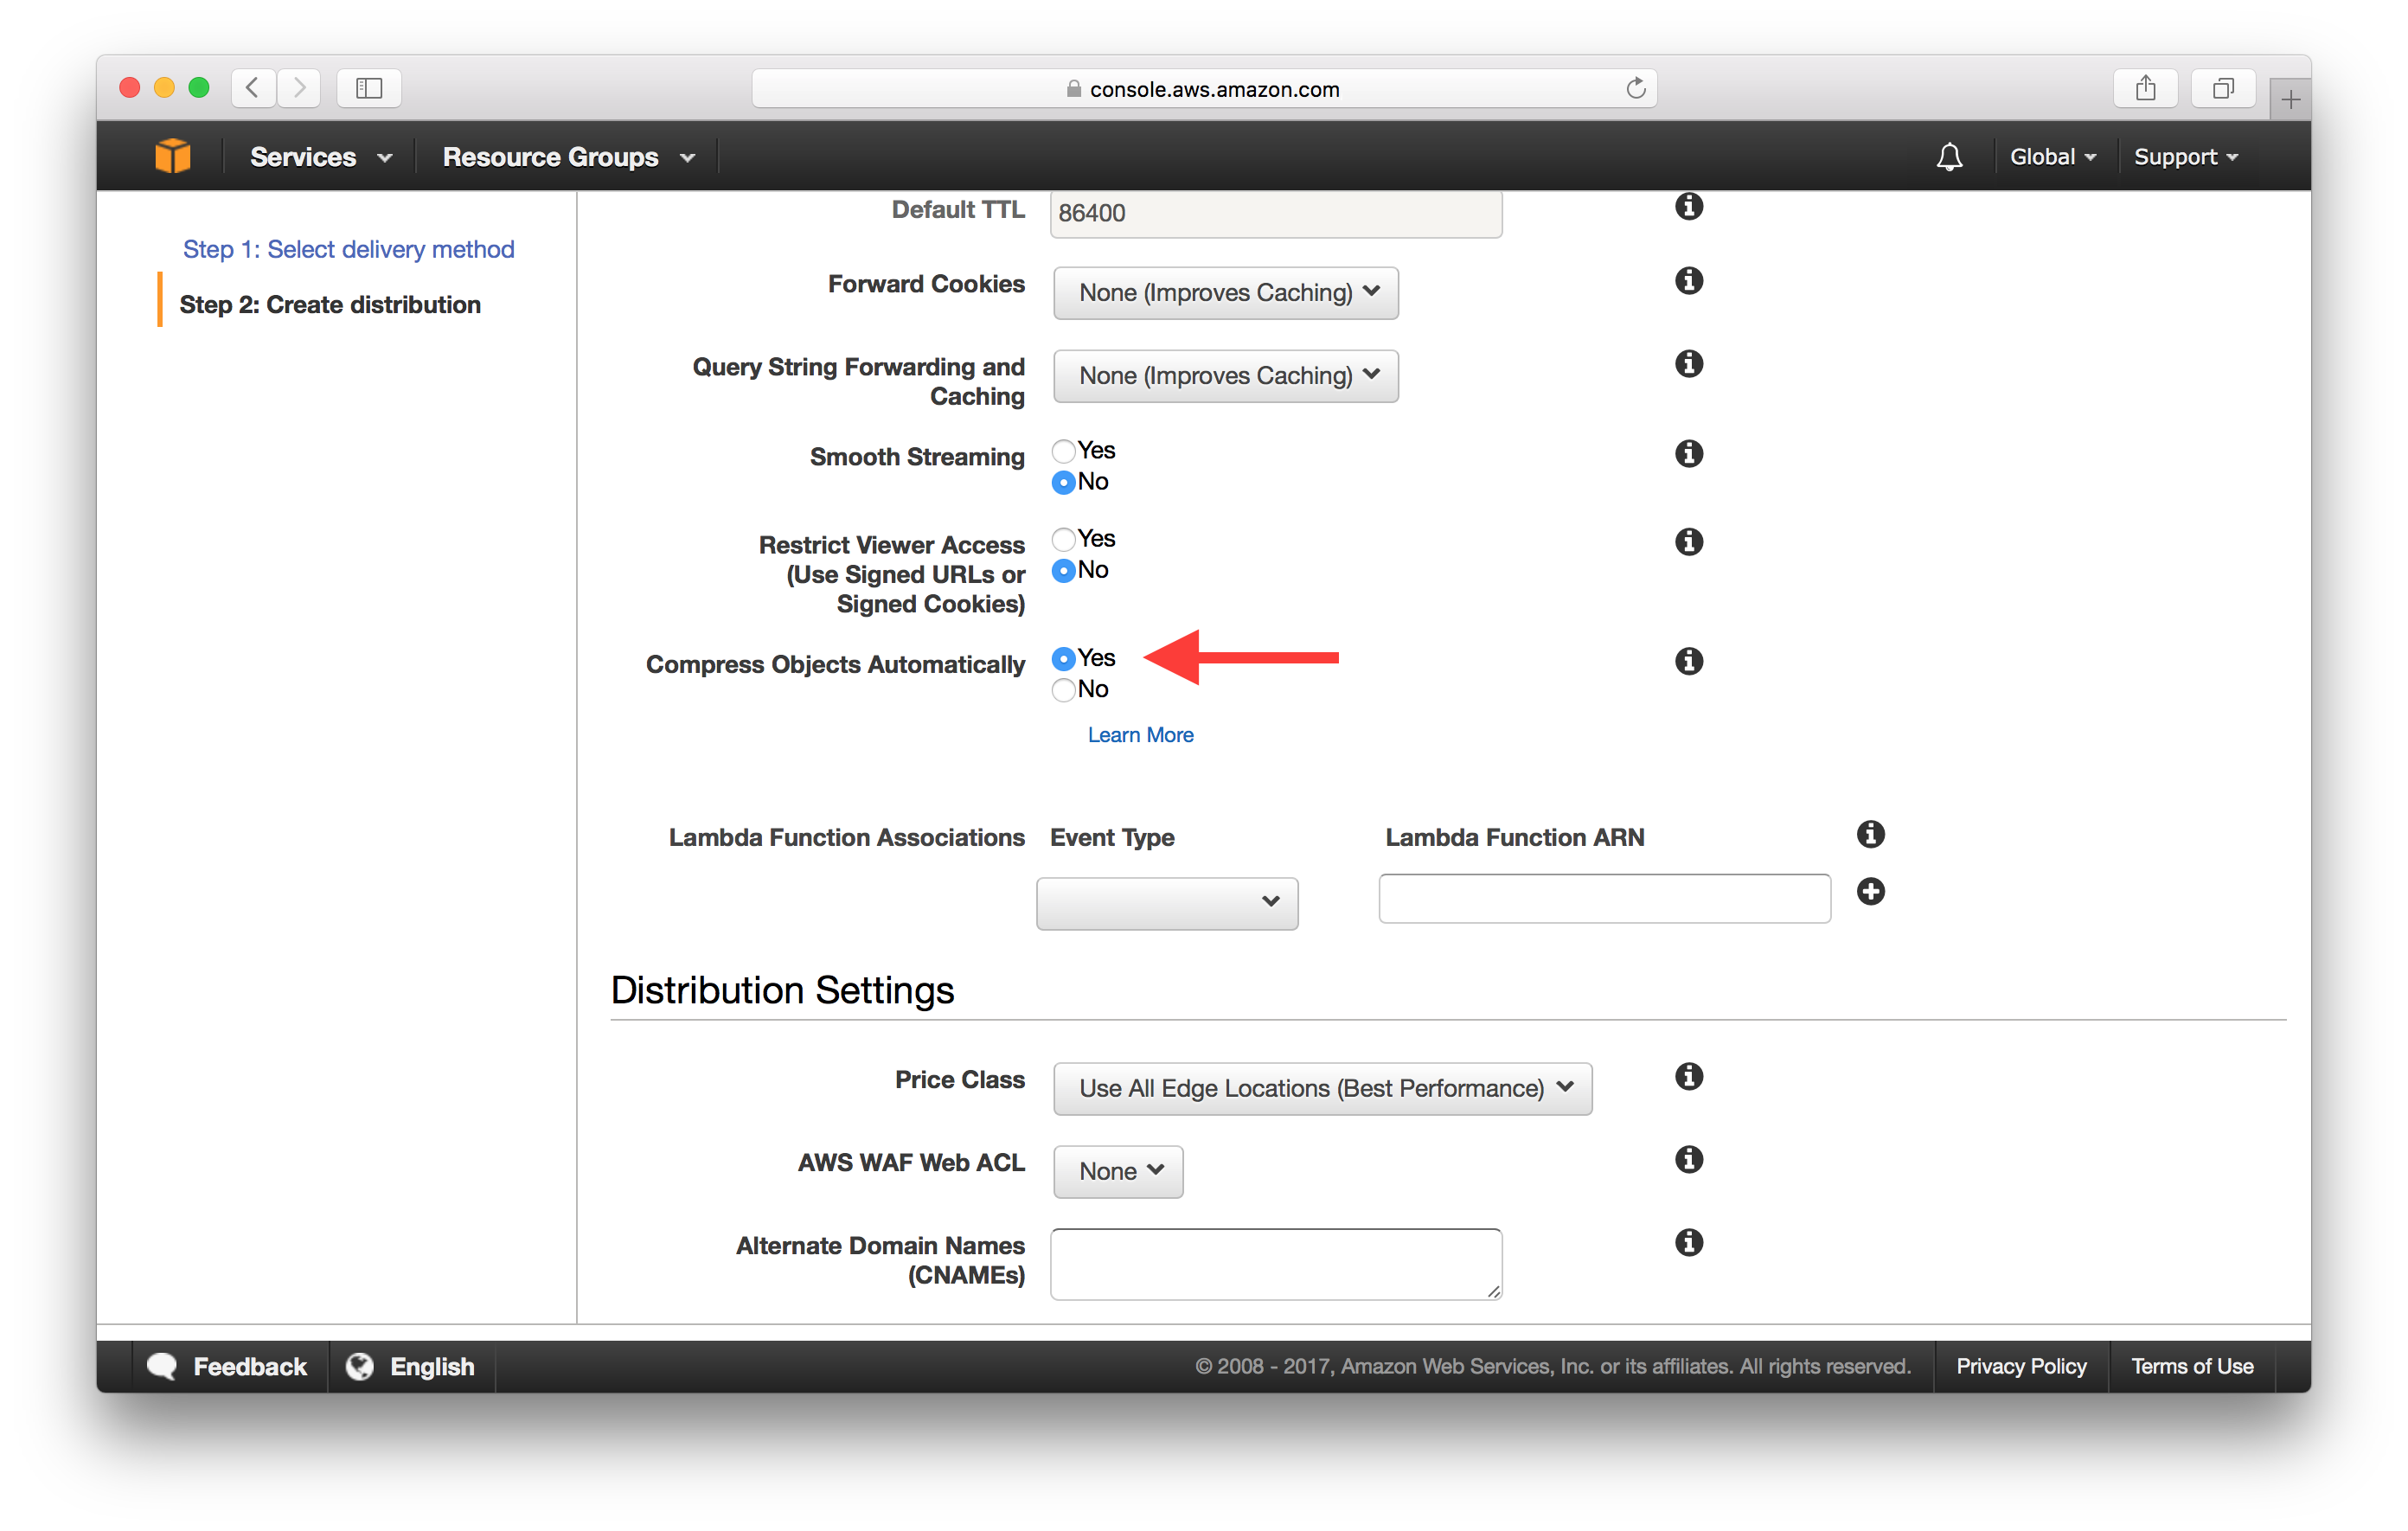
And now scroll down the form and switch Compress Objects Automatically to Yes. This will automatically Gzip compress the files that can be compressed and speed up the delivery of our app.
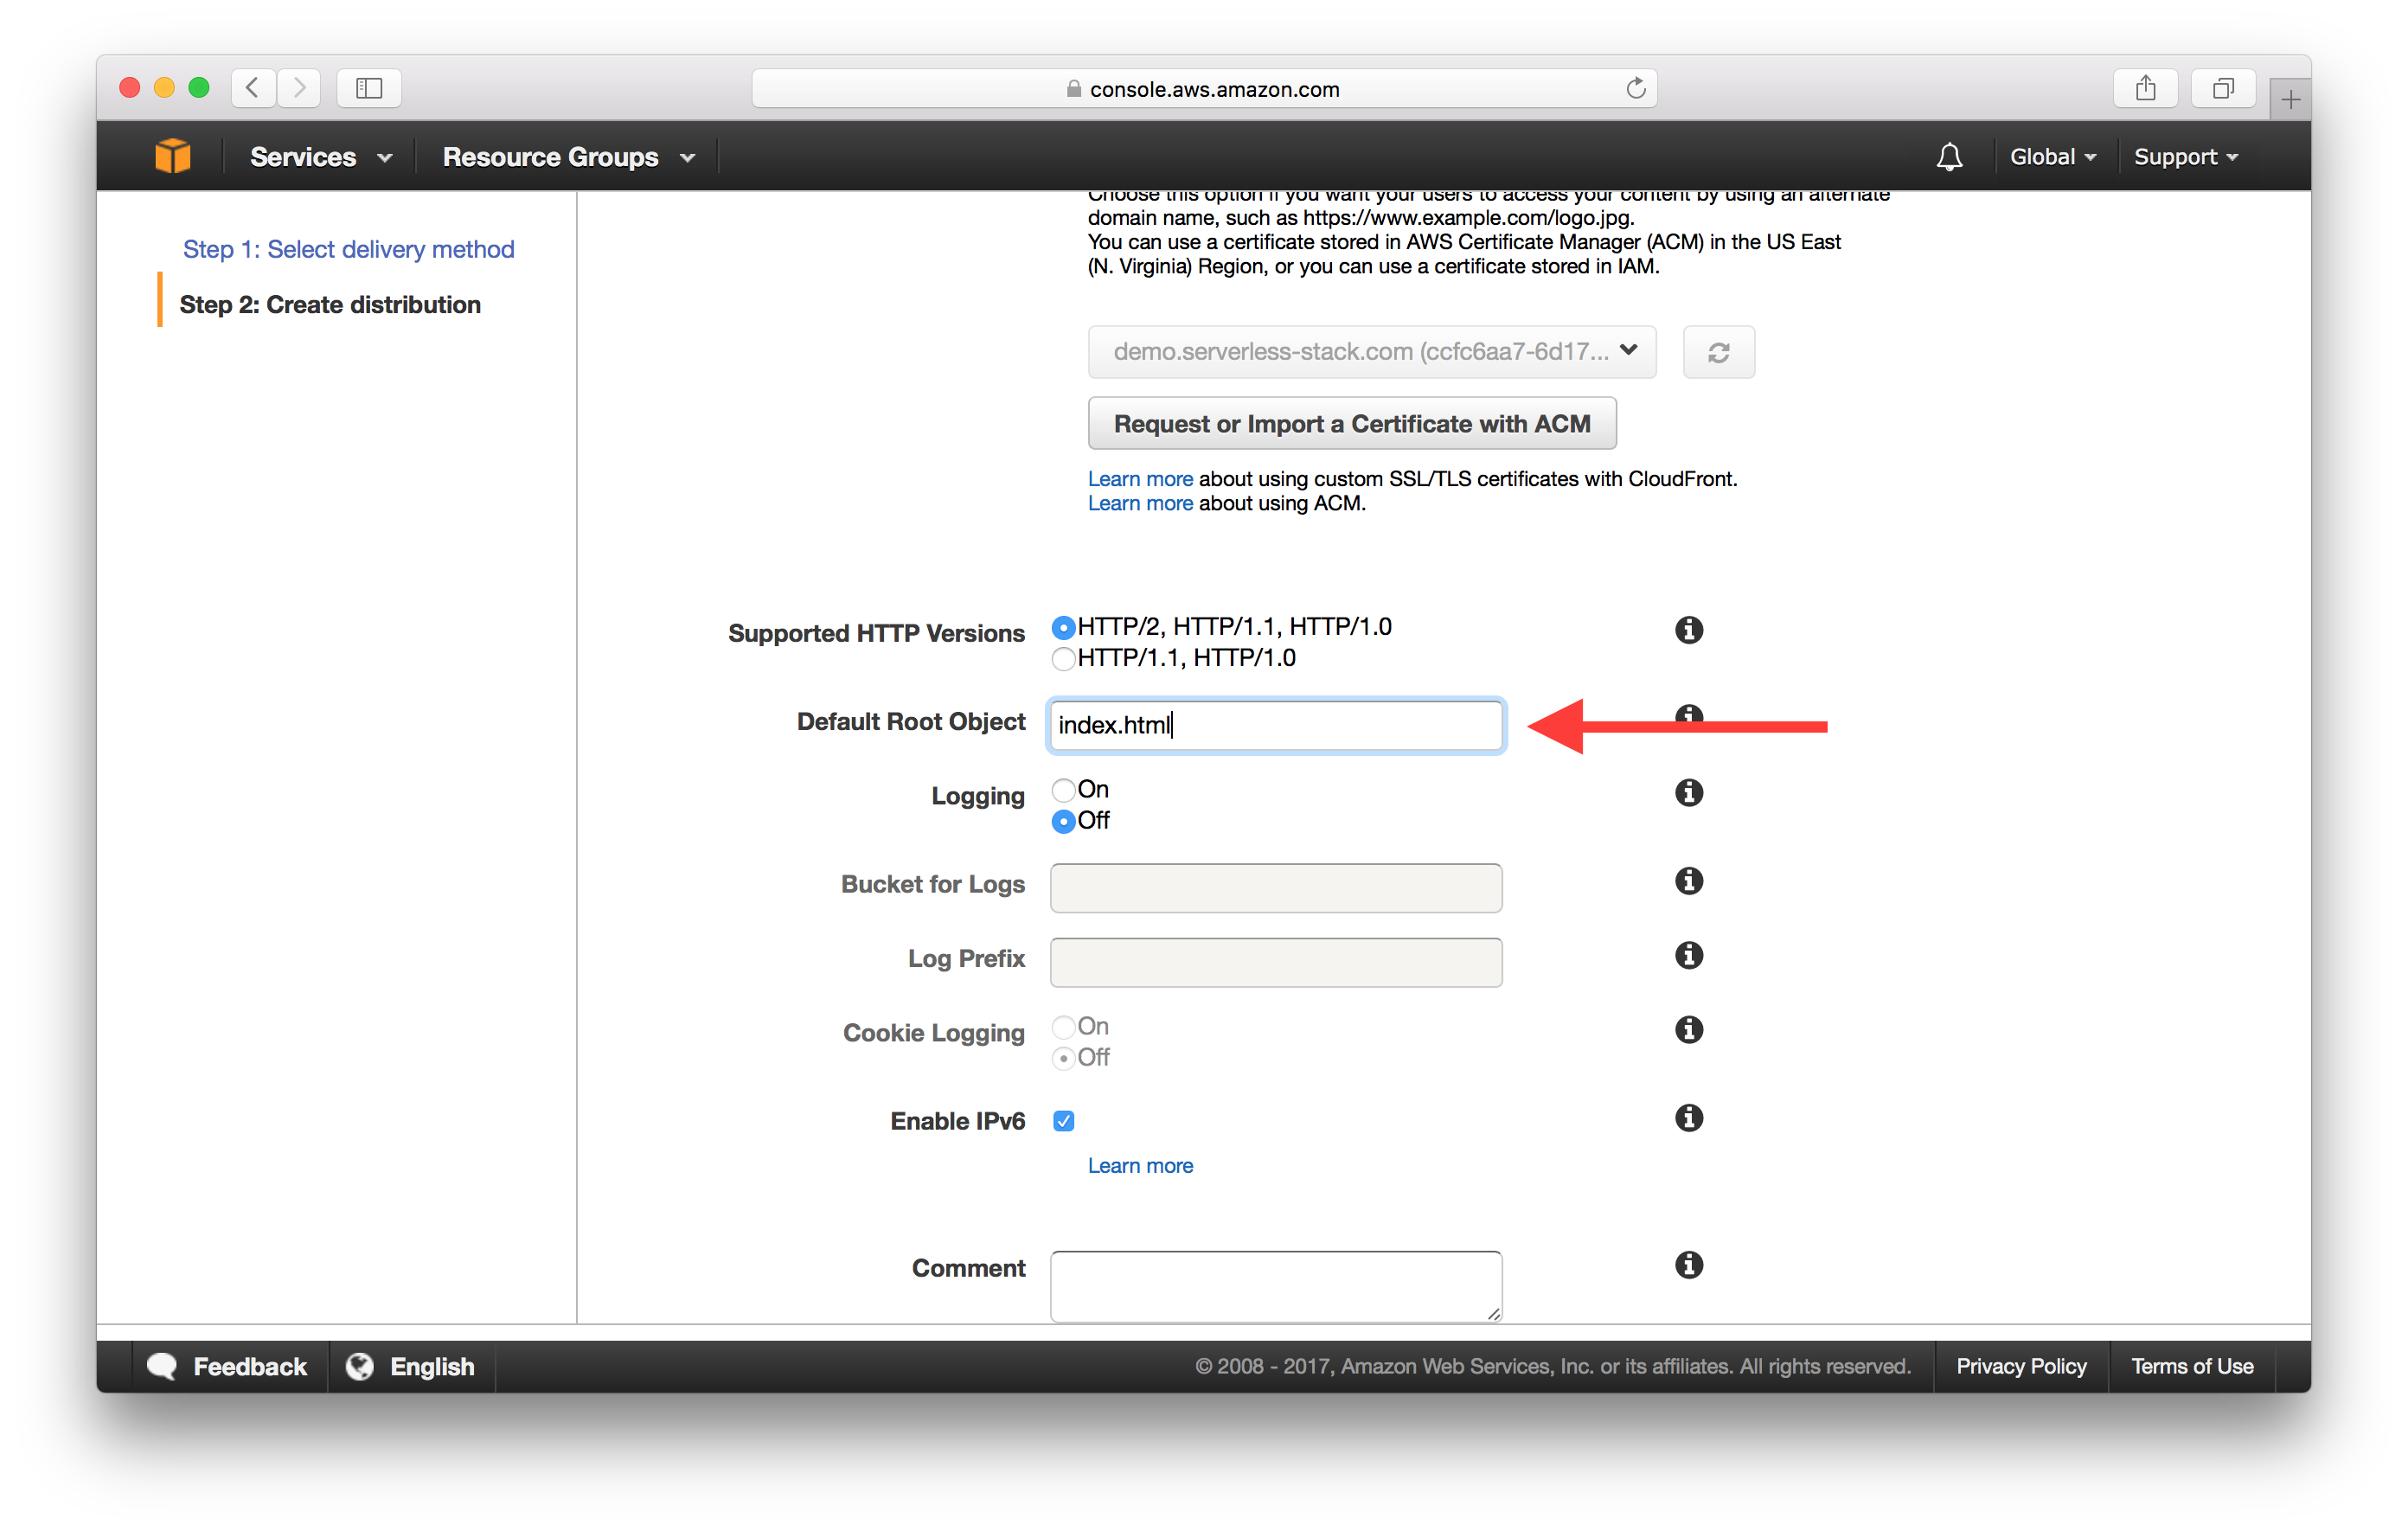
Next, scroll down a bit further to set the Default Root Object to index.html.
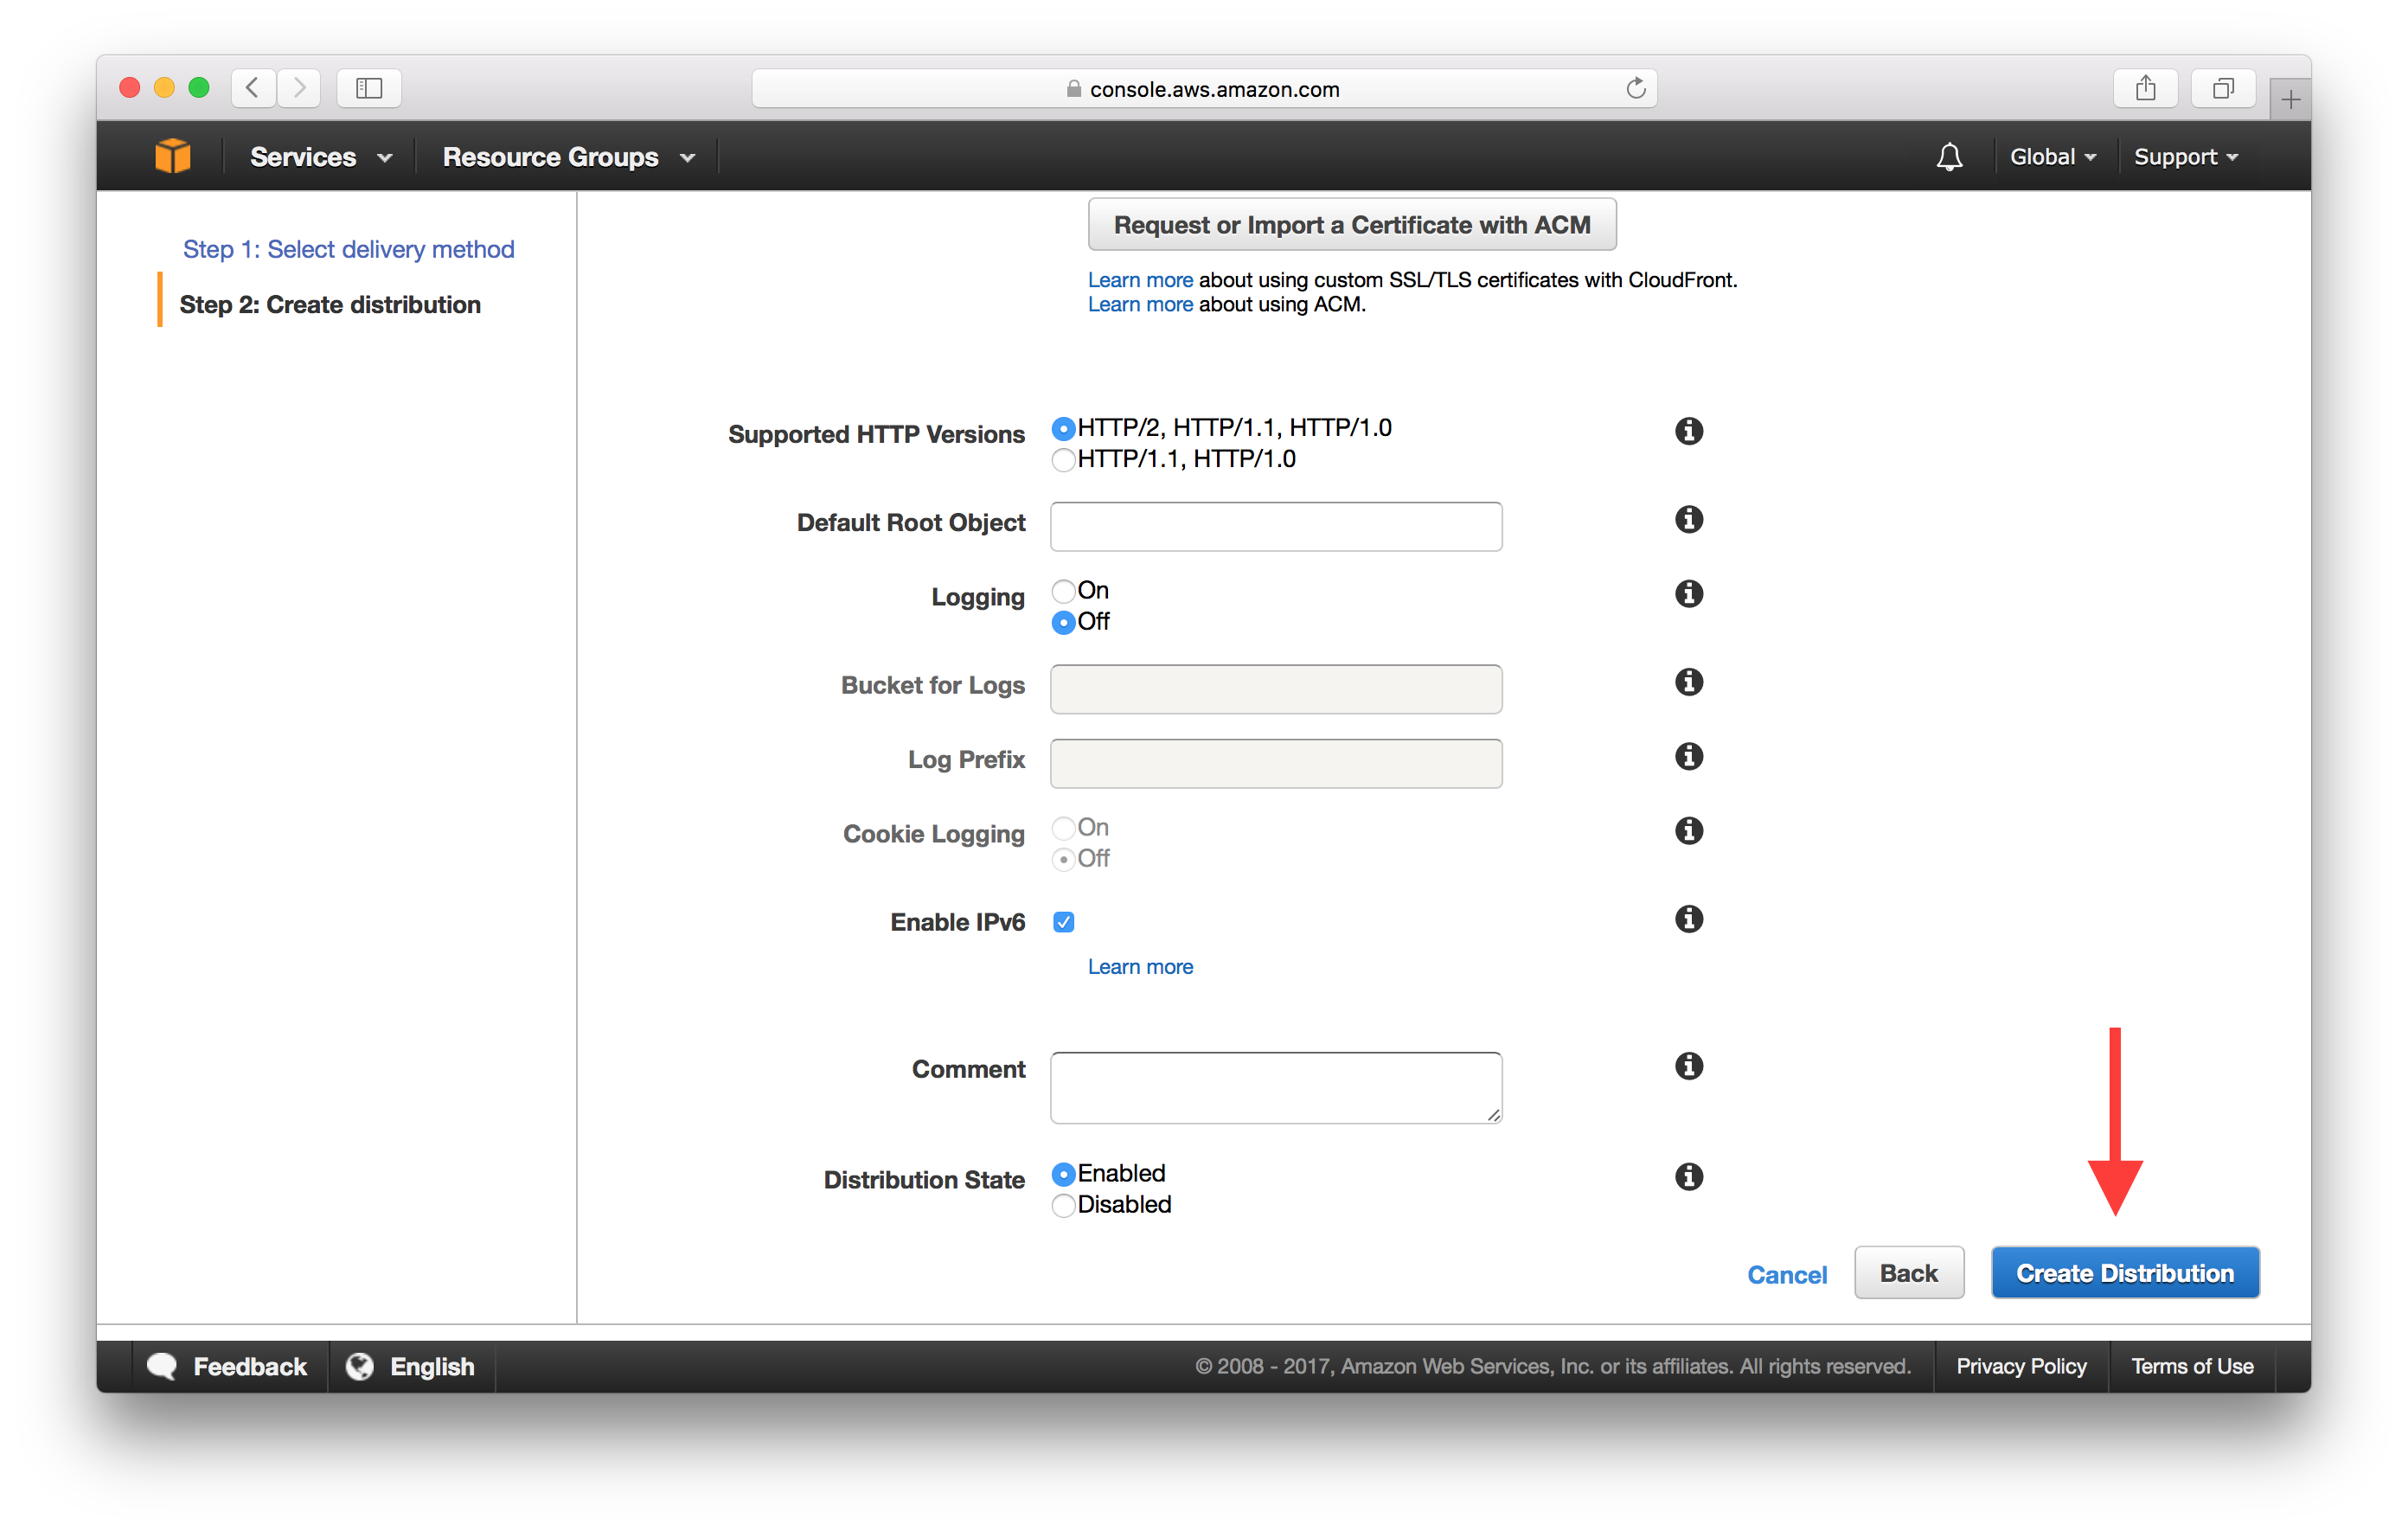
And finally, hit Create Distribution.
It takes AWS a little while to create a distribution. But once it is complete you can find your CloudFront Distribution by clicking on your newly created distribution from the list and looking up its domain name.
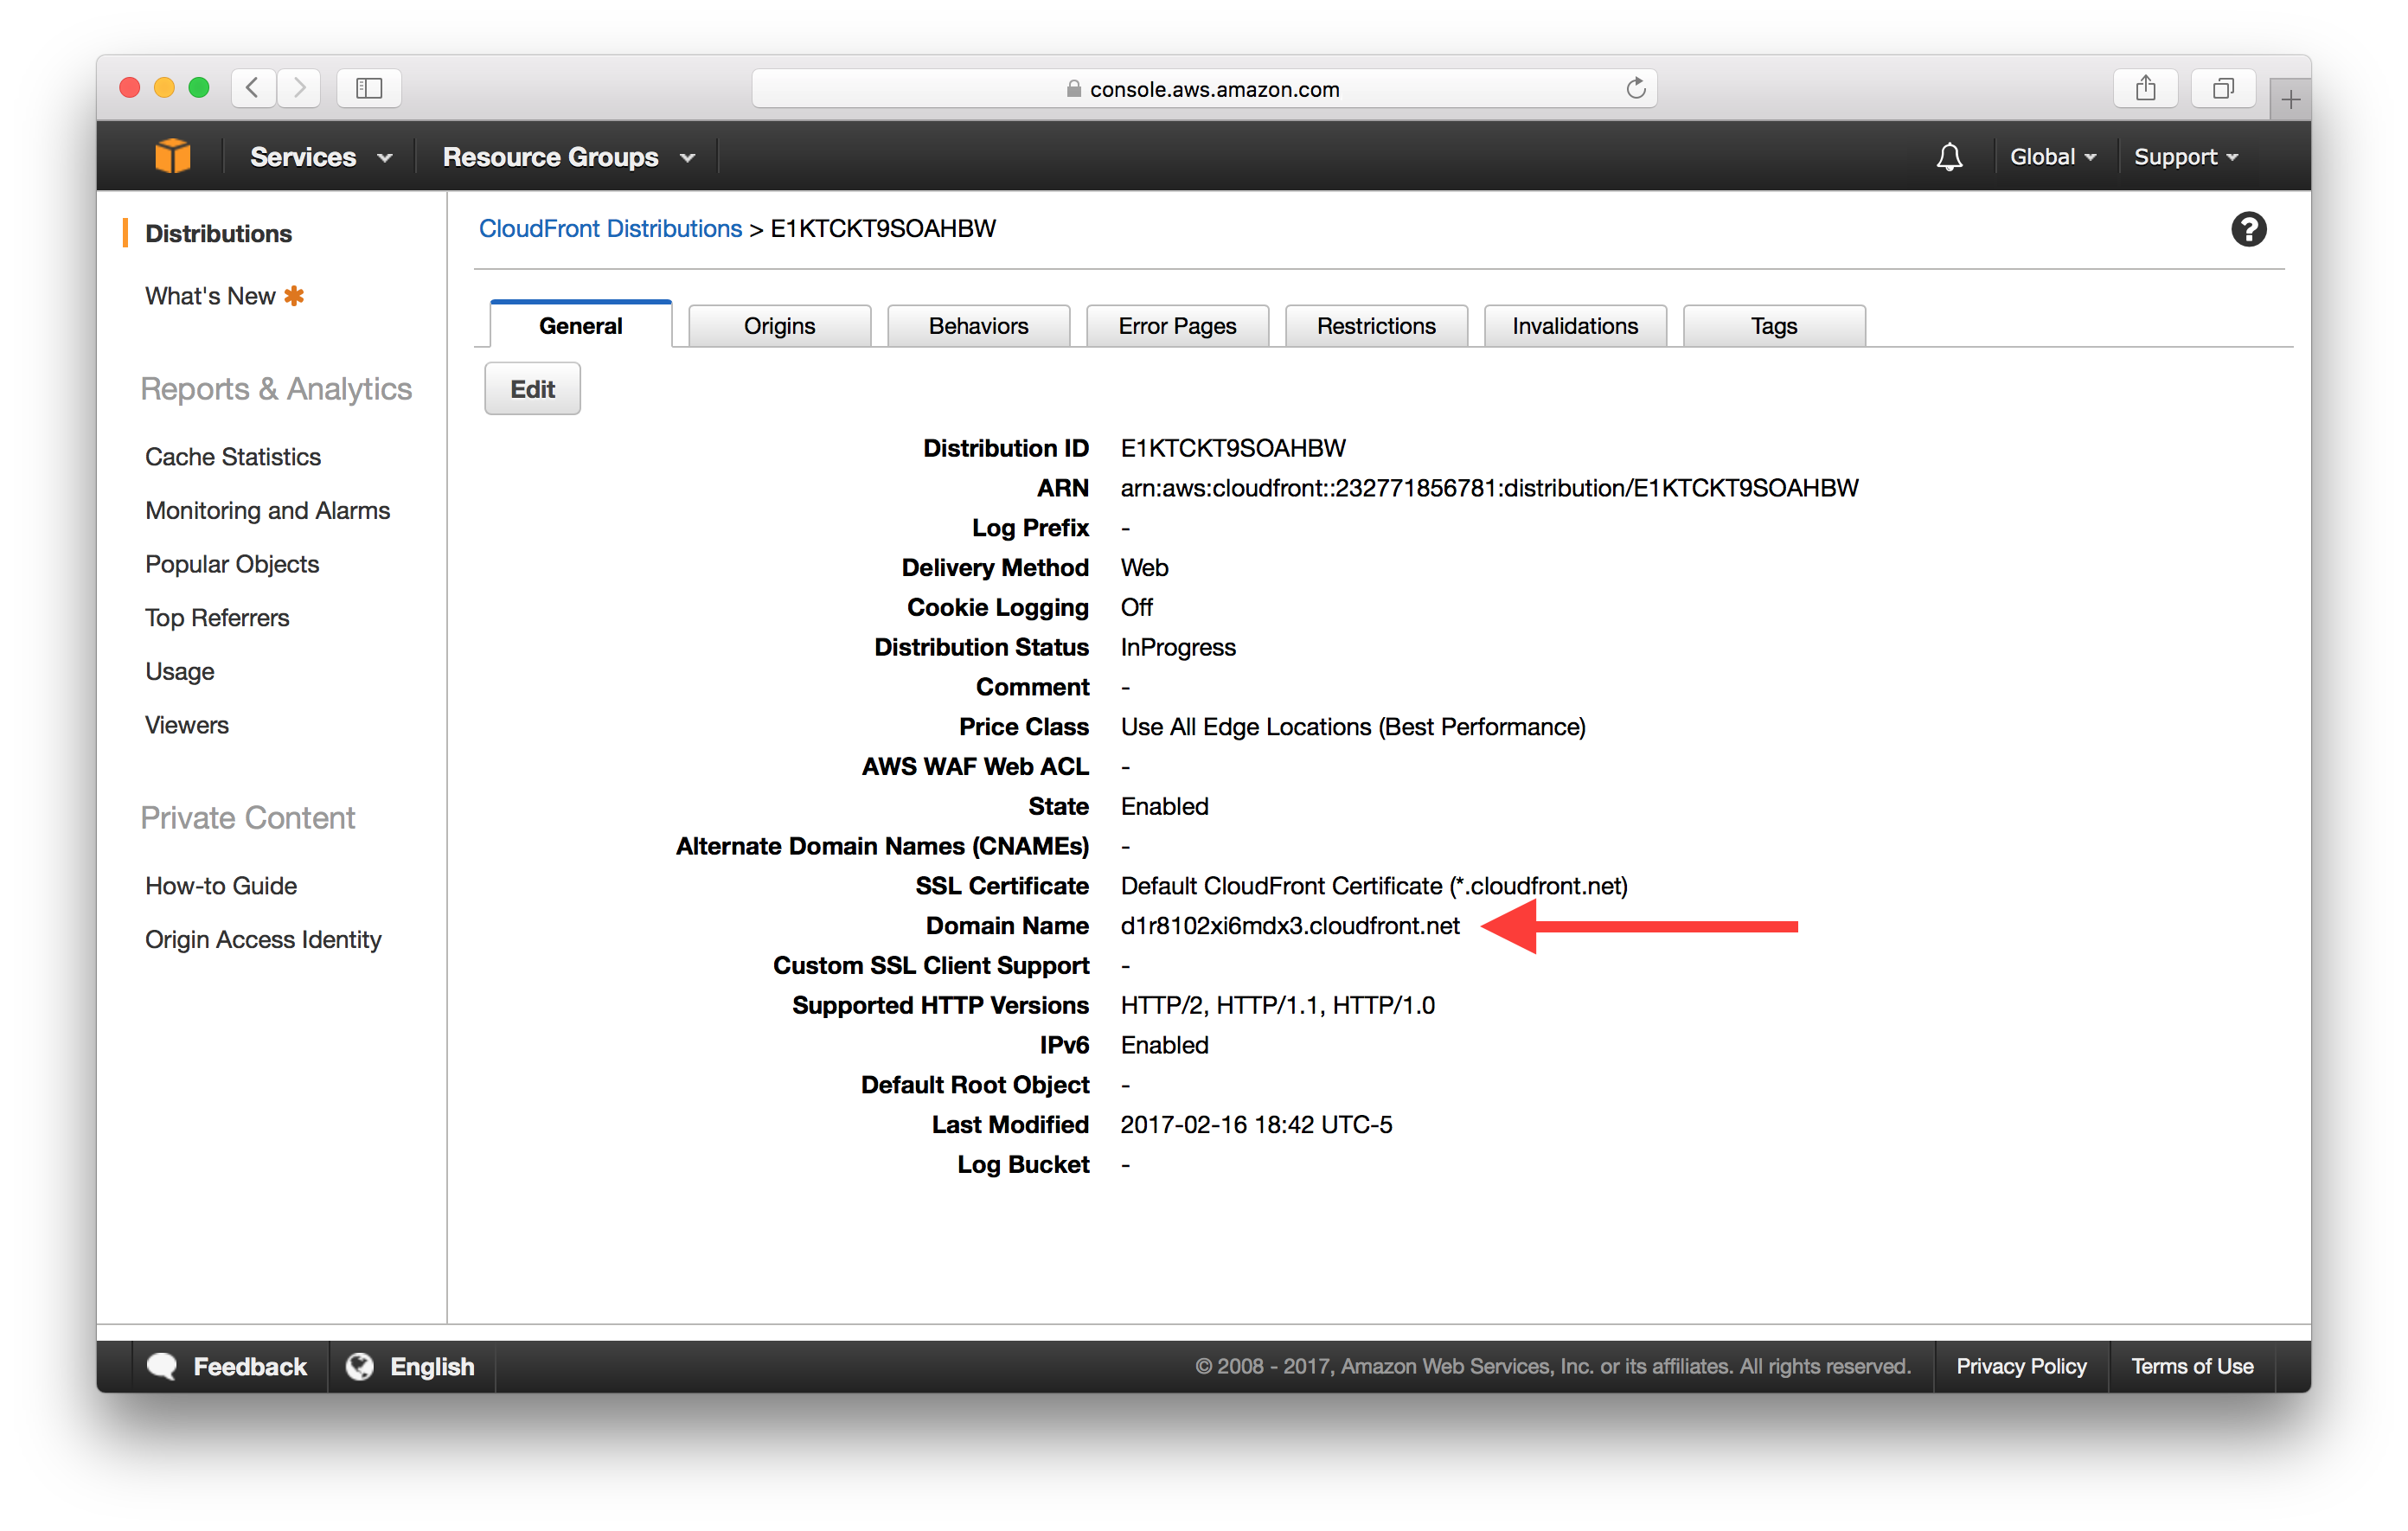
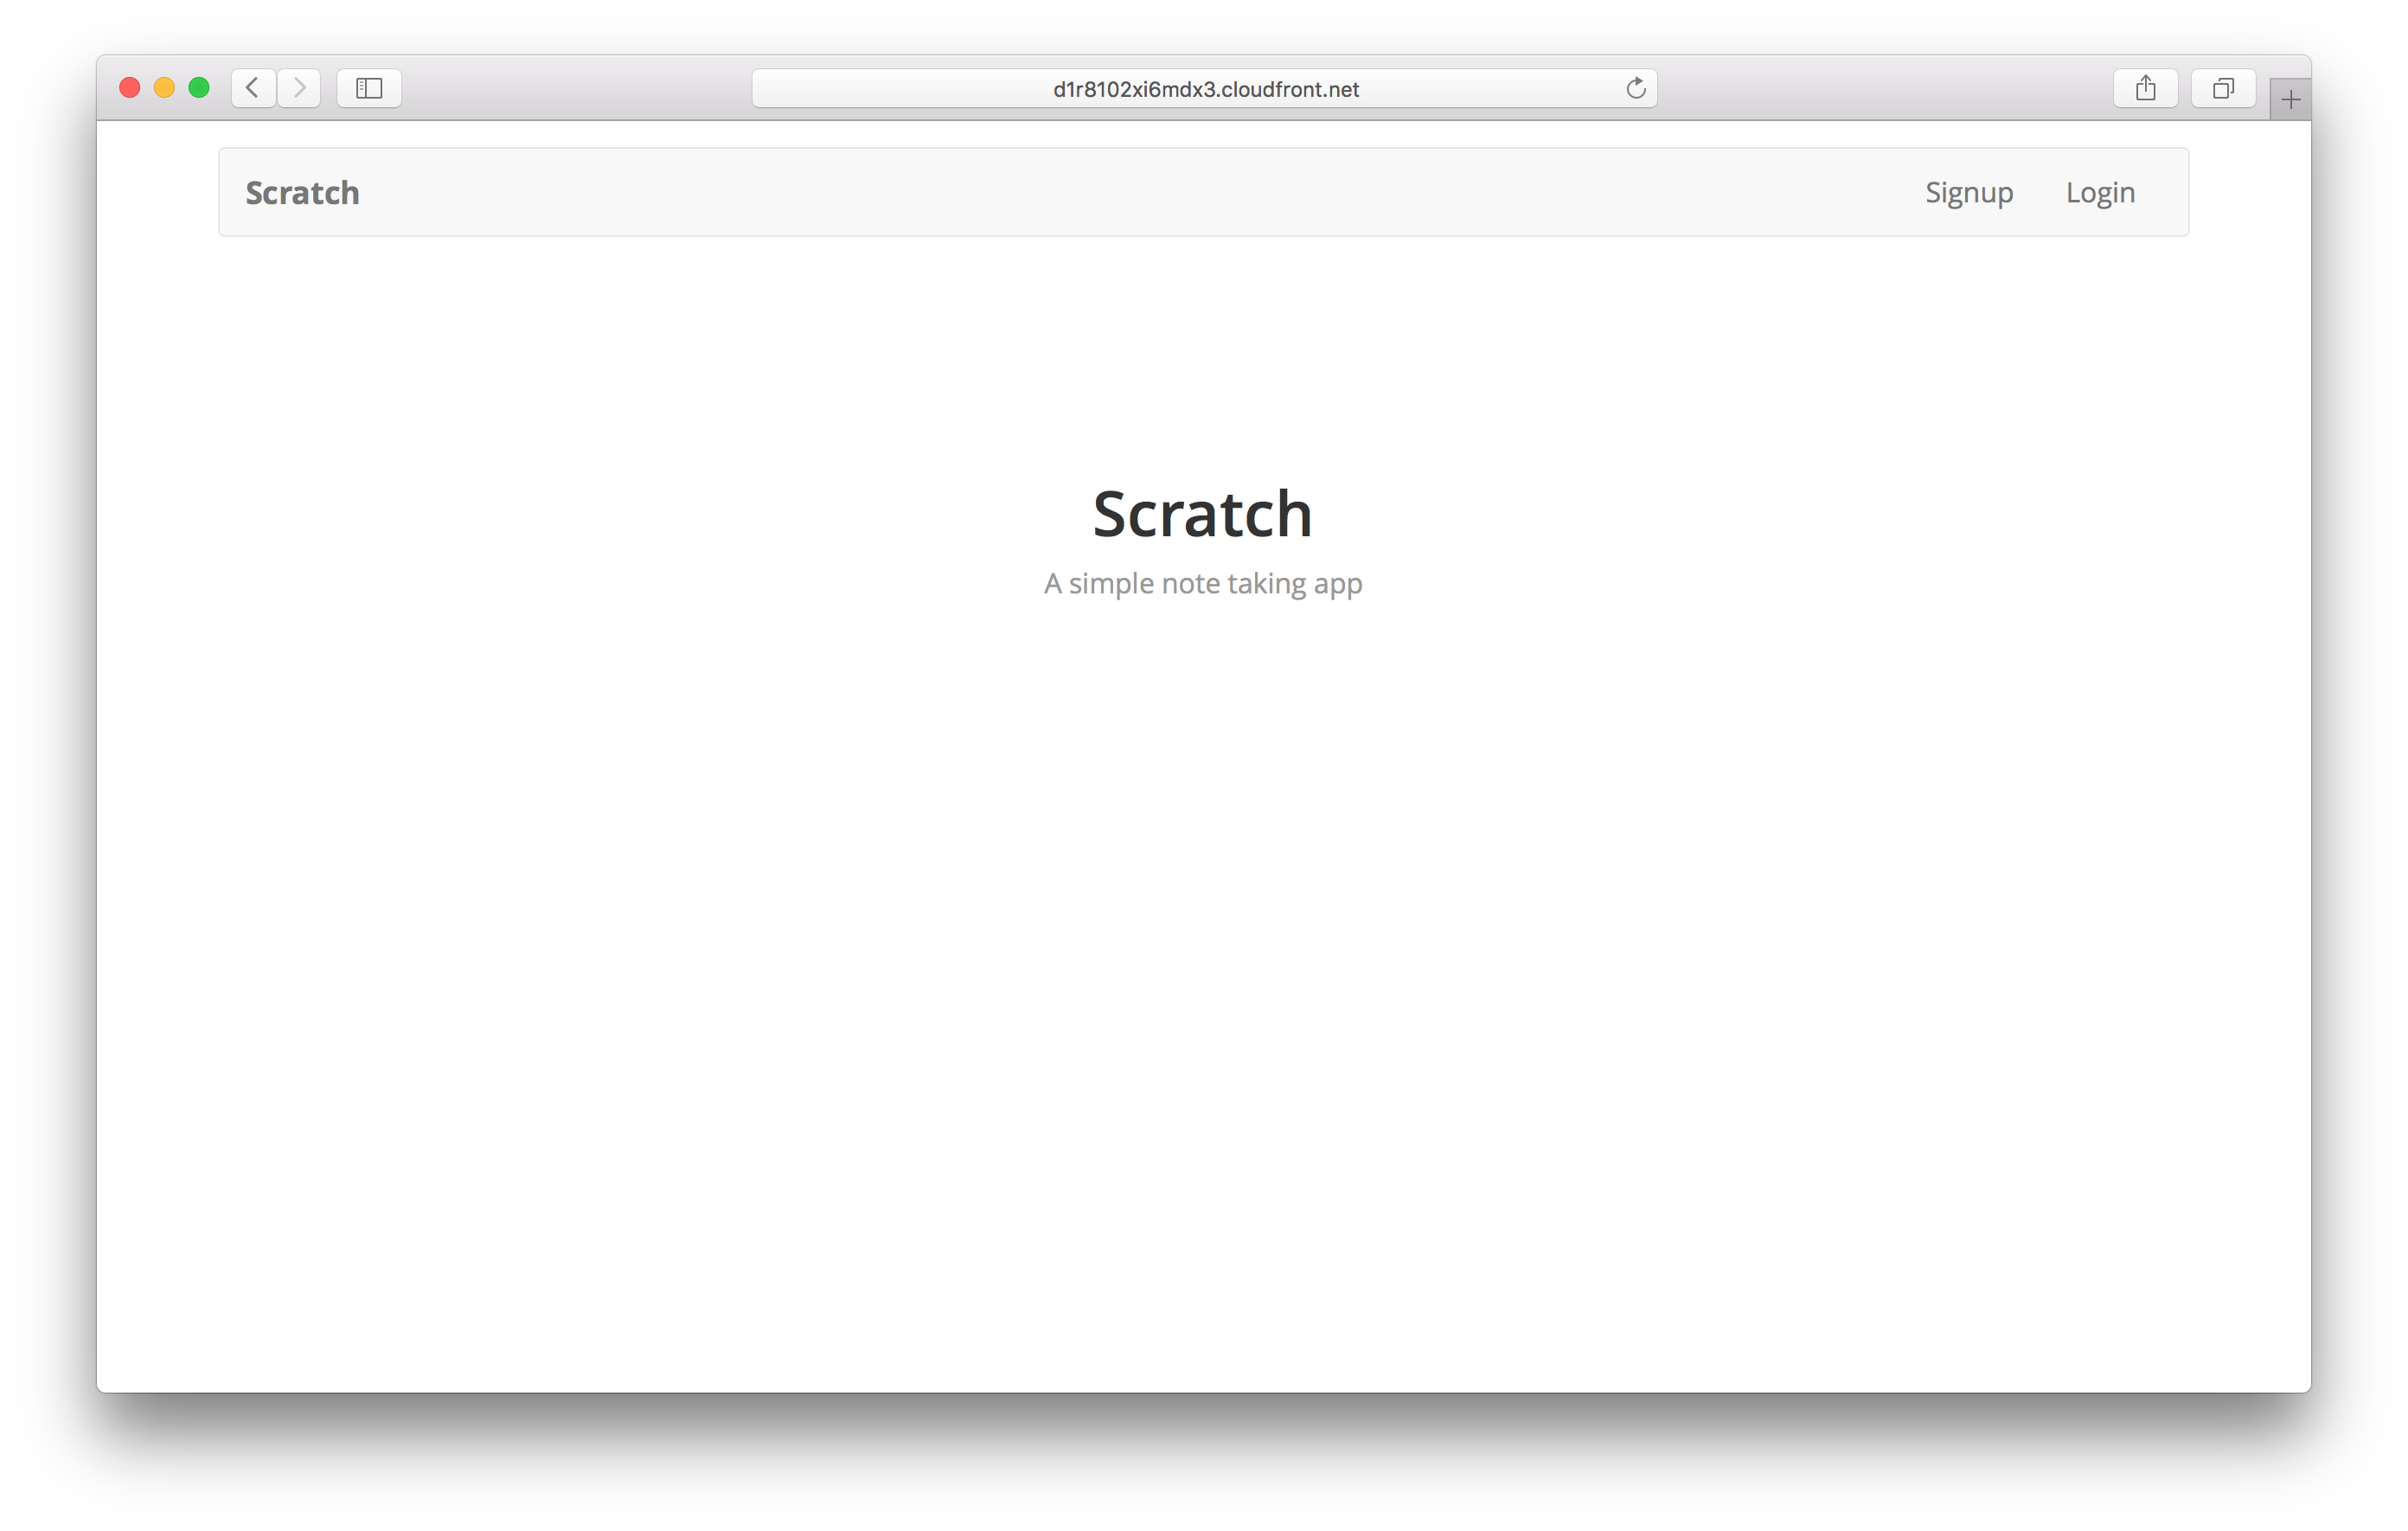
And if you navigate over to that in your browser, you should see your app live.
Now before we move on there is one last thing we need to do. Currently, our static website returns our index.html as the error page. We set this up back in the chapter where we created our S3 bucket. However, it returns a HTTP status code of 404 when it does so. We want to return the index.html but since the routing is handled by React Router; it does not make sense that we return the 404 HTTP status code. One of the issues with this is that certain corporate firewalls and proxies tend to block 4xx and 5xx responses.
Custom Error Responses
So we are going to create a custom error response and return a 200 status code instead. The downside of this approach is that we are going to be returning 200 even for cases where we don’t have a route in our React Router. Unfortunately, there isn’t a way around this. This is because CloudFront or S3 are not aware of the routes in our React Router.
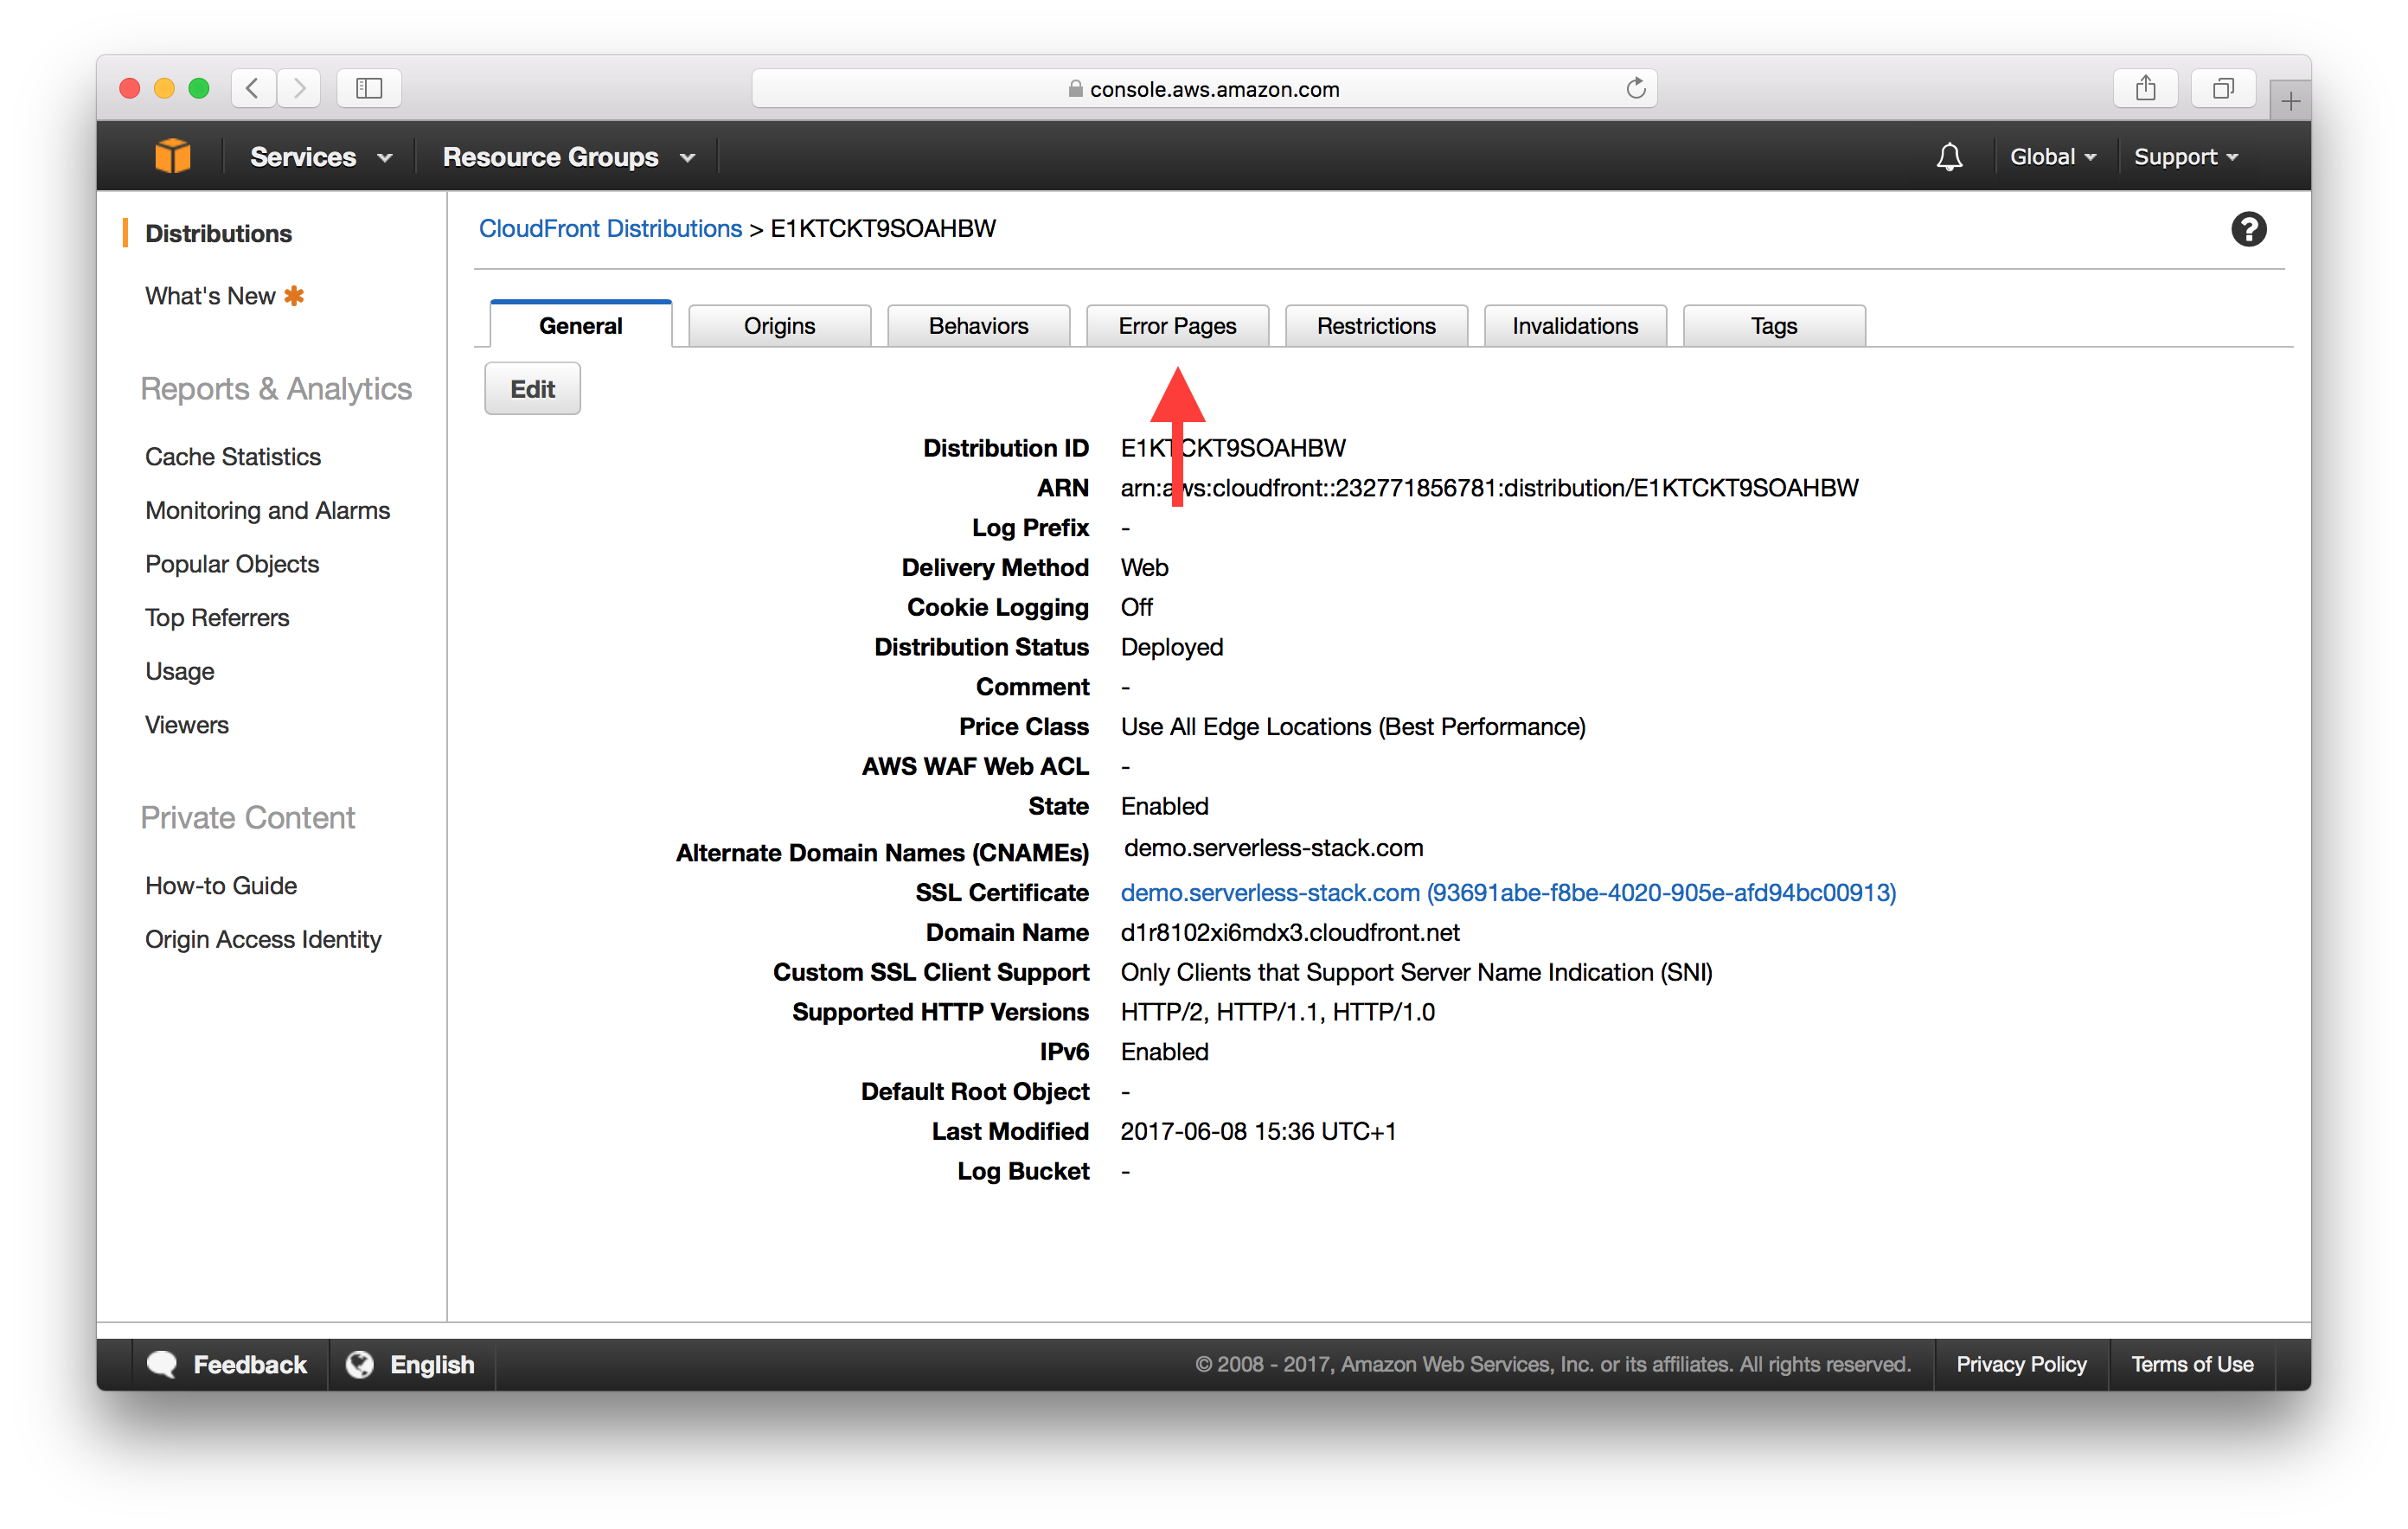
To set up a custom error response, head over to the Error Pages tab in our Distribution.
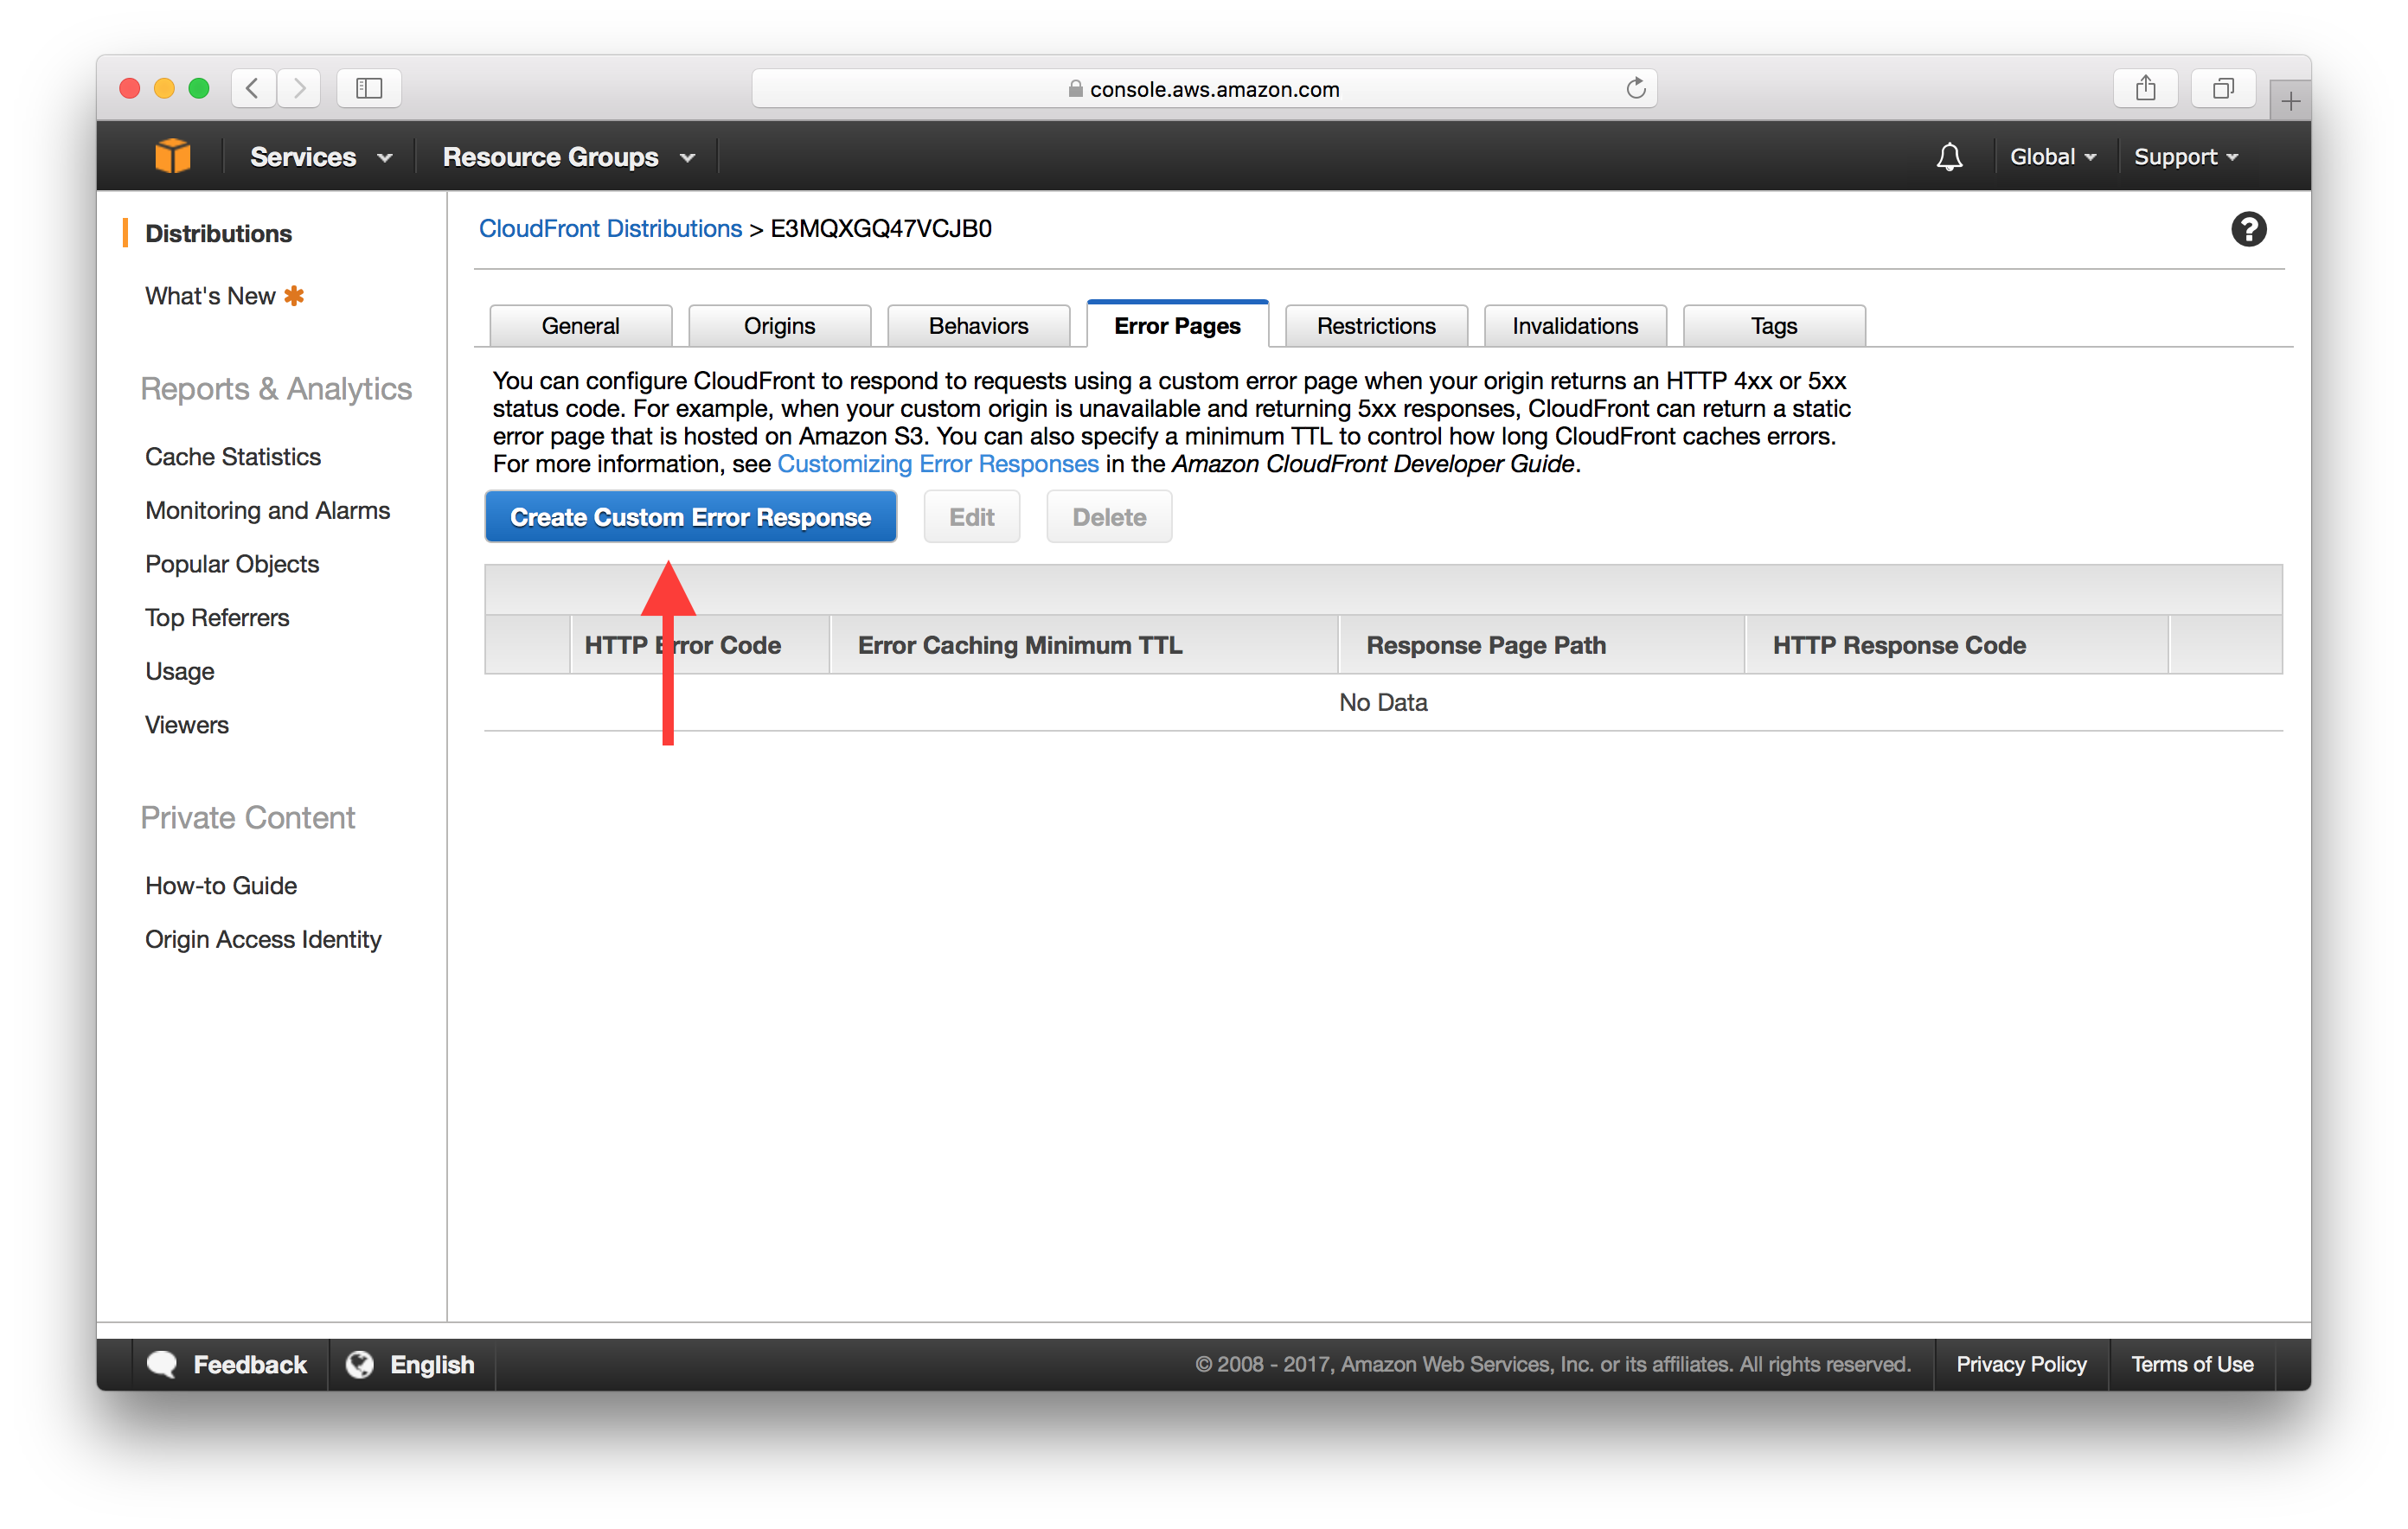
And select Create Custom Error Response.
Pick 404 for the HTTP Error Code and select Customize Error Response. Enter /index.html for the Response Page Path and 200 for the HTTP Response Code.
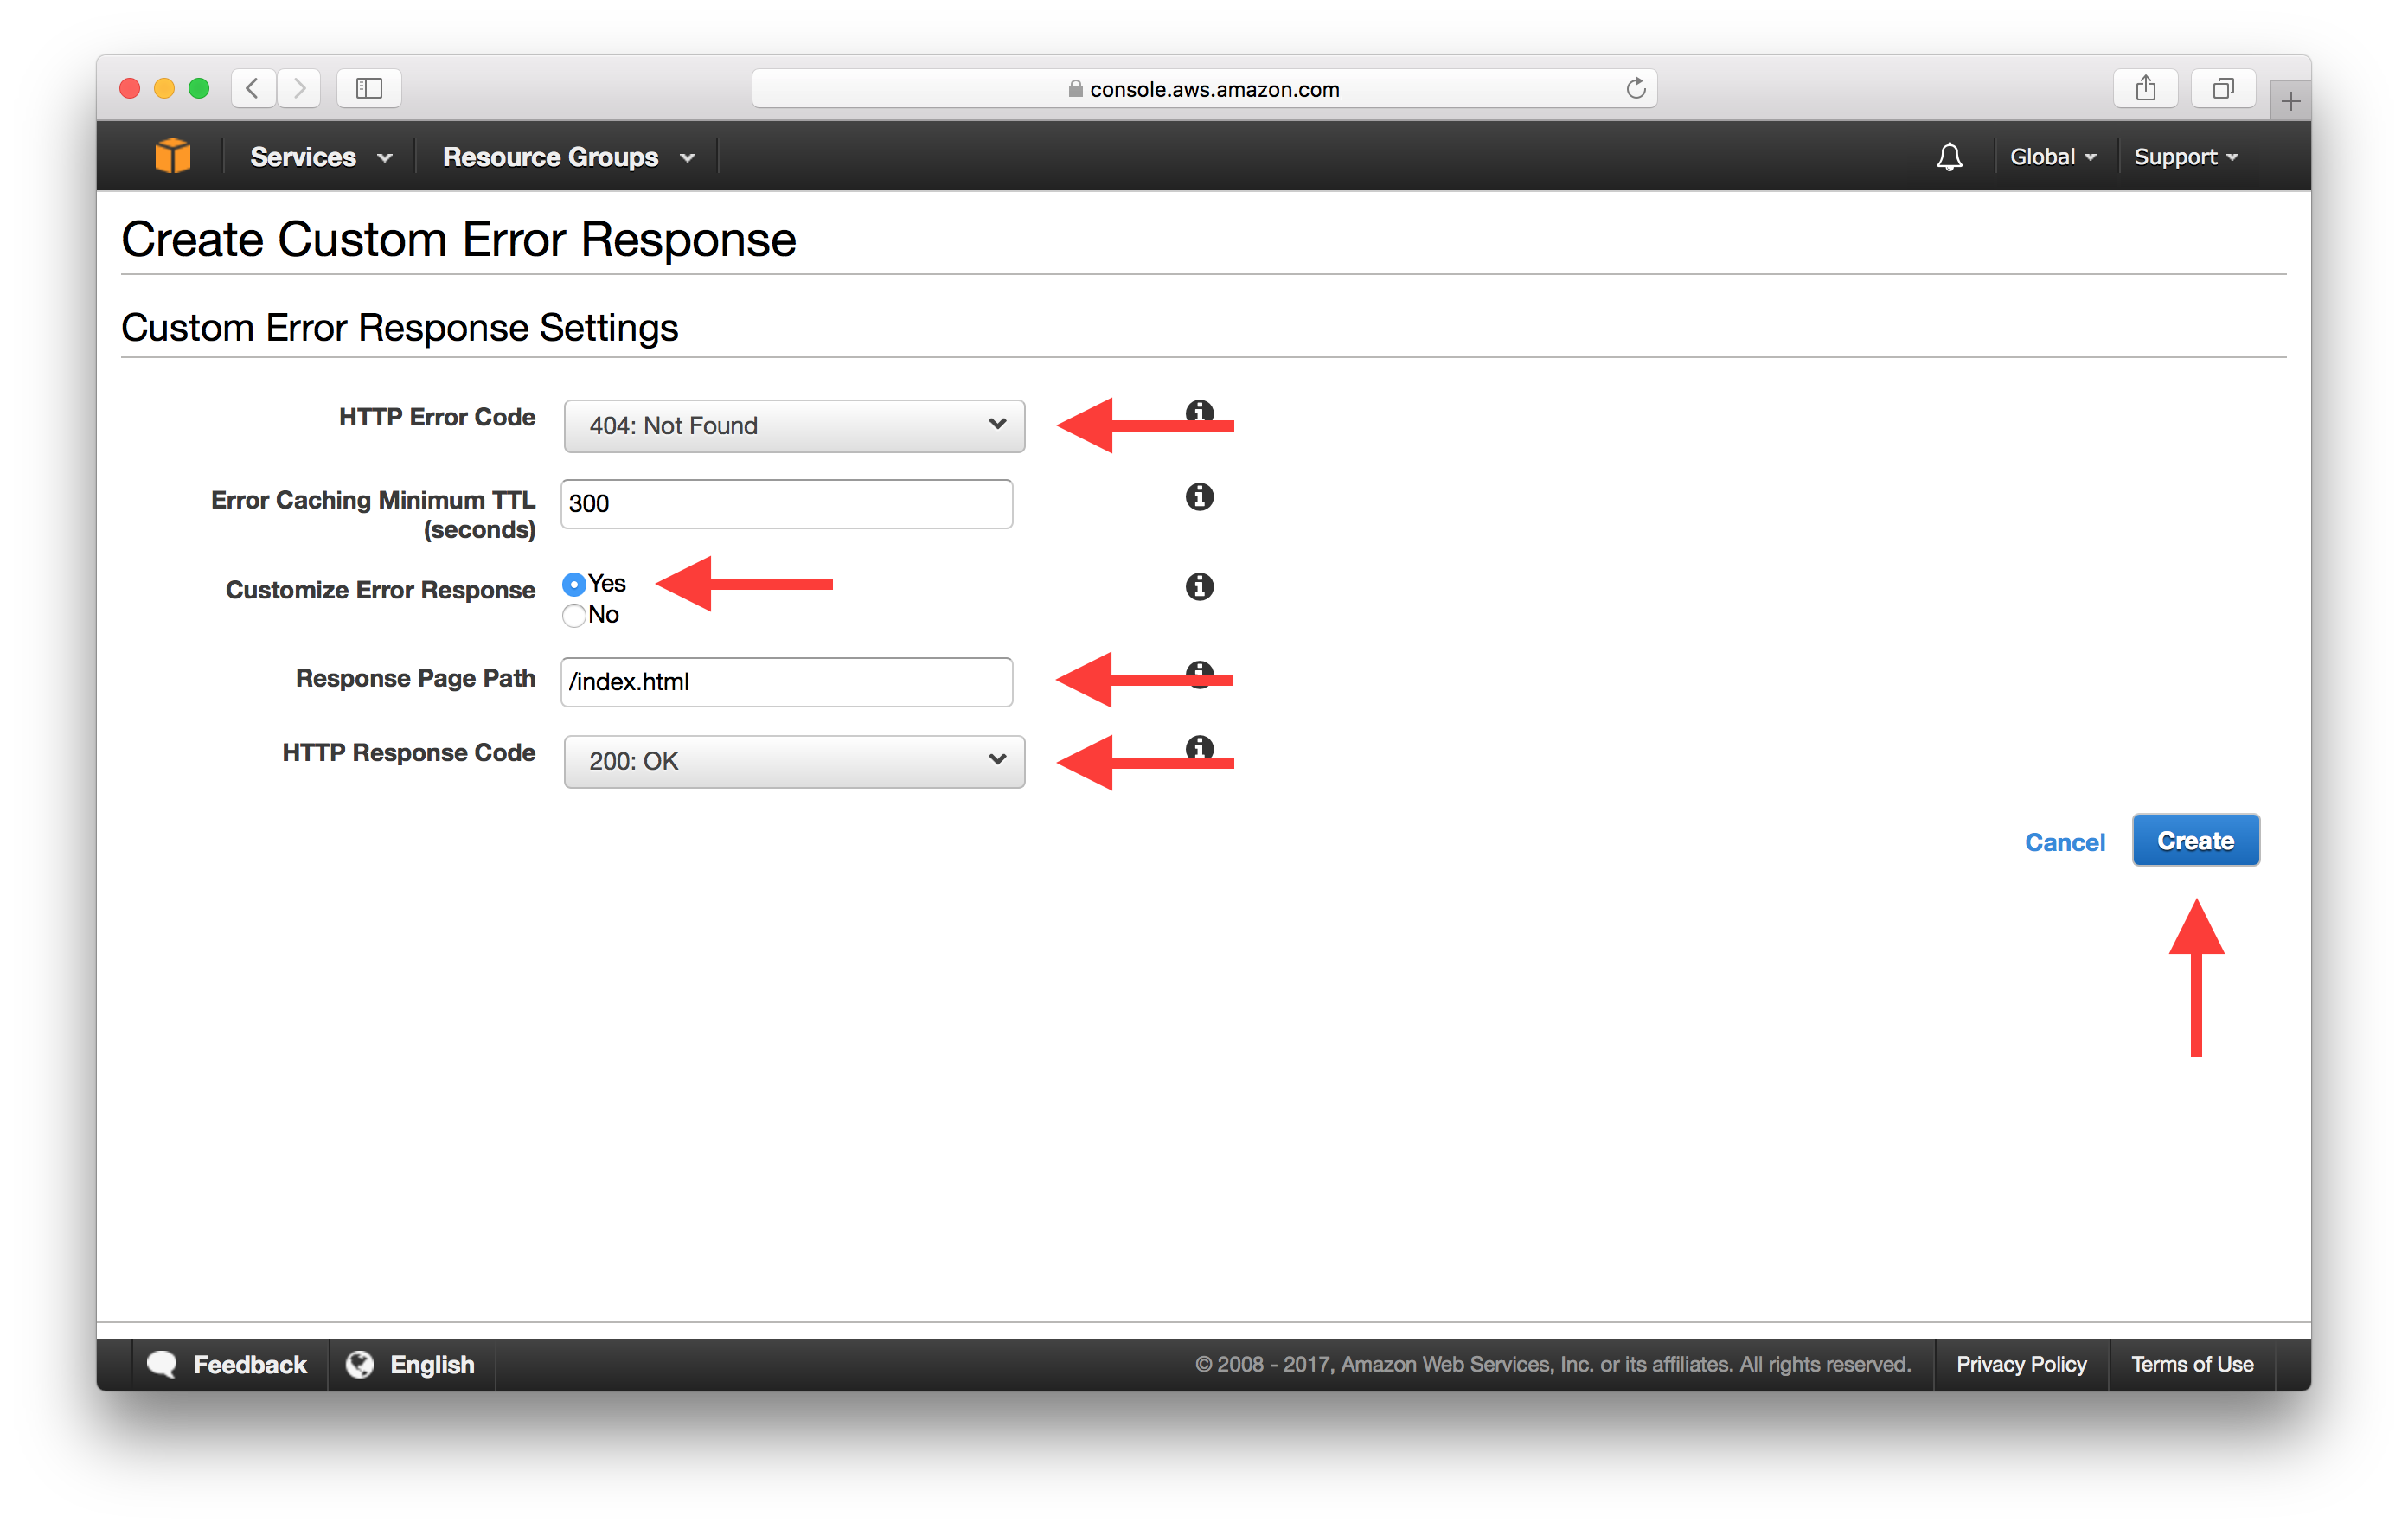
And hit Create. This is basically telling CloudFront to respond to any 404 responses from our S3 bucket with the index.html and a 200 status code. Creating a custom error response should take a couple of minutes to complete.
Next up, let’s point a custom domain to our CloudFront Distribution. And setup SSL.
For help and discussion
Comments on this chapter