Set up a Custom Domain With SSL
Now that our CloudFront Distribution has been created. Let’s configure it with a custom domain and setup SSL.
Setup a New Domain
Let’s start by setting up your custom domain.
- If you have an existing domain that is not on AWS, follow these docs to move it over to Route 53.
- If you’d like to pruchase a new Route 53 domain, you can follow the step in this chapter — Purchase a Domain with Route 53
Setup SSL
Now that we have our domain, request a certificate to enable us to use SSL or HTTPS with our domain. AWS makes this fairly easy to do, thanks to Certificate Manager.
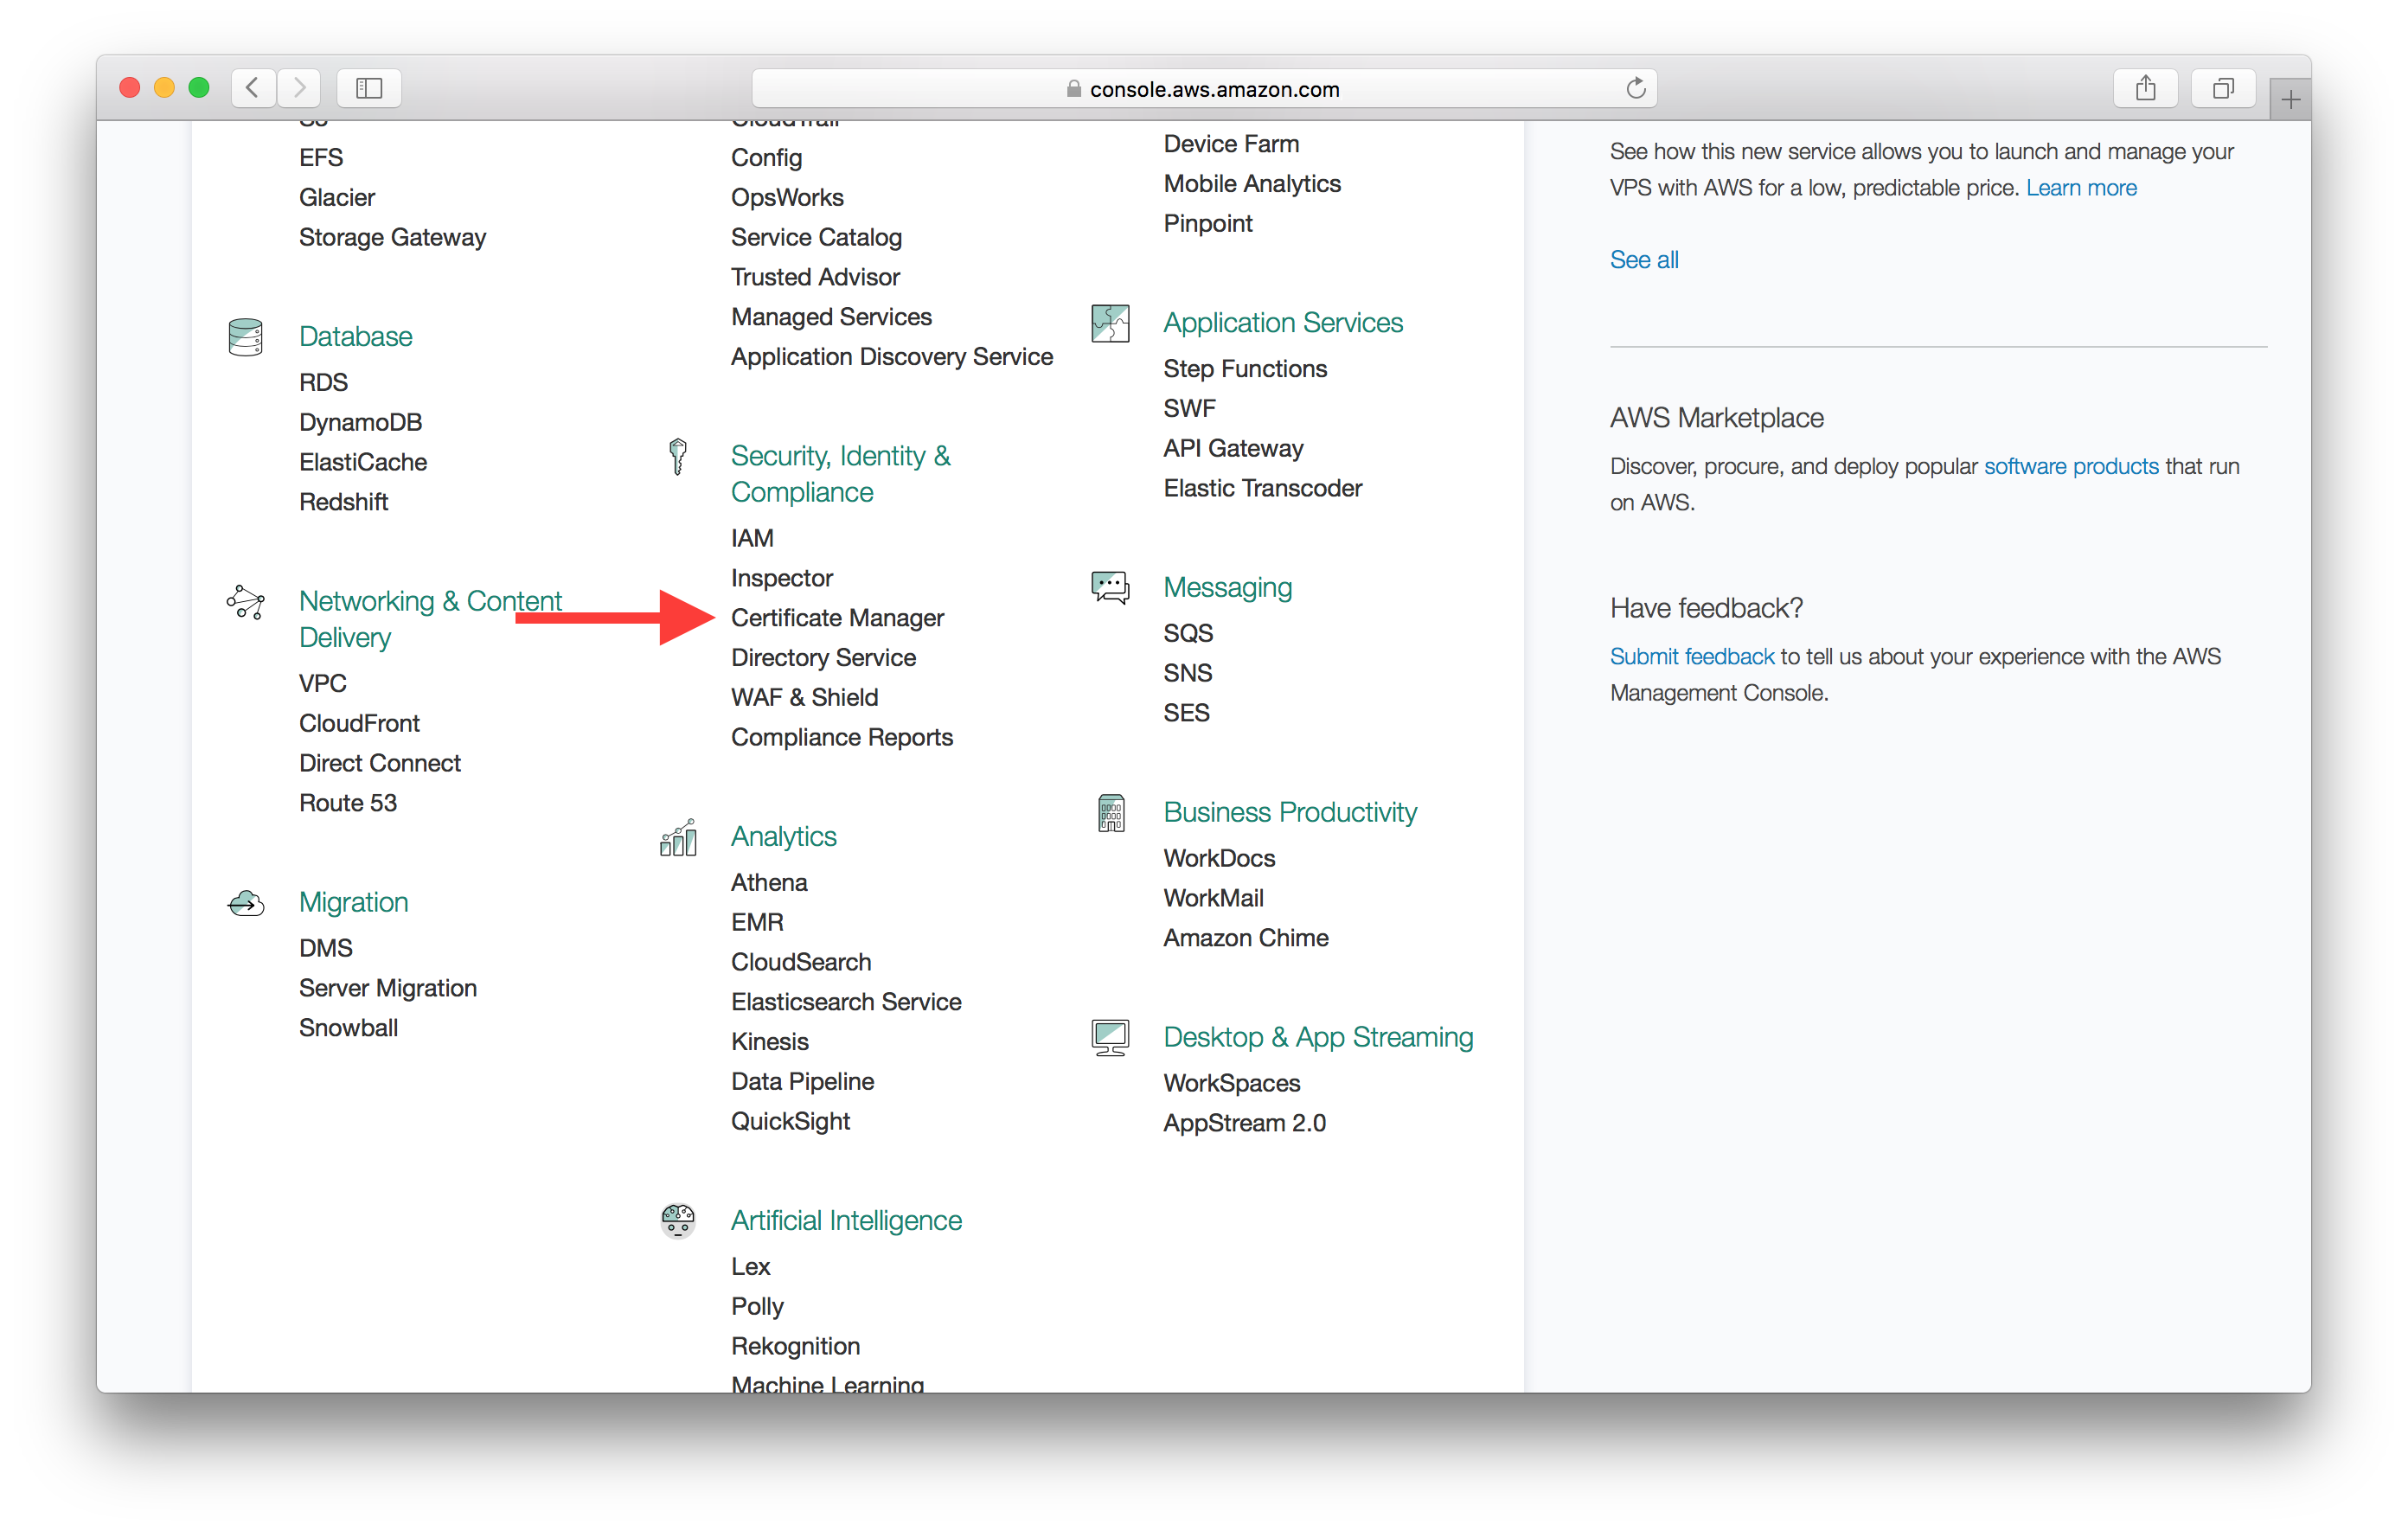
Select Certificate Manager from the list of services in your AWS Console. Ensure that you are in the US East (N. Virginia) region. This is because a certificate needs to be from this region for it to work with CloudFront.
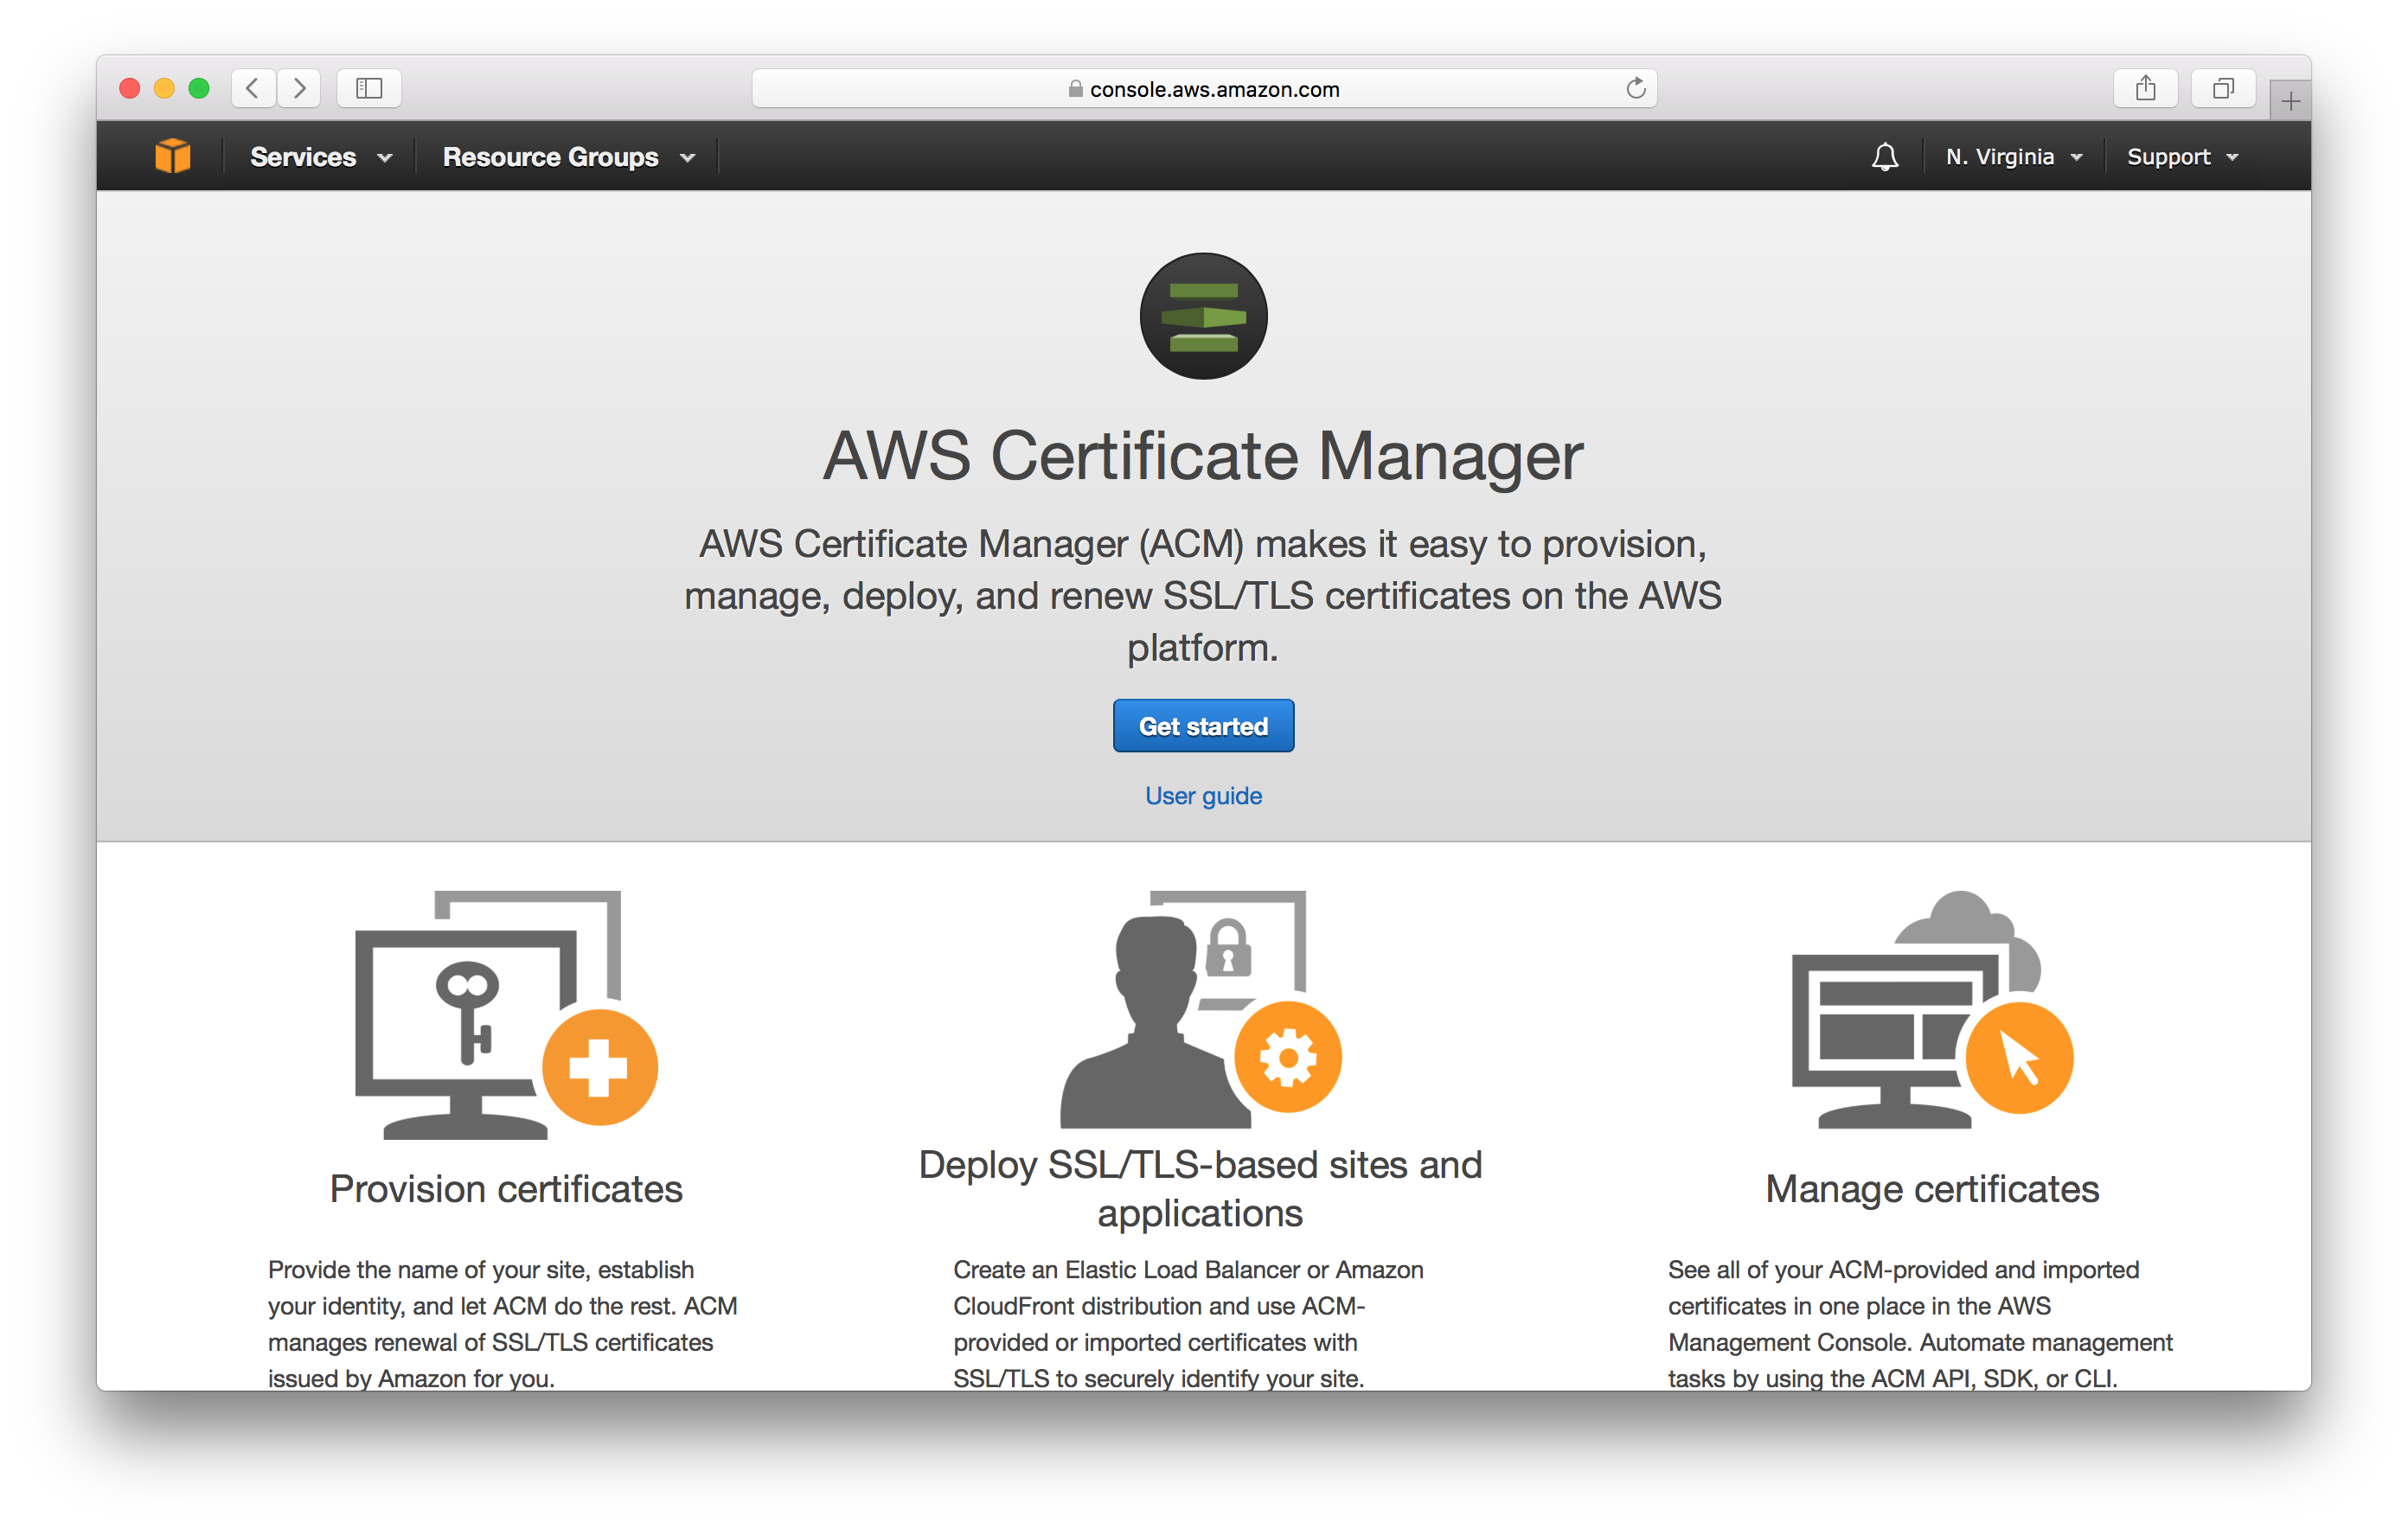
If this is your first certificate, you’ll need to hit Get started. If not then hit Request a certificate from the top.
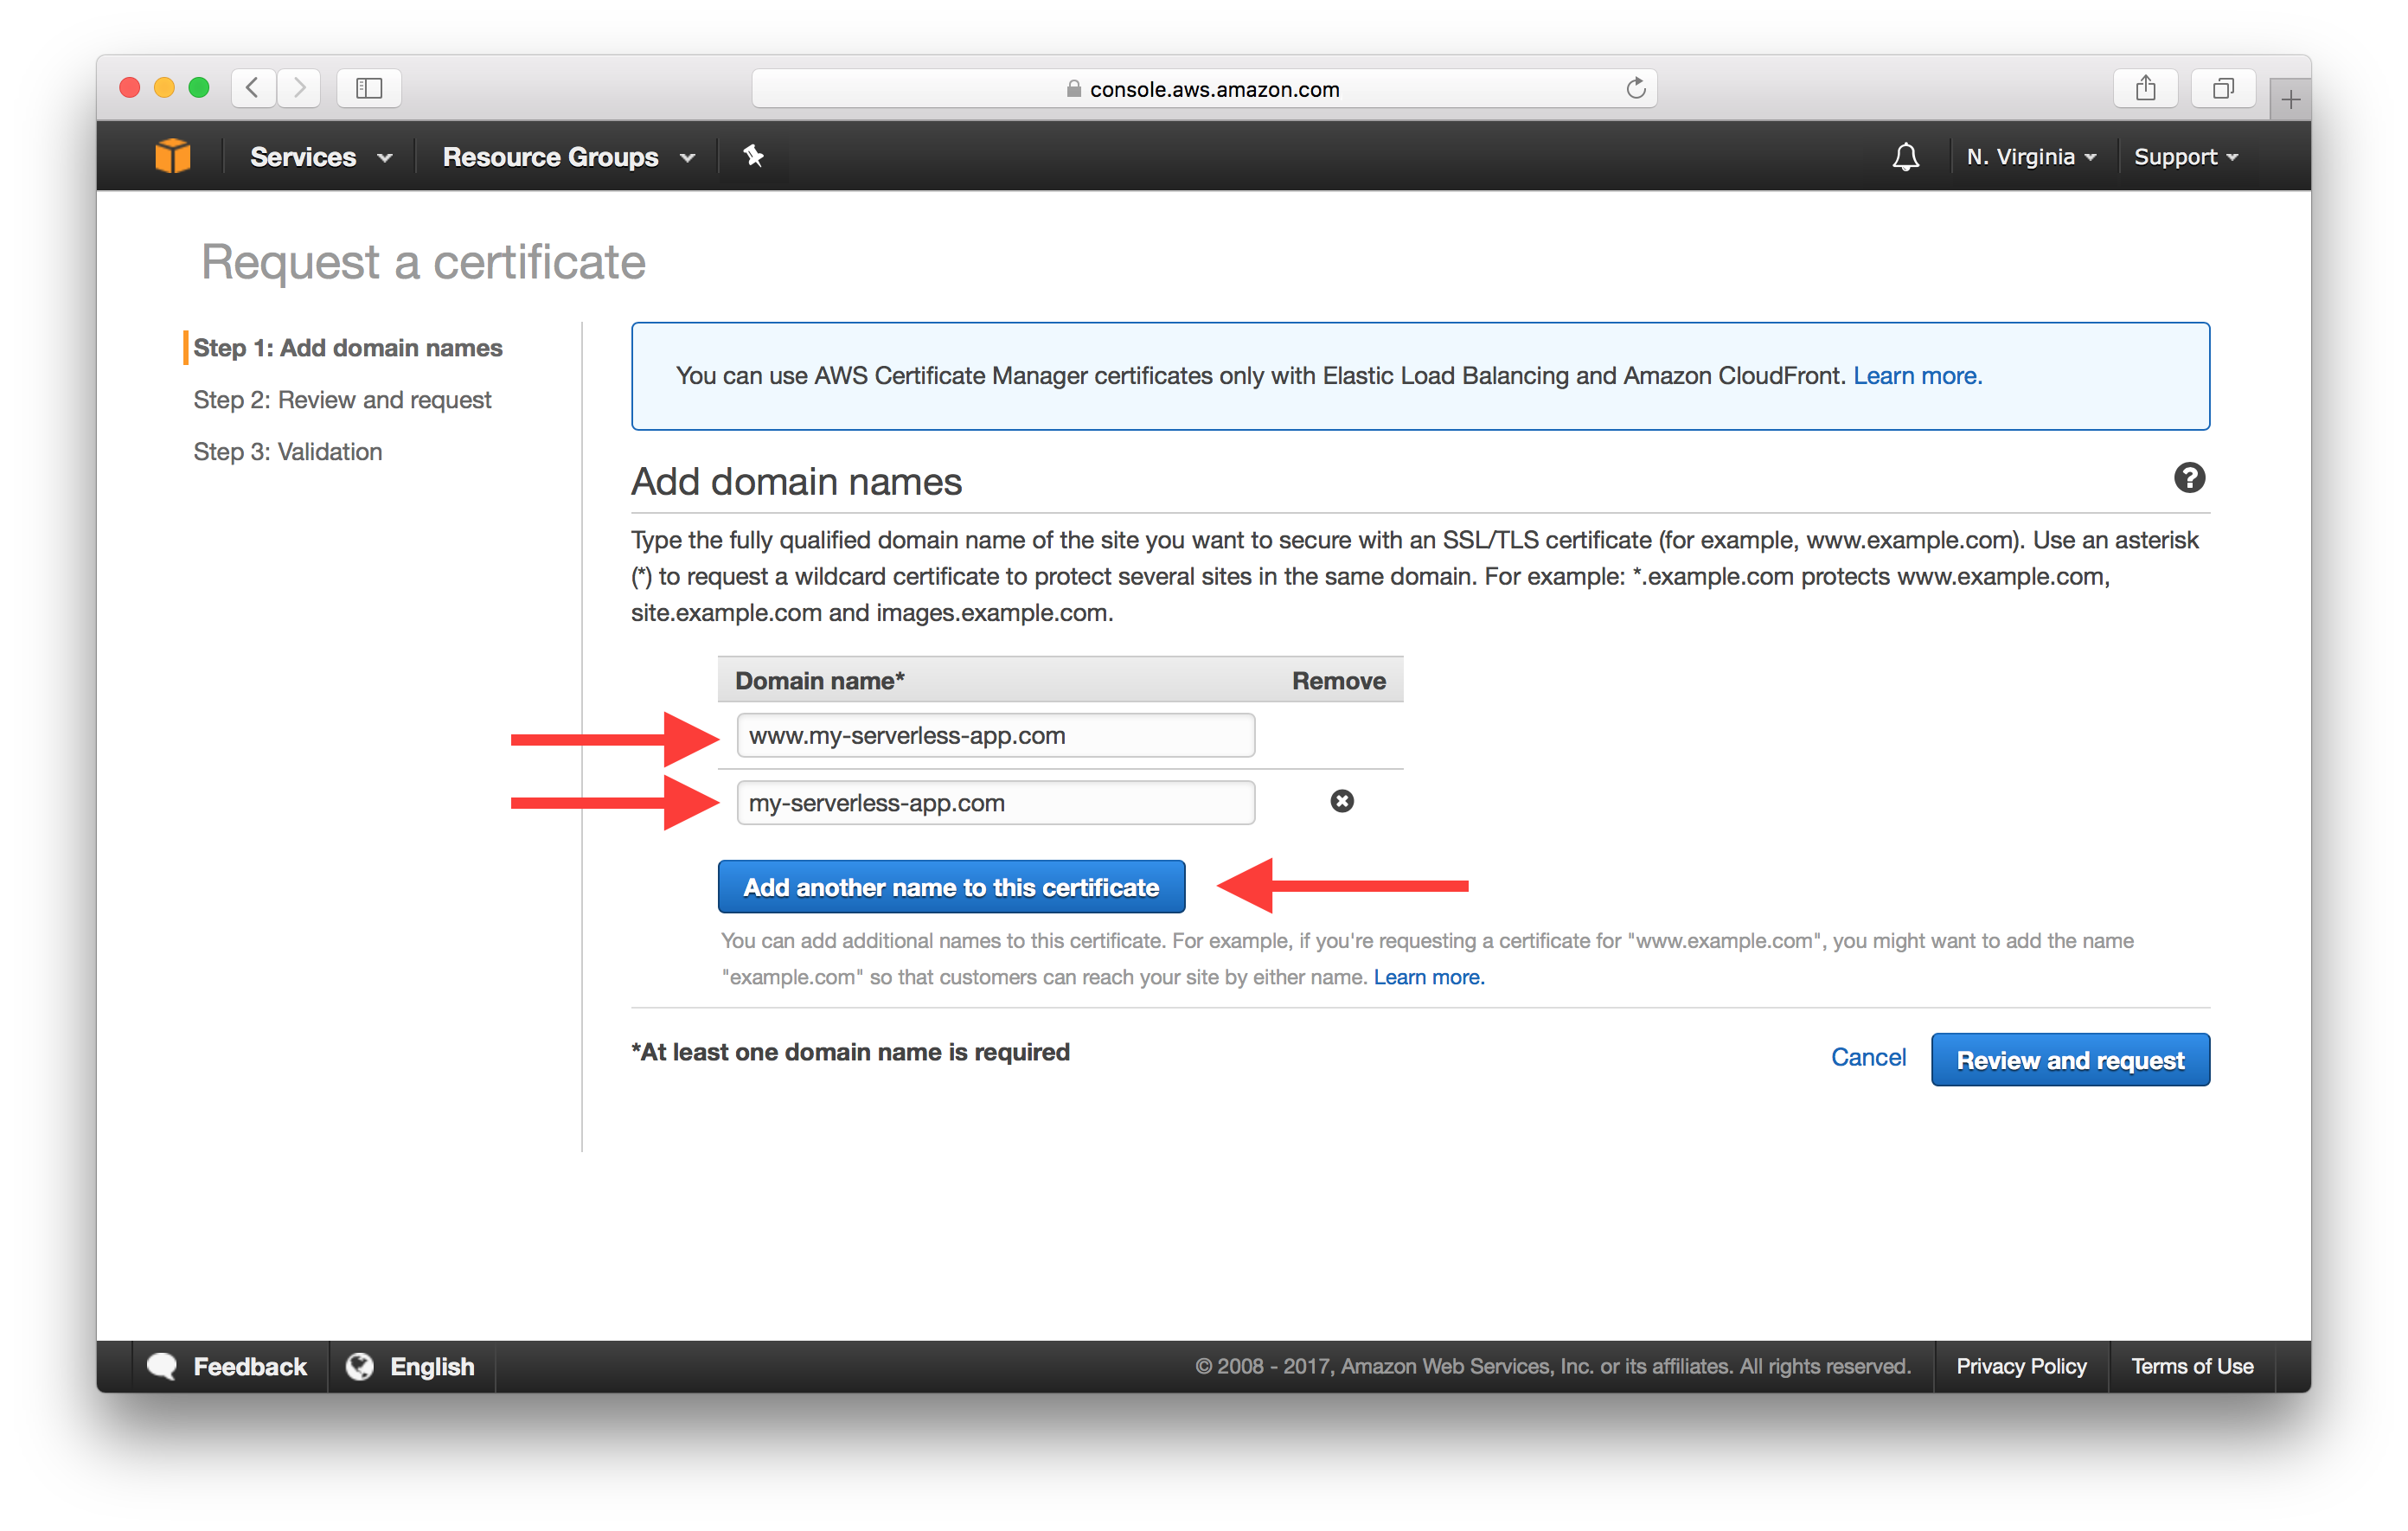
And type in the name of our domain. Hit Add another name to this certificate and add our www version of our domain as well. Hit Review and request once you are done.
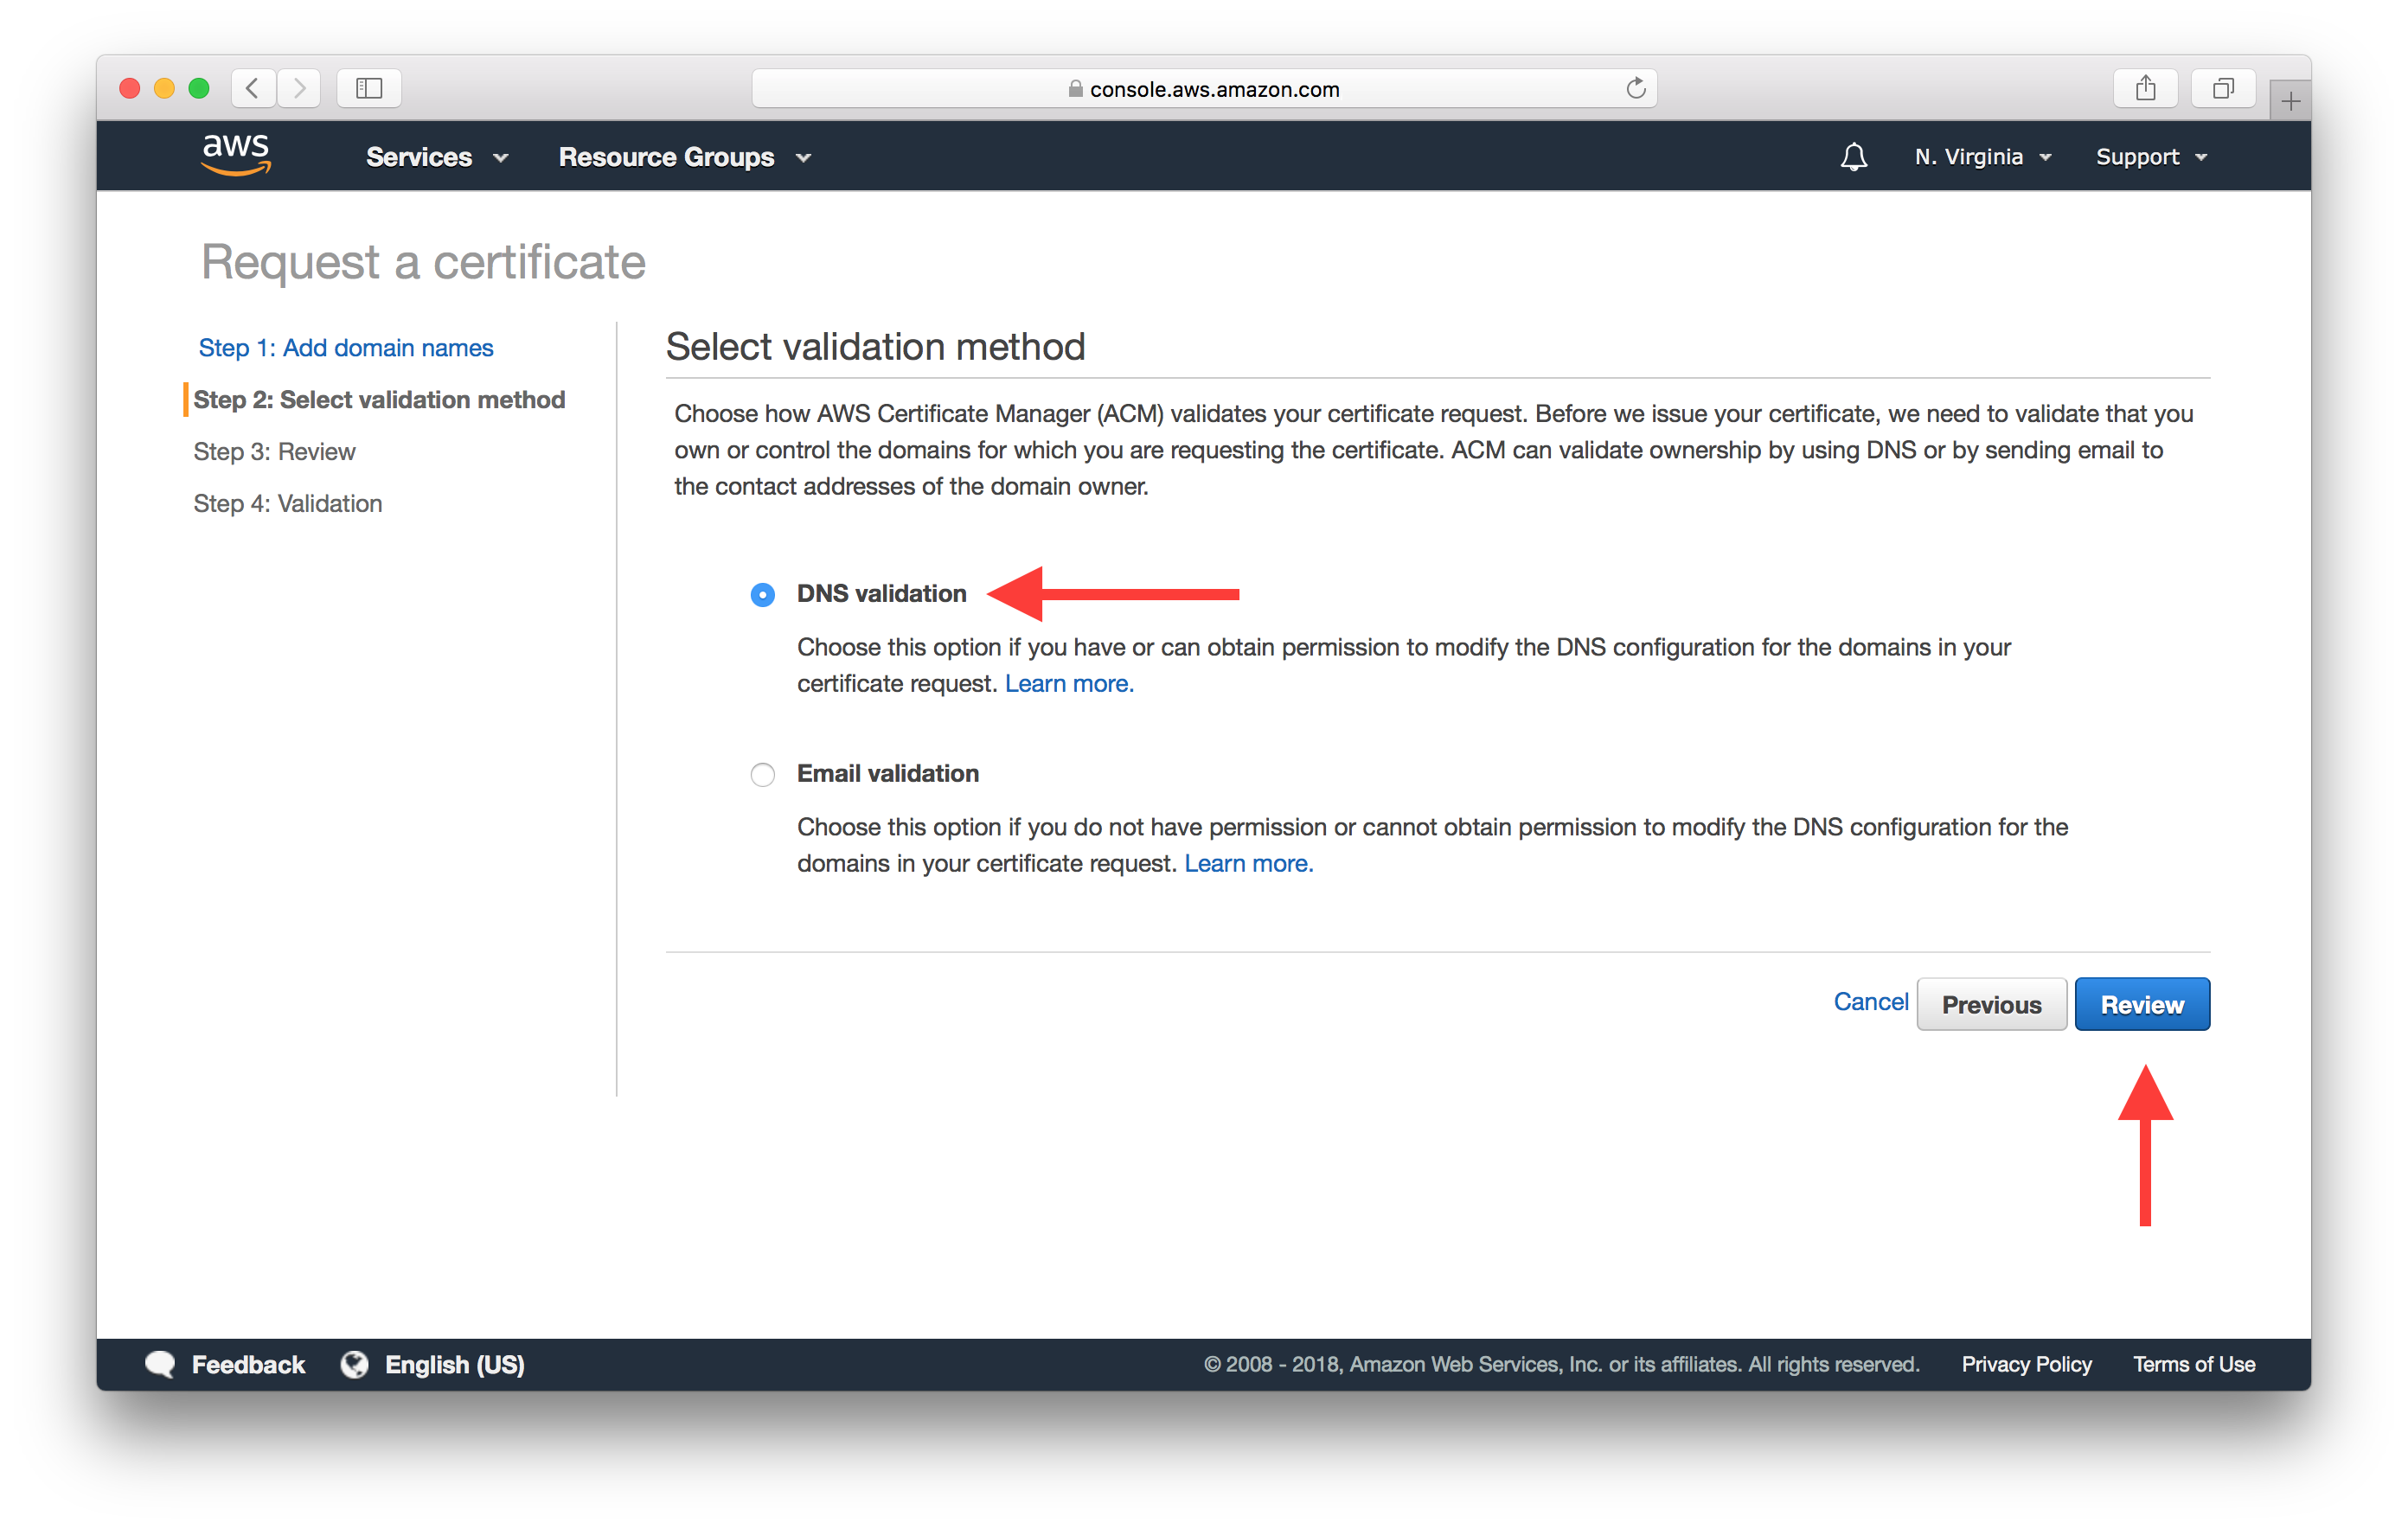
Now to confirm that we control the domain, select the DNS validation method and hit Review.
On the validation screen expand the two domains we are trying to validate.

Since we control the domain through Route 53, we can directly create the DNS record through here by hitting Create record in Route 53.
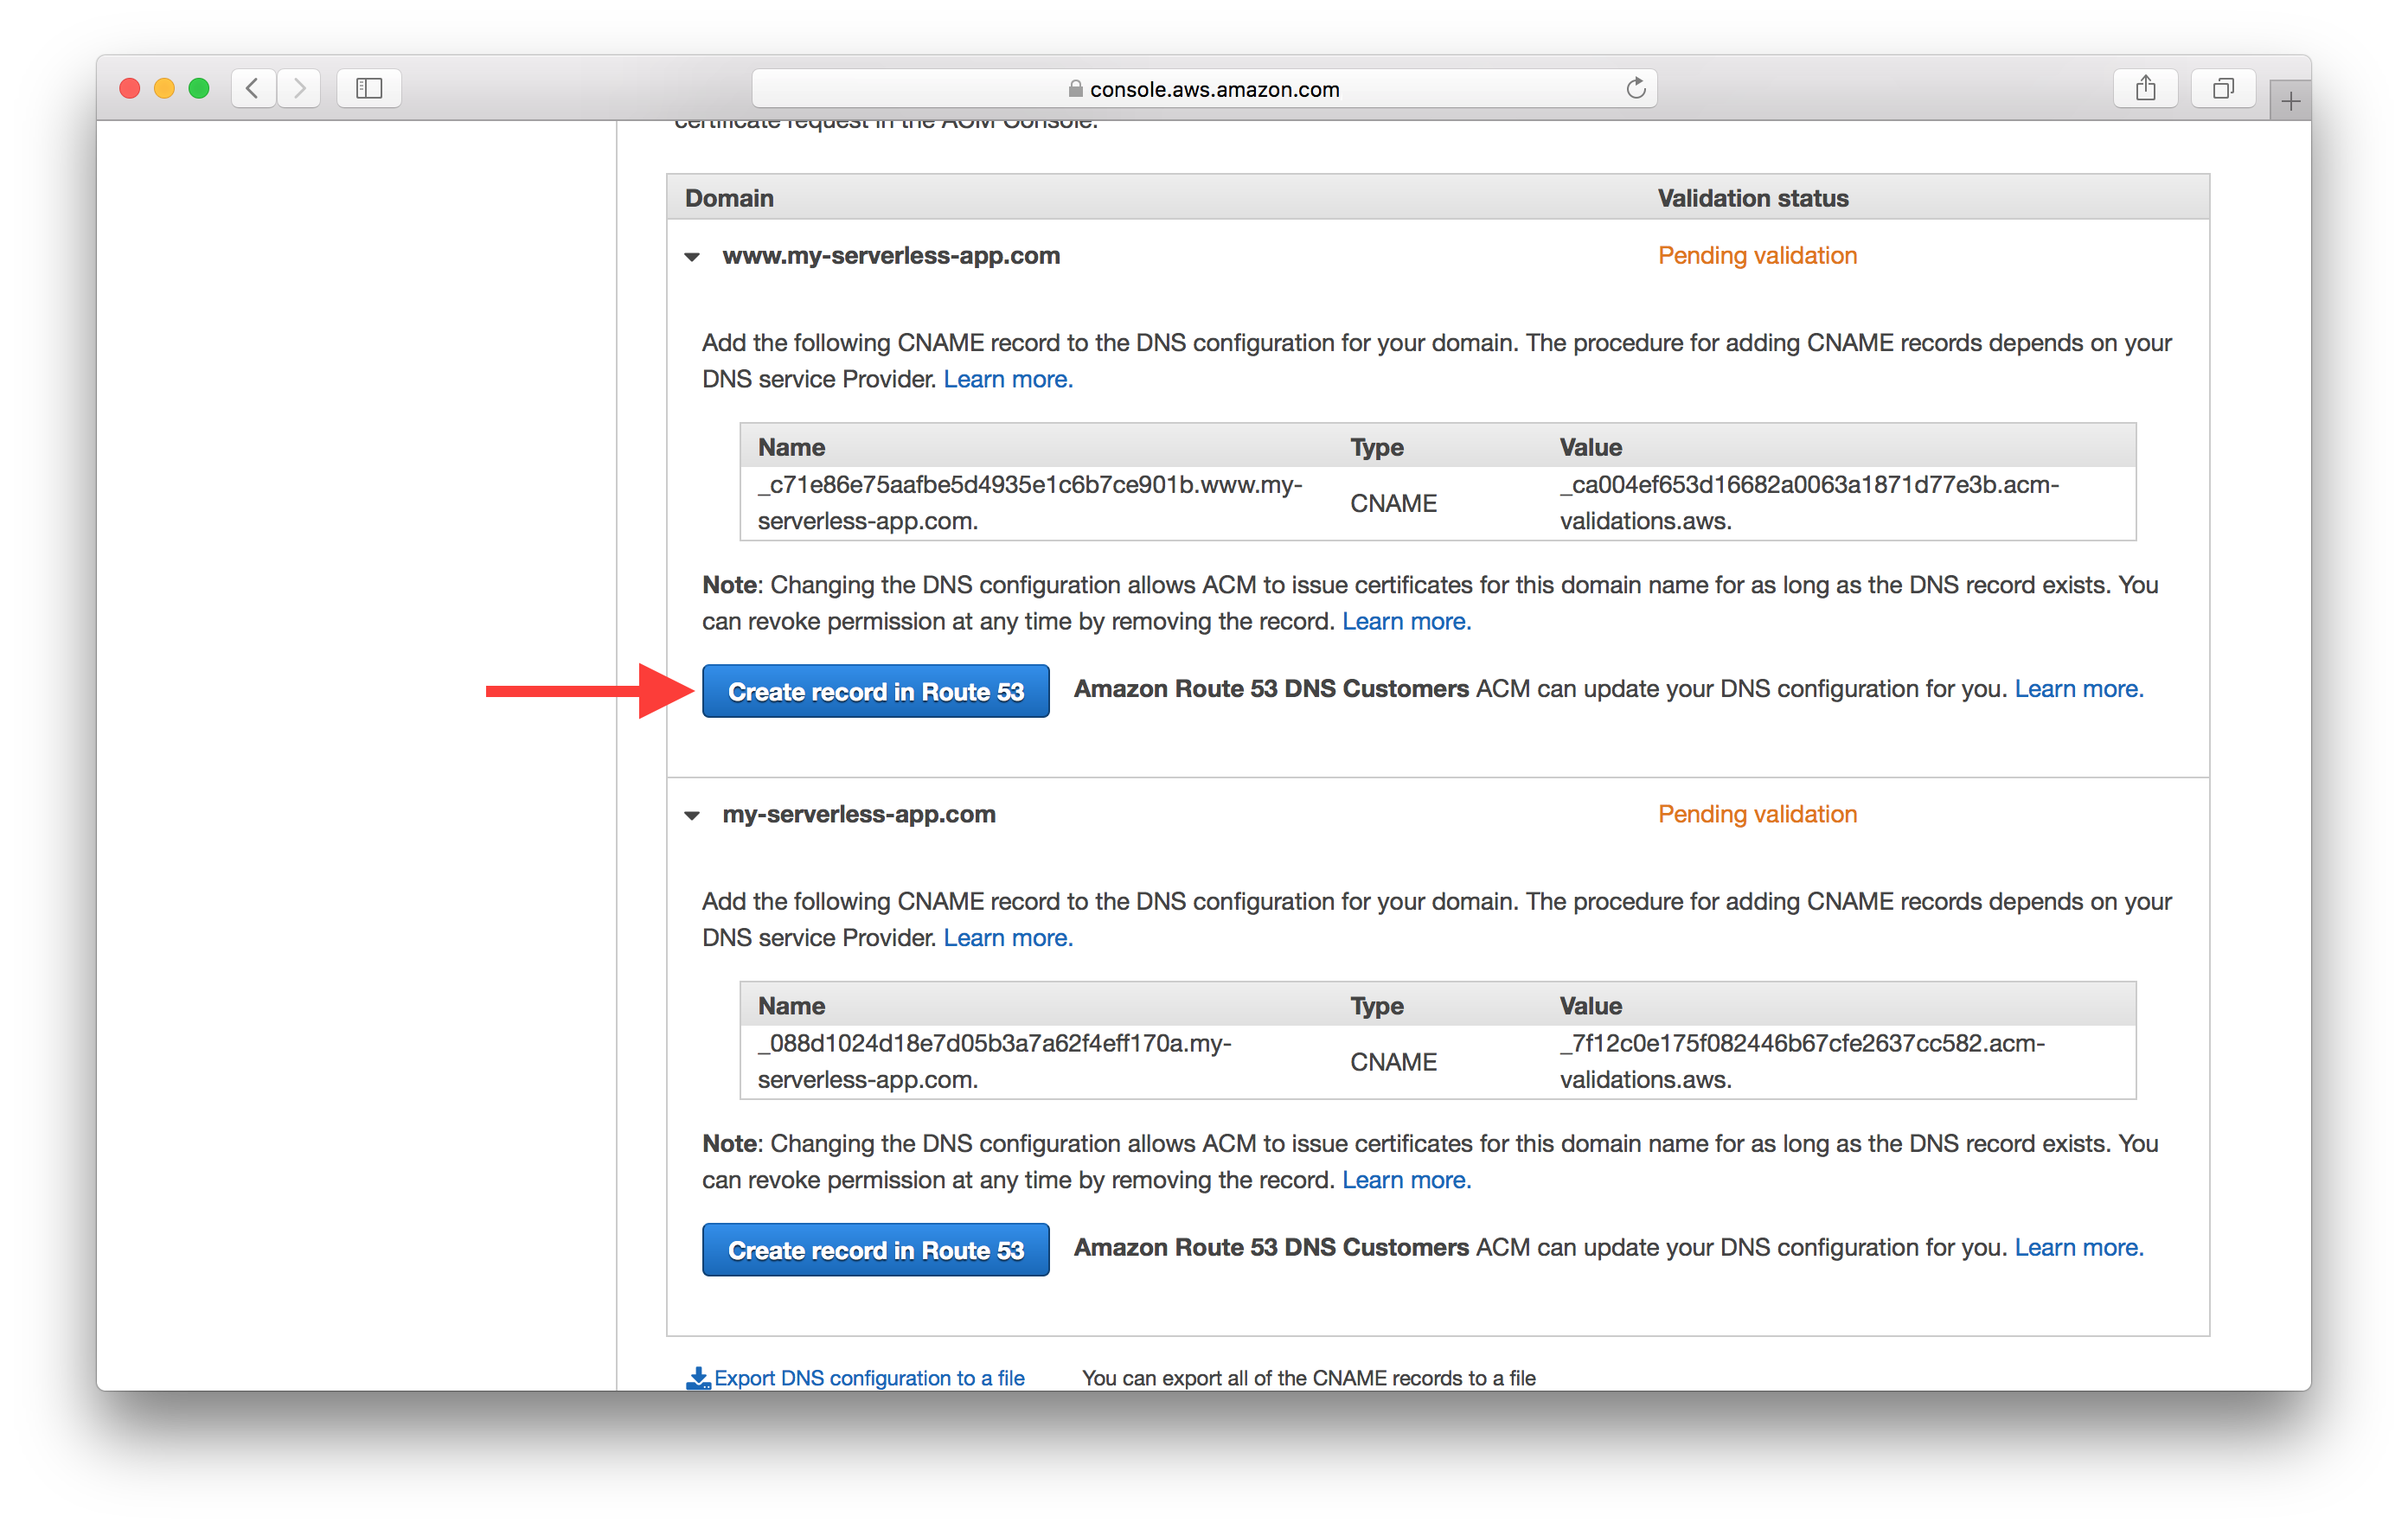
And confirm that you want the record to be created by hitting Create.

Also, make sure to do this for the other domain.
The process of creating a DNS record and validating it can take around 30 minutes.
Next up, we’ll associate our domain and its certificate with our CloudFront Distribution.
For help and discussion
Comments on this chapter