Handle CORS in S3 for File Uploads
In the notes app we’ll be building, users will be uploading files to the bucket we just created. And since our app will be served through our custom domain, it’ll be communicating across domains while it does the uploads. By default, S3 does not allow its resources to be accessed from a different domain. However, cross-origin resource sharing (CORS) defines a way for client web applications that are loaded in one domain to interact with resources in a different domain. Let’s enable CORS for our S3 bucket.
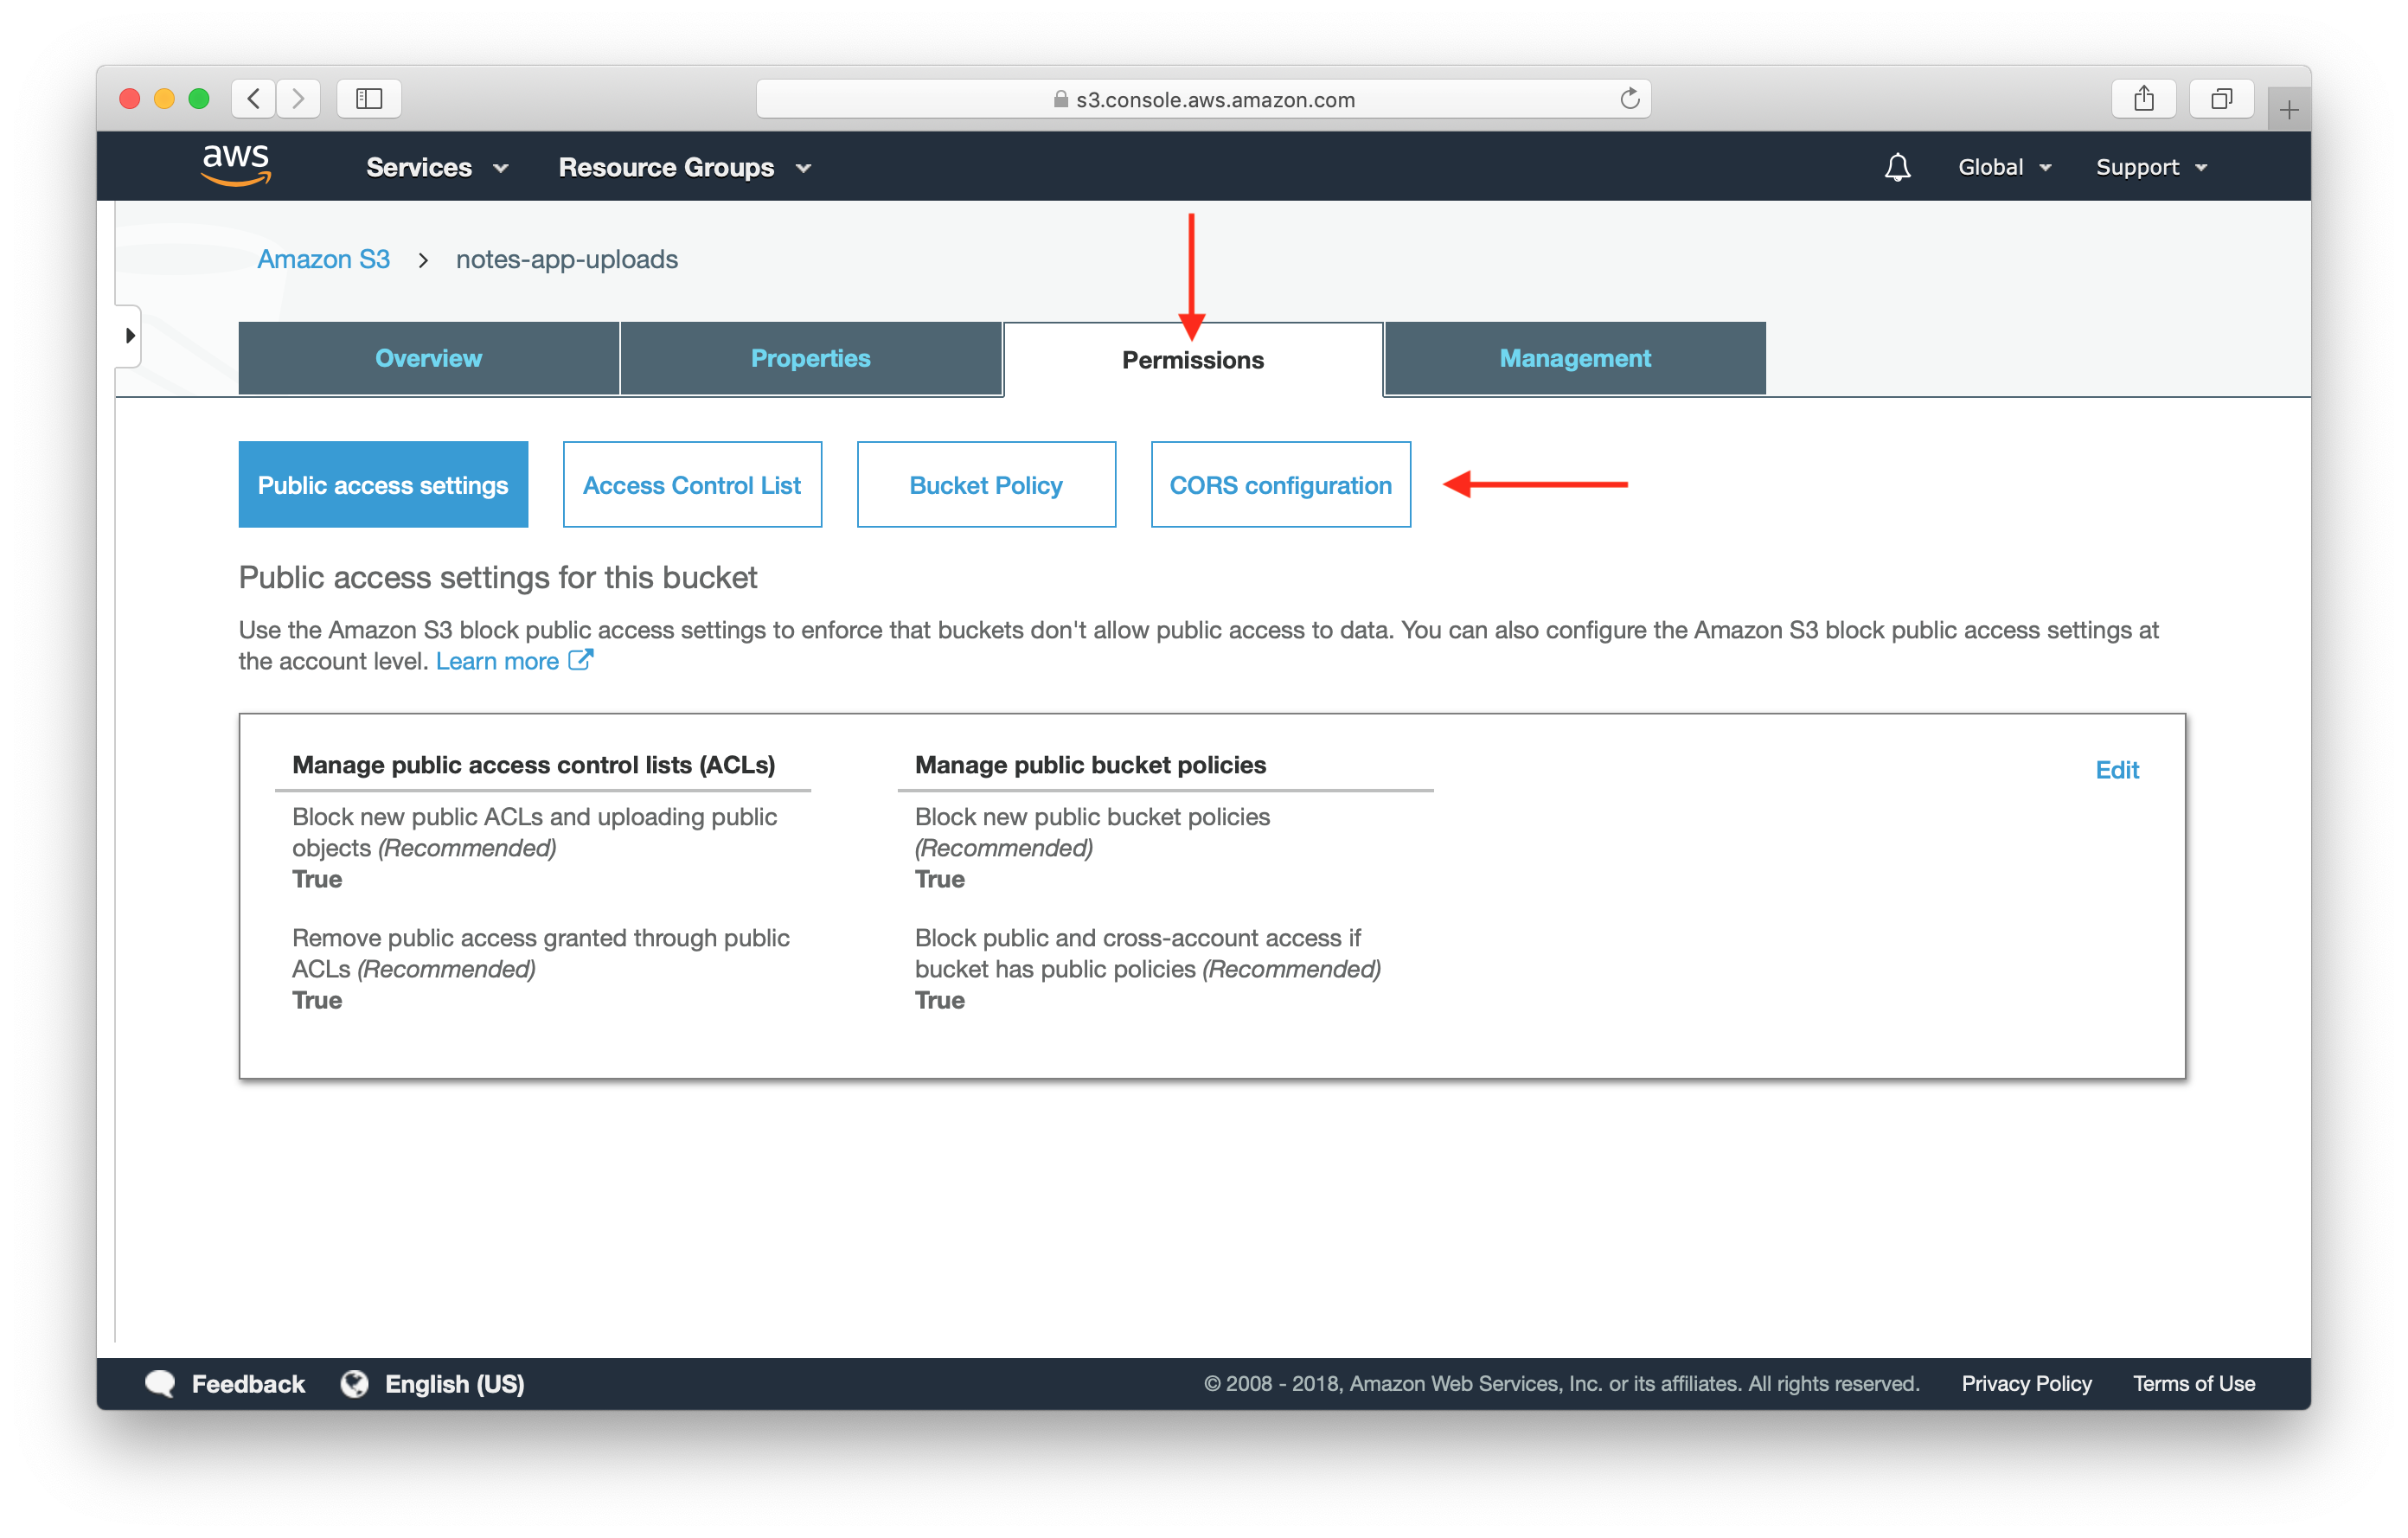
Go back to the AWS Console and head over to the S3 section. Then, select the bucket we had previously created.

Select the Permissions tab, then select CORS configuration.
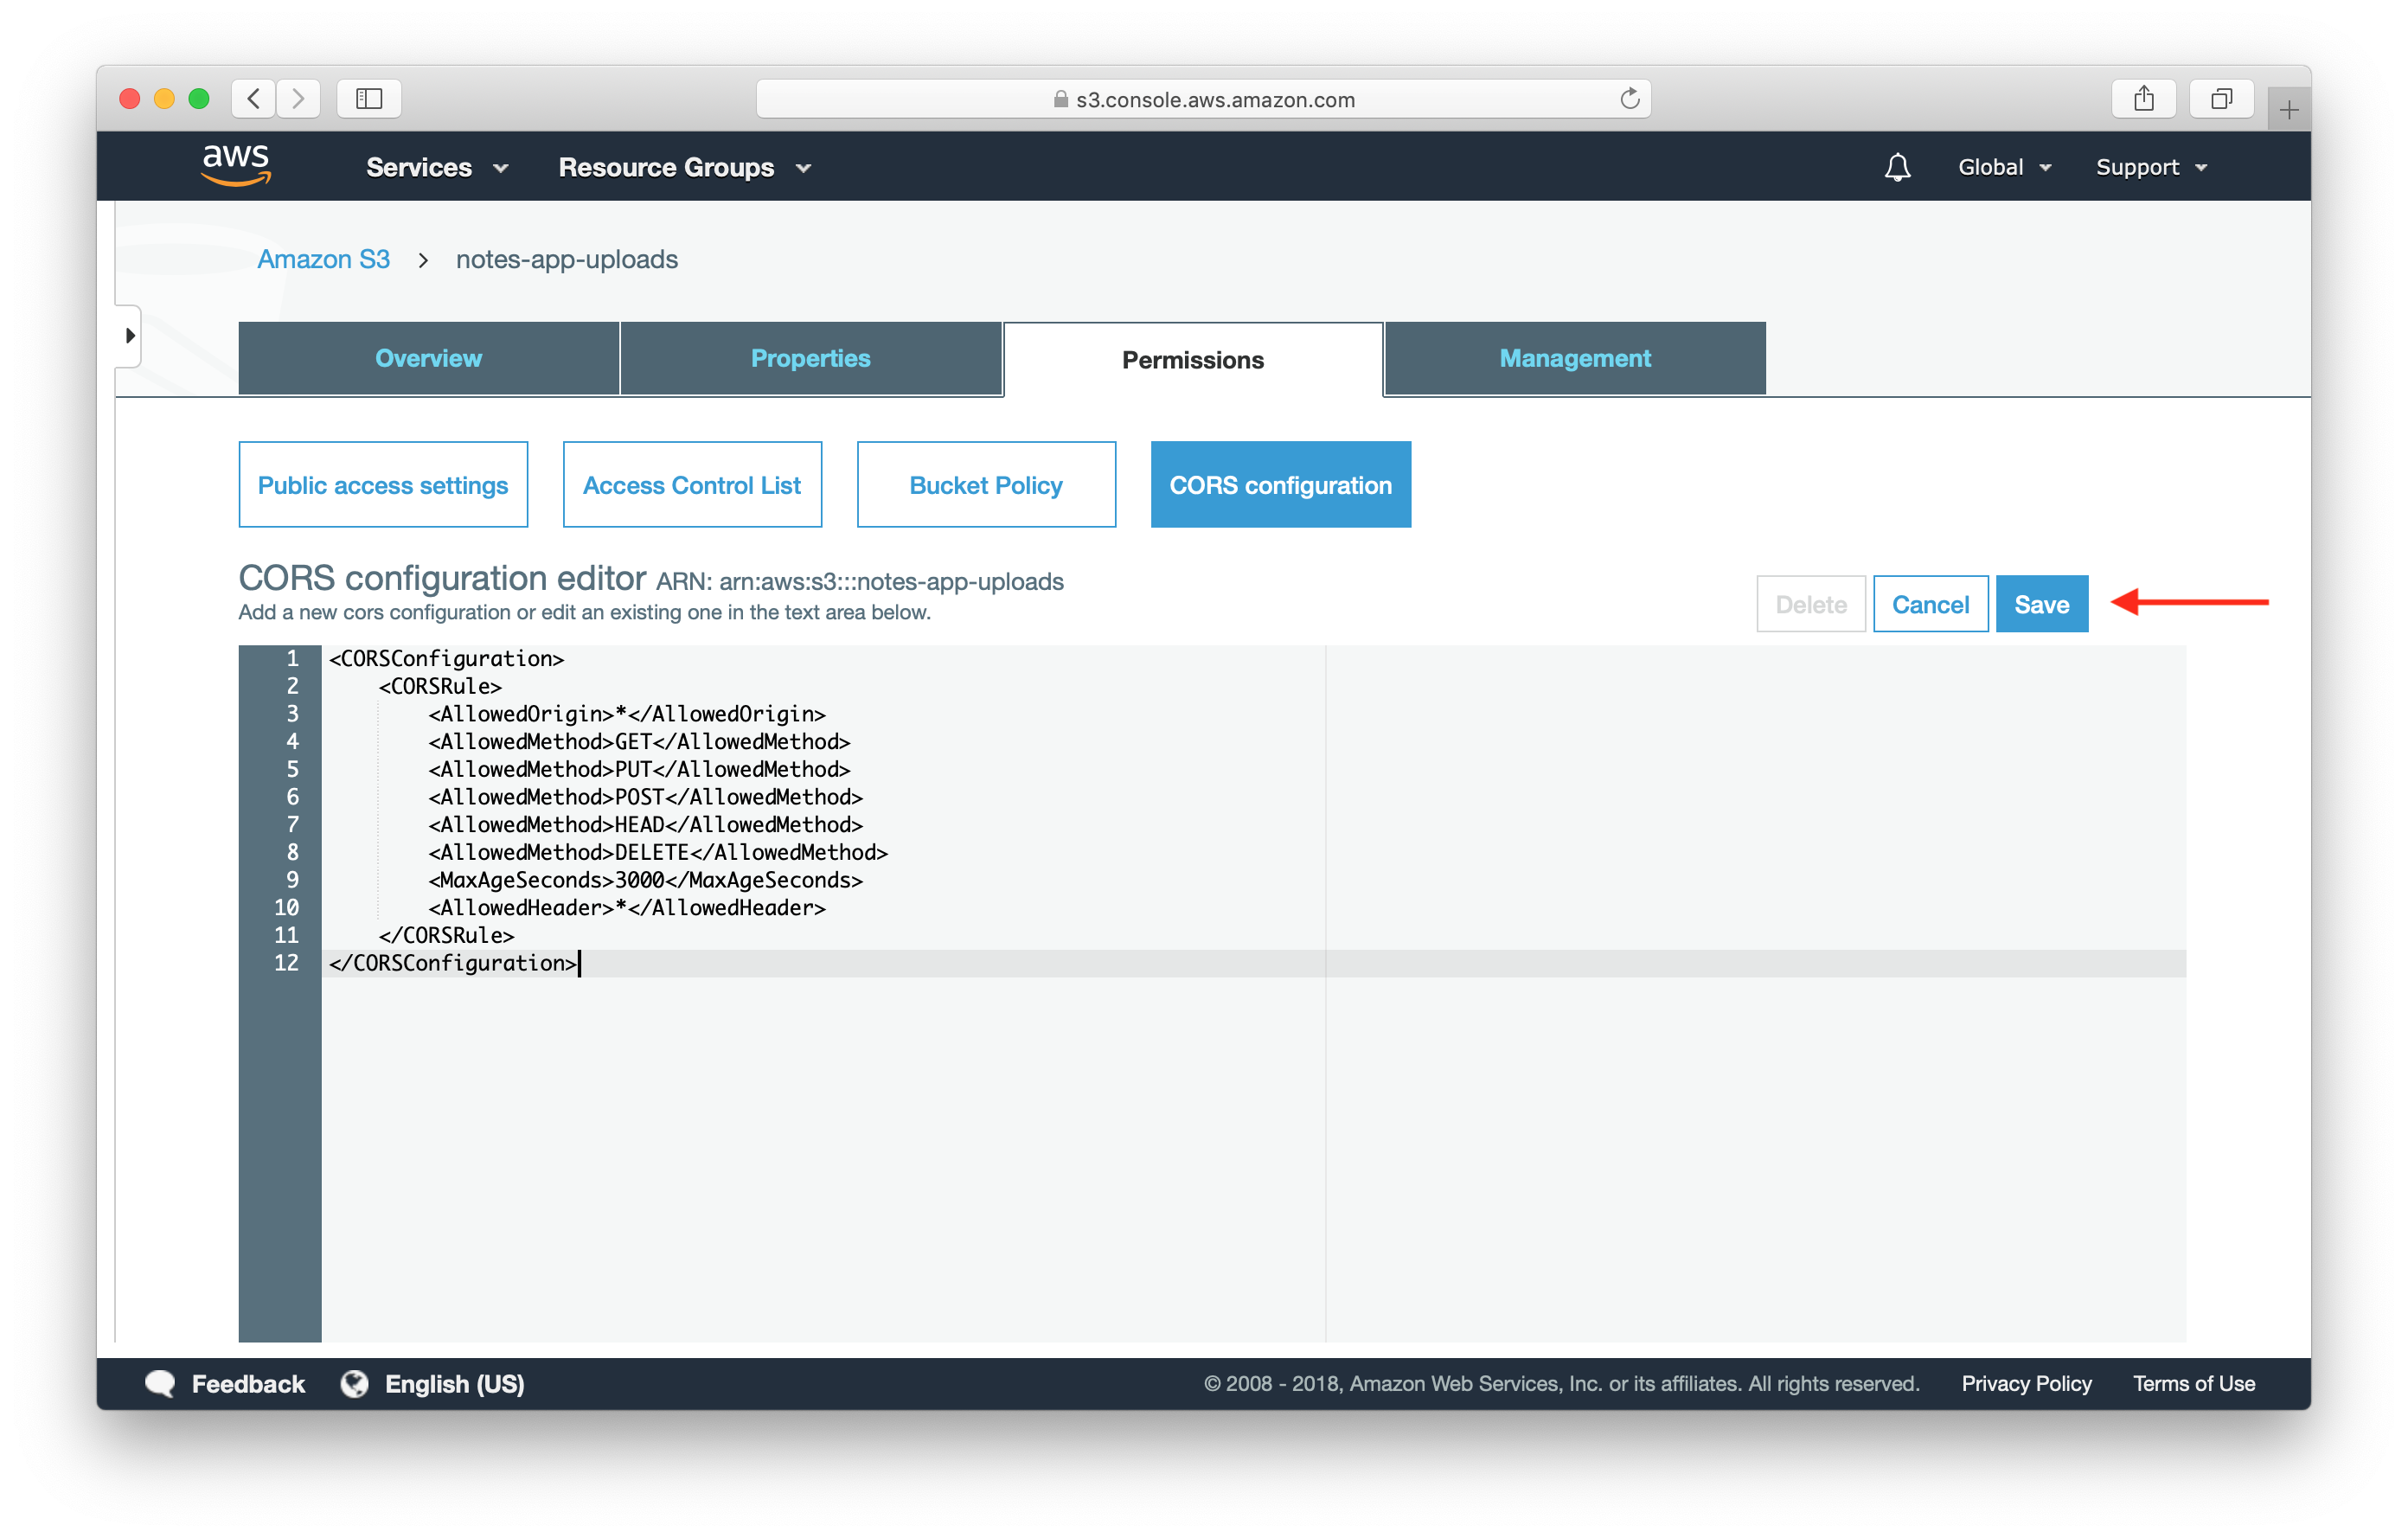
Add the following CORS configuration into the editor, then hit Save.
<CORSConfiguration>
	<CORSRule>
		<AllowedOrigin>*</AllowedOrigin>
		<AllowedMethod>GET</AllowedMethod>
		<AllowedMethod>PUT</AllowedMethod>
		<AllowedMethod>POST</AllowedMethod>
		<AllowedMethod>HEAD</AllowedMethod>
		<AllowedMethod>DELETE</AllowedMethod>
		<MaxAgeSeconds>3000</MaxAgeSeconds>
		<AllowedHeader>*</AllowedHeader>
	</CORSRule>
</CORSConfiguration>
Note that, you can customize this configuration to use your own domain or a list of domains when you use this in production.
Now we are ready to use our Serverless backend to create our frontend React app!
For help and discussion
Comments on this chapter